

The Sixer Fixer-upper: Part 2
Entry posted by Nathan Strum
476 views
Welcome to part 2 of my 2600 repair blog thing! Didn't have to wait very long for that, did ya'? ![]()
Part 1 was just getting a little bit too long, so I decided to break this up into two parts. Or maybe three. Probably three. I haven't written that far yet. ![]()
In Part 1, when I wrote that I wanted my 2600 fixed permanently, there was still one thing that had been bugging me for years...
My 2600 has been taken apart and put back together so many times, several of the screw holes are stripped. Two of them are so bad, the screws don't even pretend to bite - they just fall right back out. Two of them in the top of the plastic case...
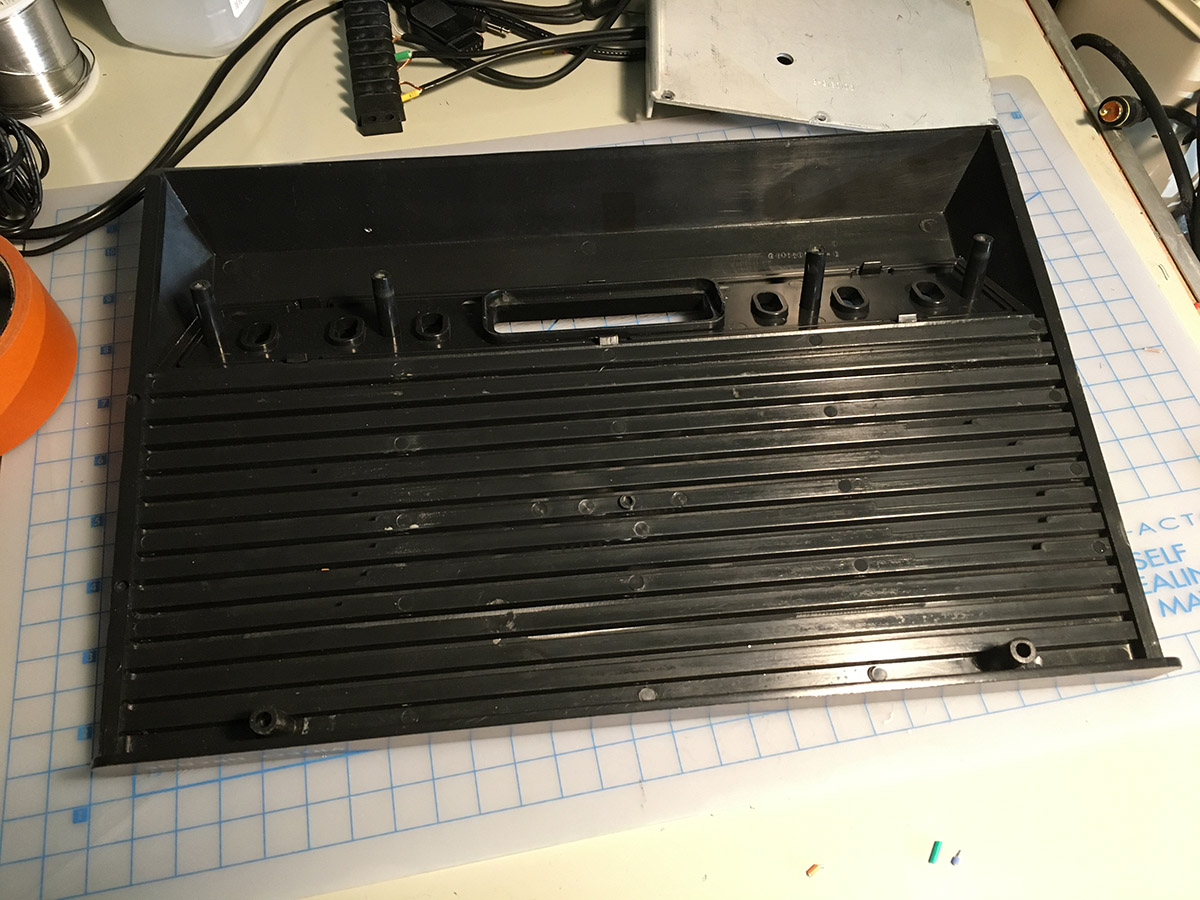
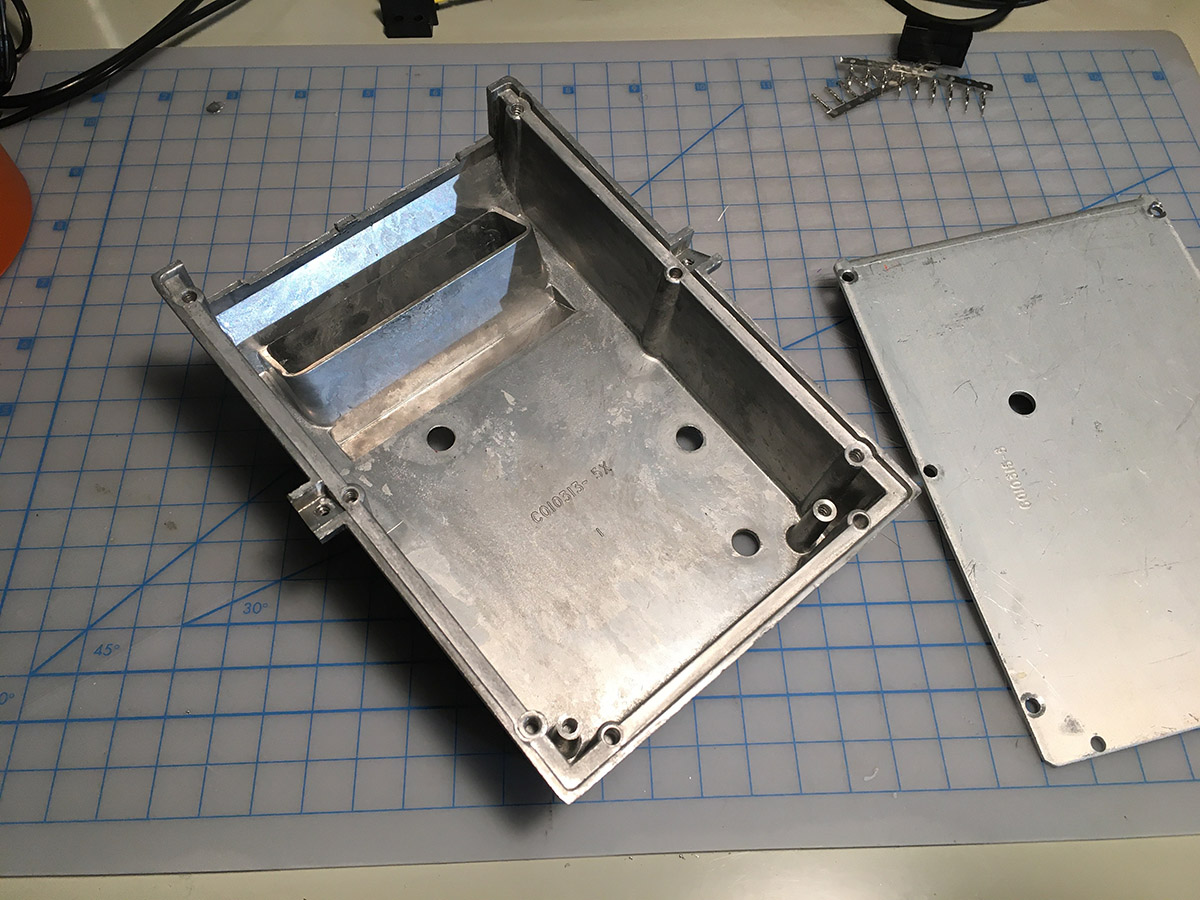
And two are in the aluminum shield.
So now, it's time to fix finally fix that too.
With these:
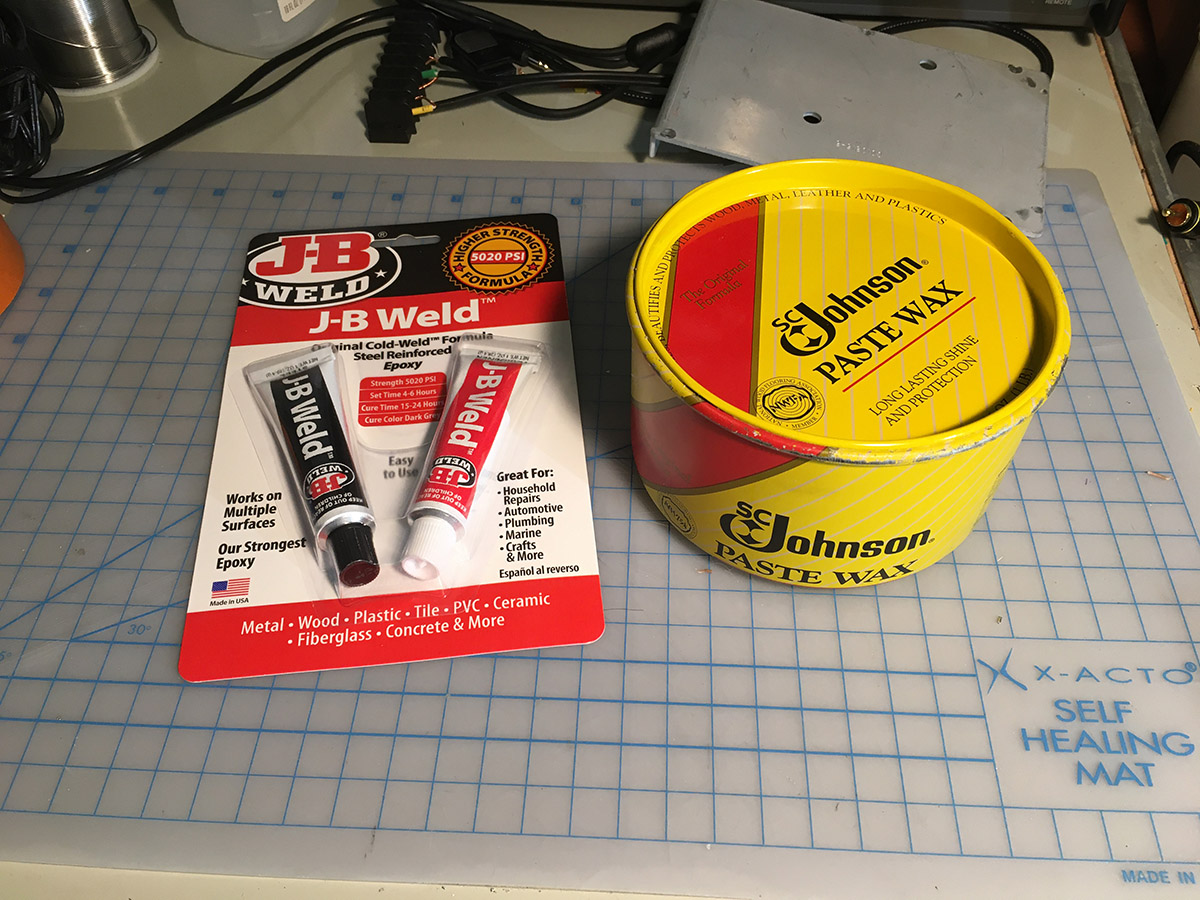
If you read about James' console repair, you'd recognize the J-B Weld. It's super-strong, steel-reinforced epoxy, and I used it to patch a hole in his 2600's case.
But paste wax??
Yep! I was thinking about how to use J-B Weld to fix the stripped holes. I figured I could put some epoxy in there, let it cure, then carefully re-tap the threads. But I wondered if it would actually work, and what that sort of stress would do to the plastic. So I did some searching, and found someone on YouTube who had come up with a better method: fill the holes in with epoxy, coat the screws with a release agent, and let the epoxy set around the screws while they were installed. Then simply back the screws out after the epoxy cures, leaving threaded holes behind! And the paste wax? That was the release agent that worked the best (which is more oily than waxy).
Now, it's one thing to do this on a big chunk of aluminum like he did. But would it work with much smaller screws, and not just on aluminum, but brittle 40-year-old plastic?
As they say on Project Farm, let's find out!
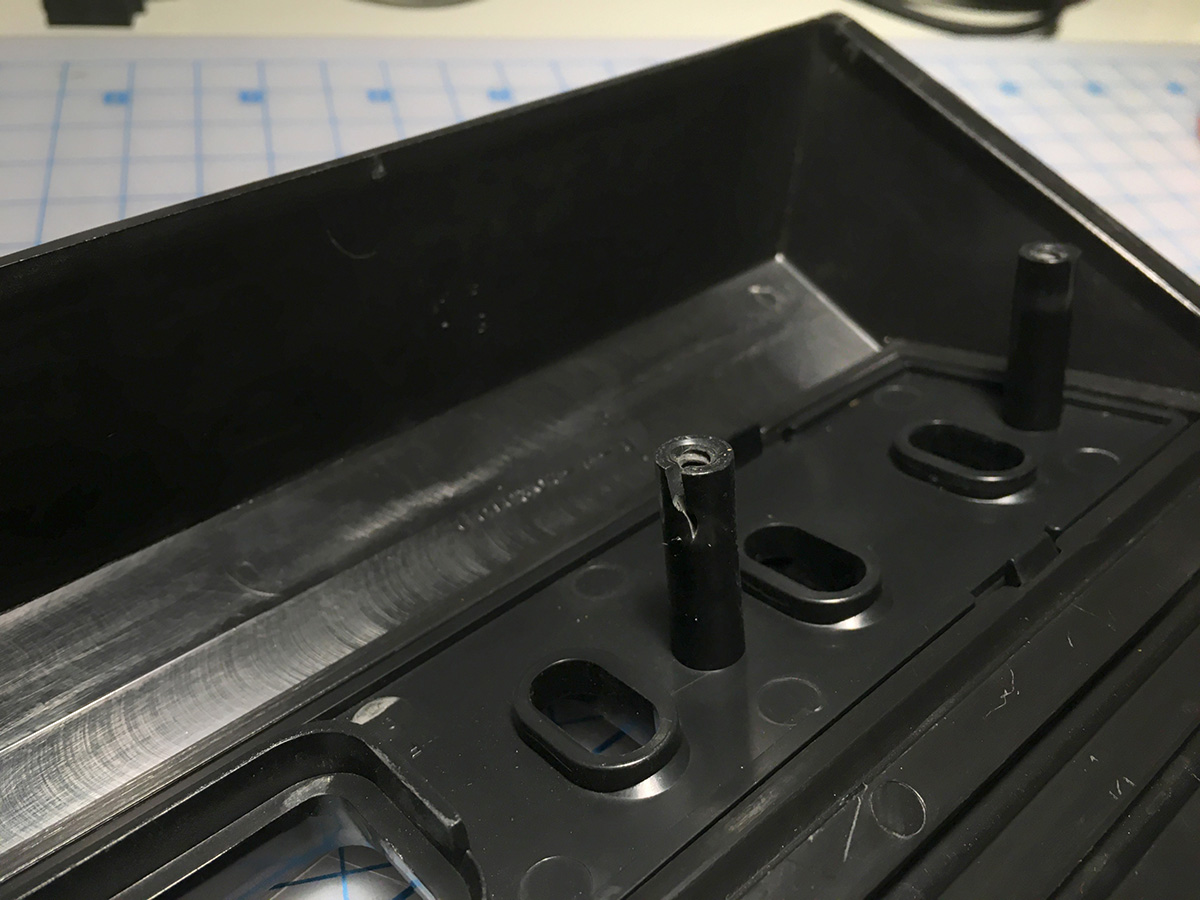
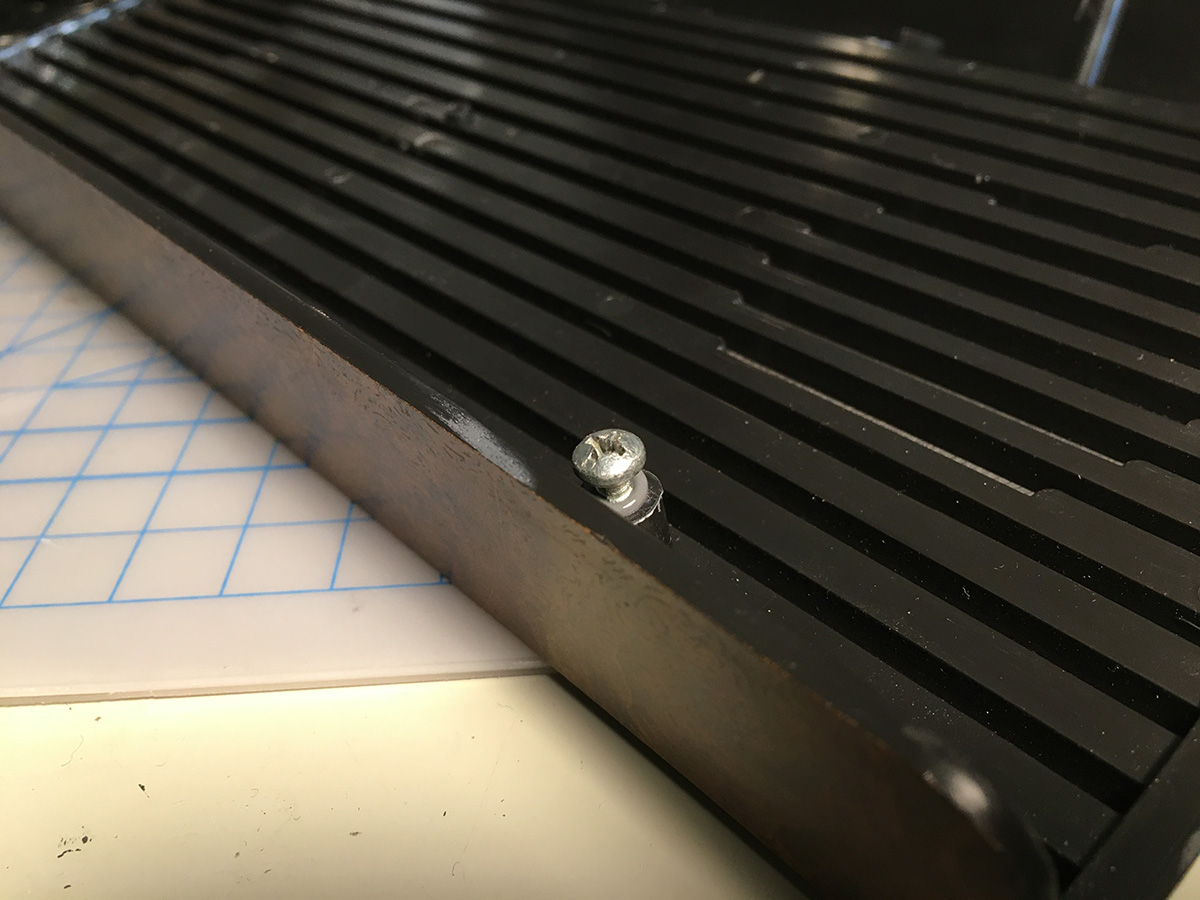
Here are the stripped screw holes. One just behind the fake wood grain panel:
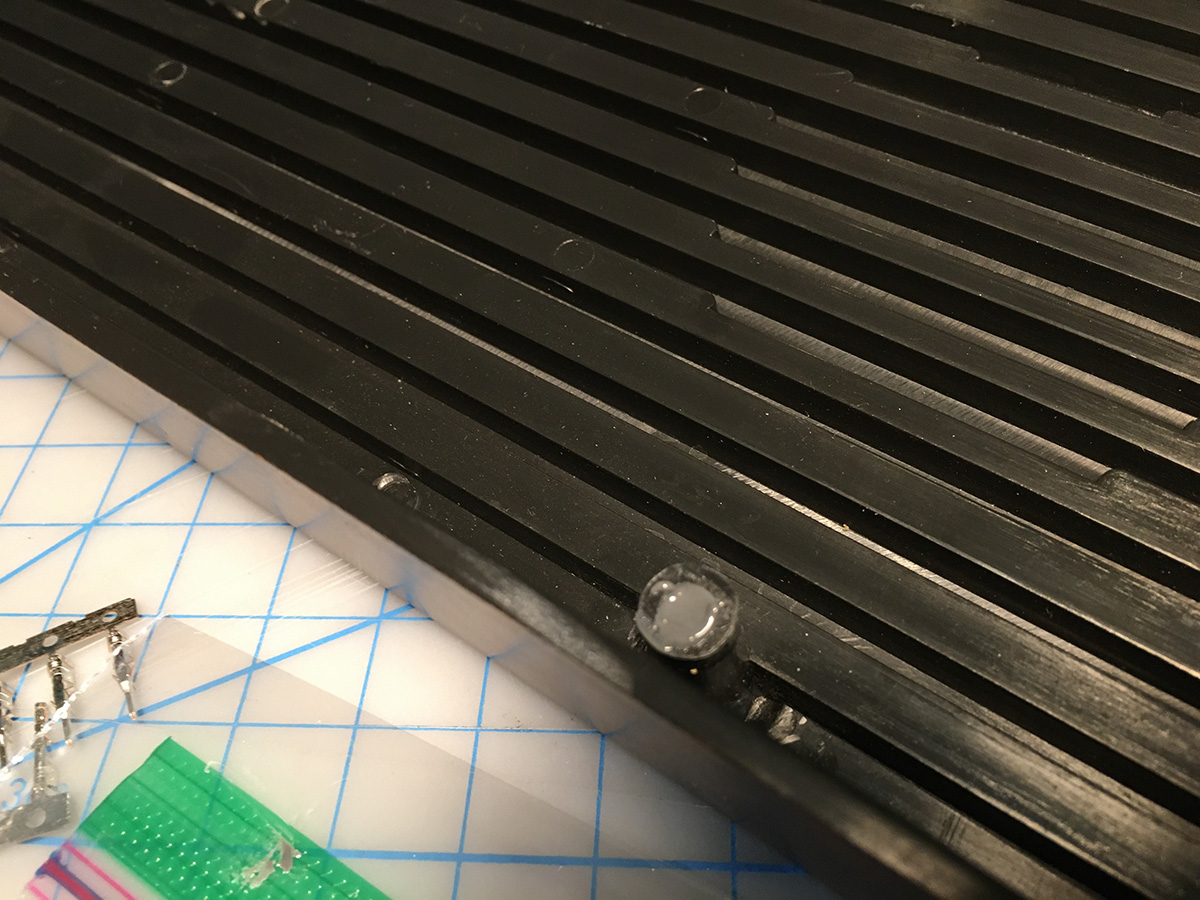
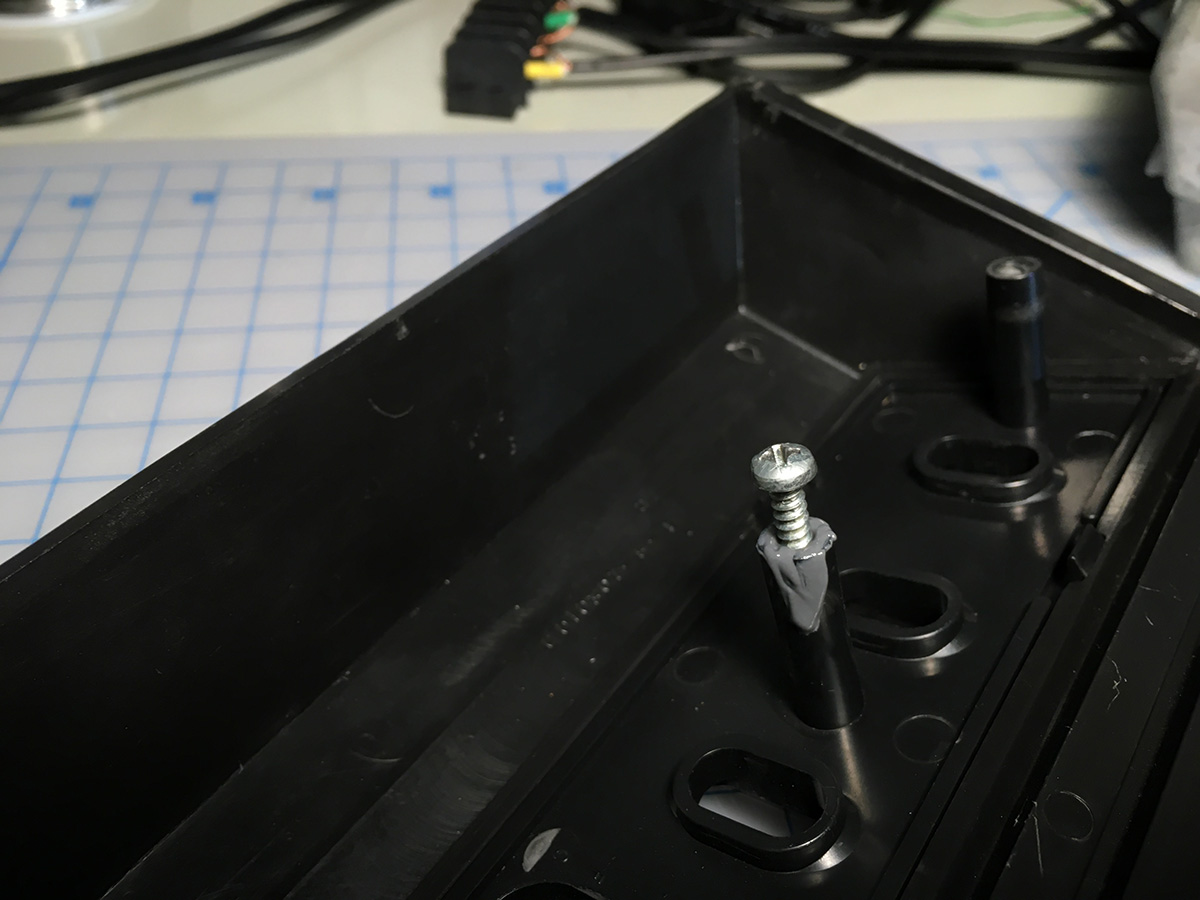
And one between two of the switches. Not just stripped, but split open!
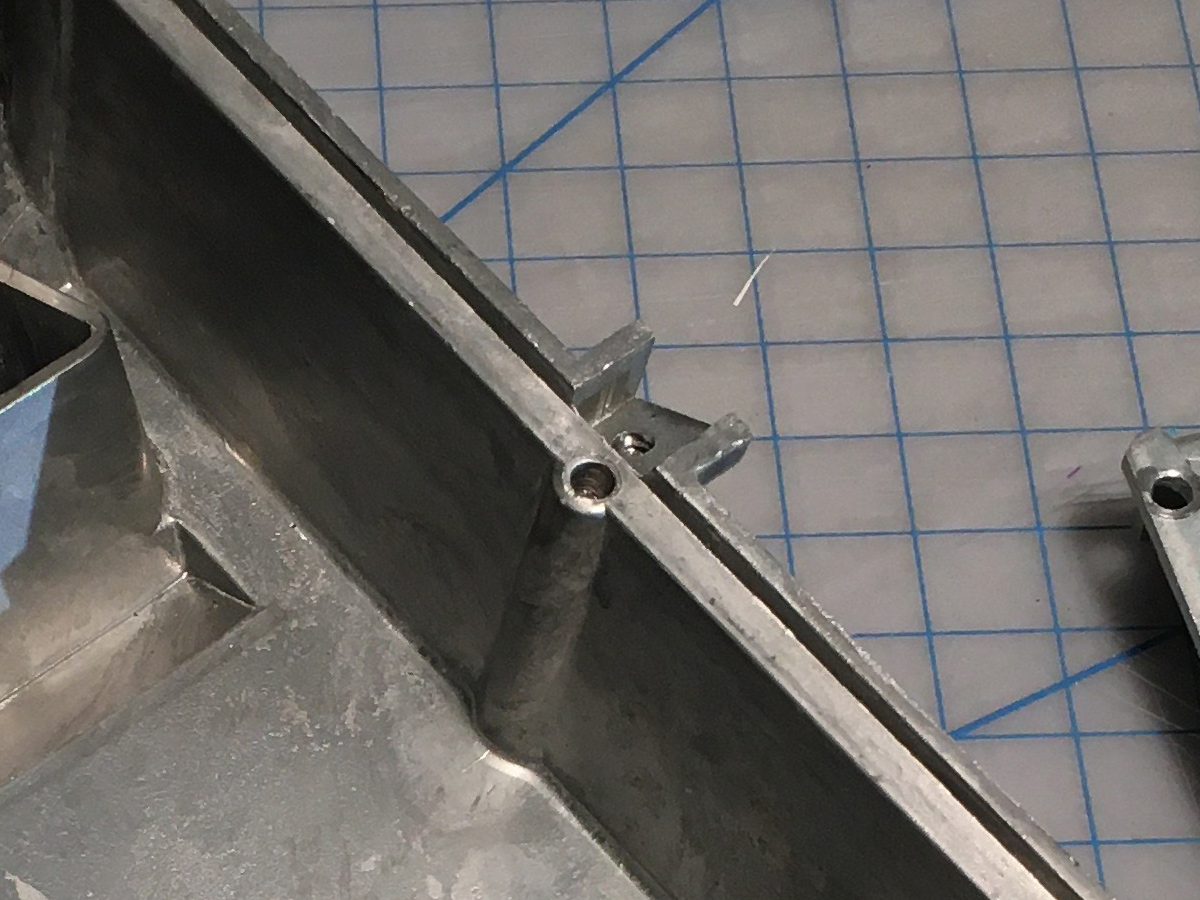
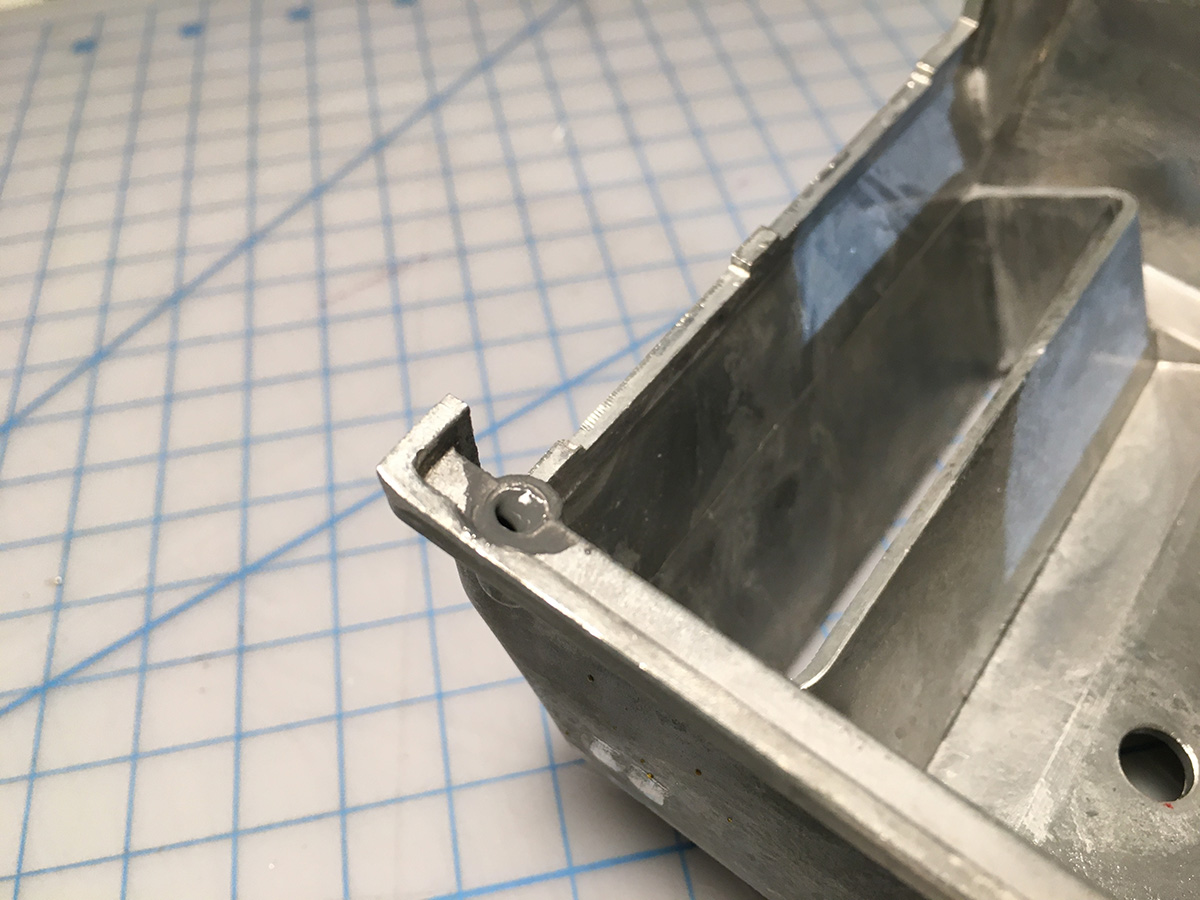
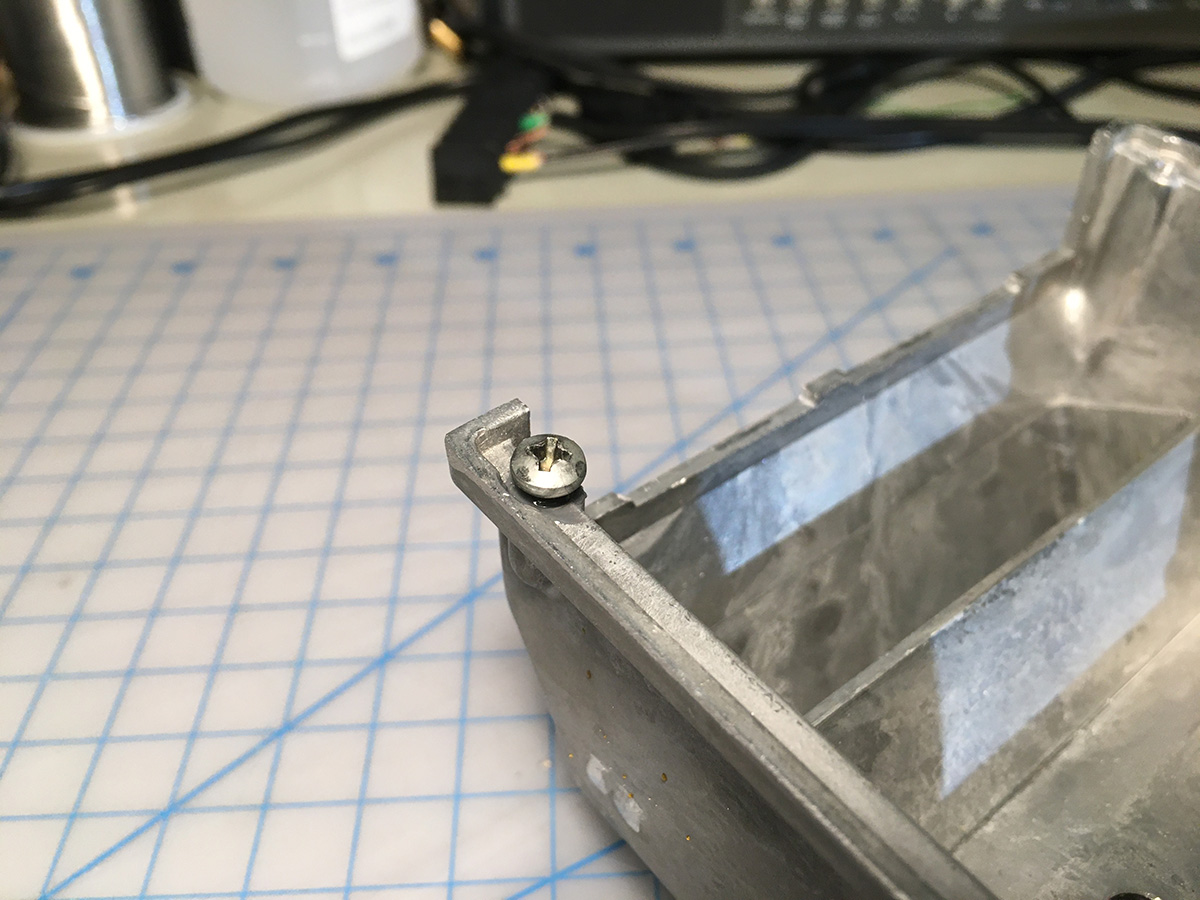
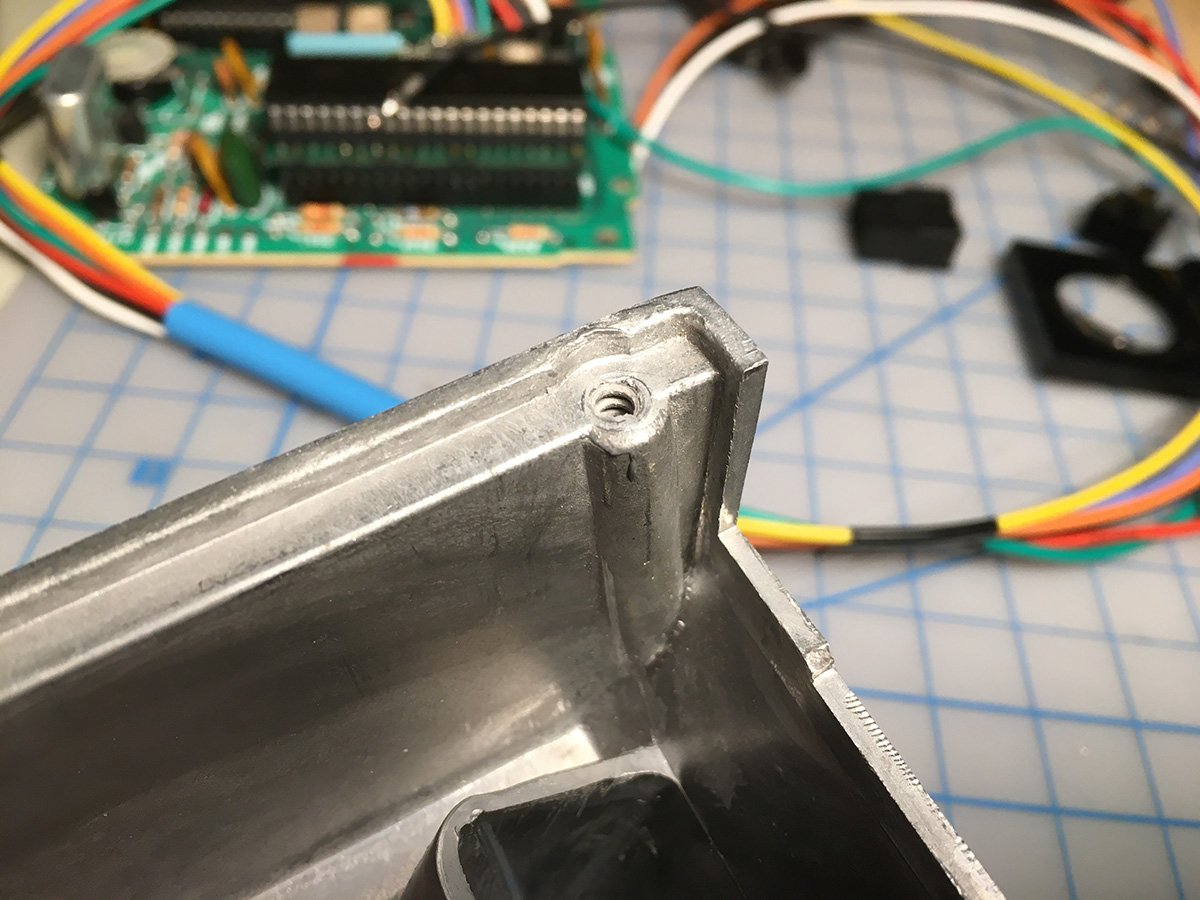
In the metal, there was one on the corner:
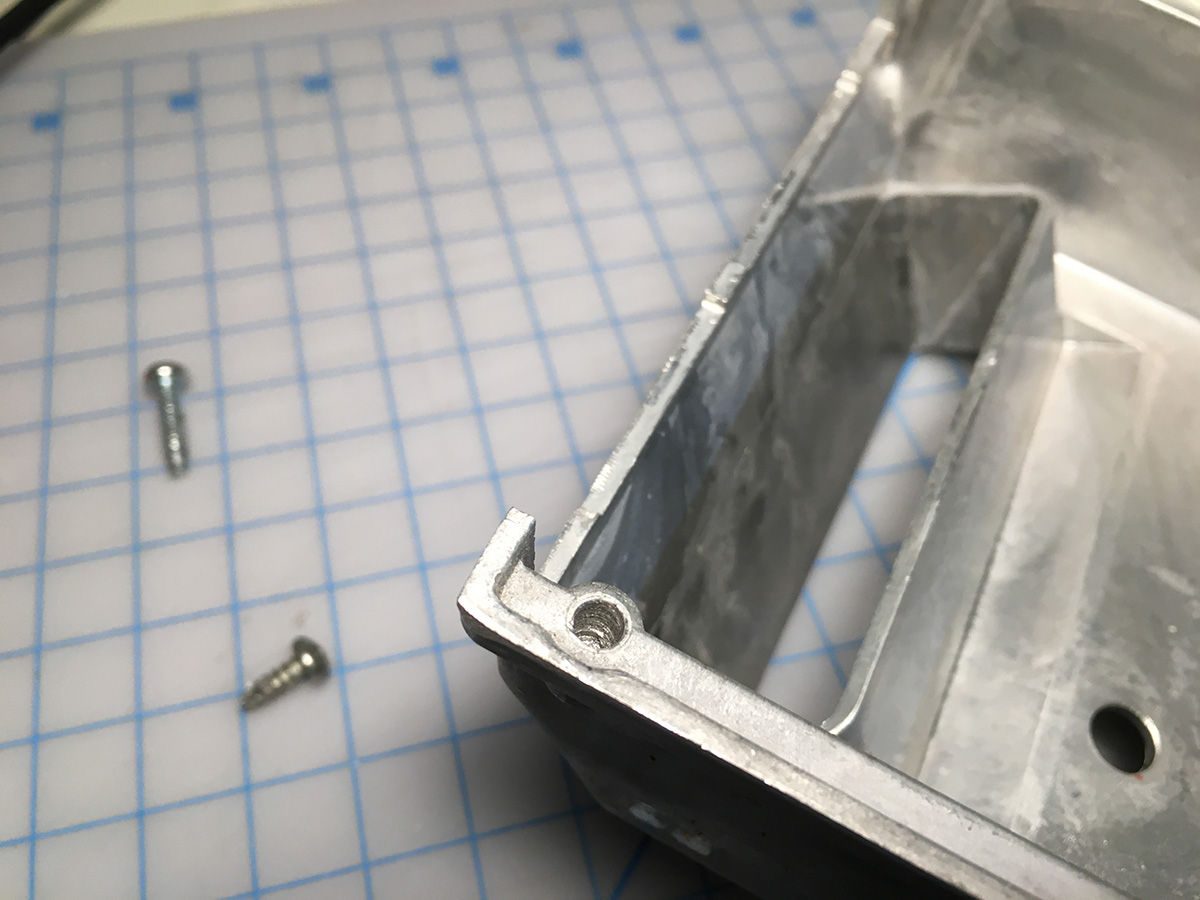
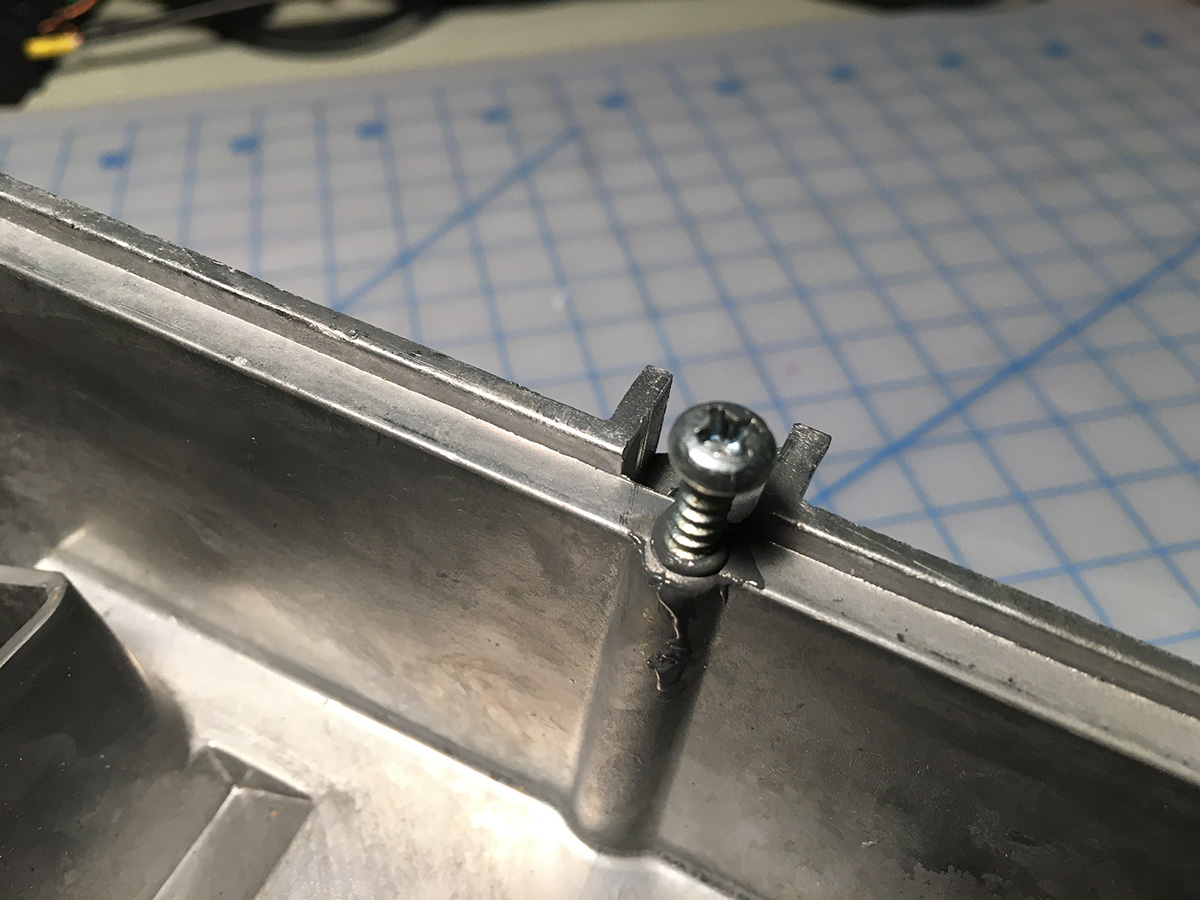
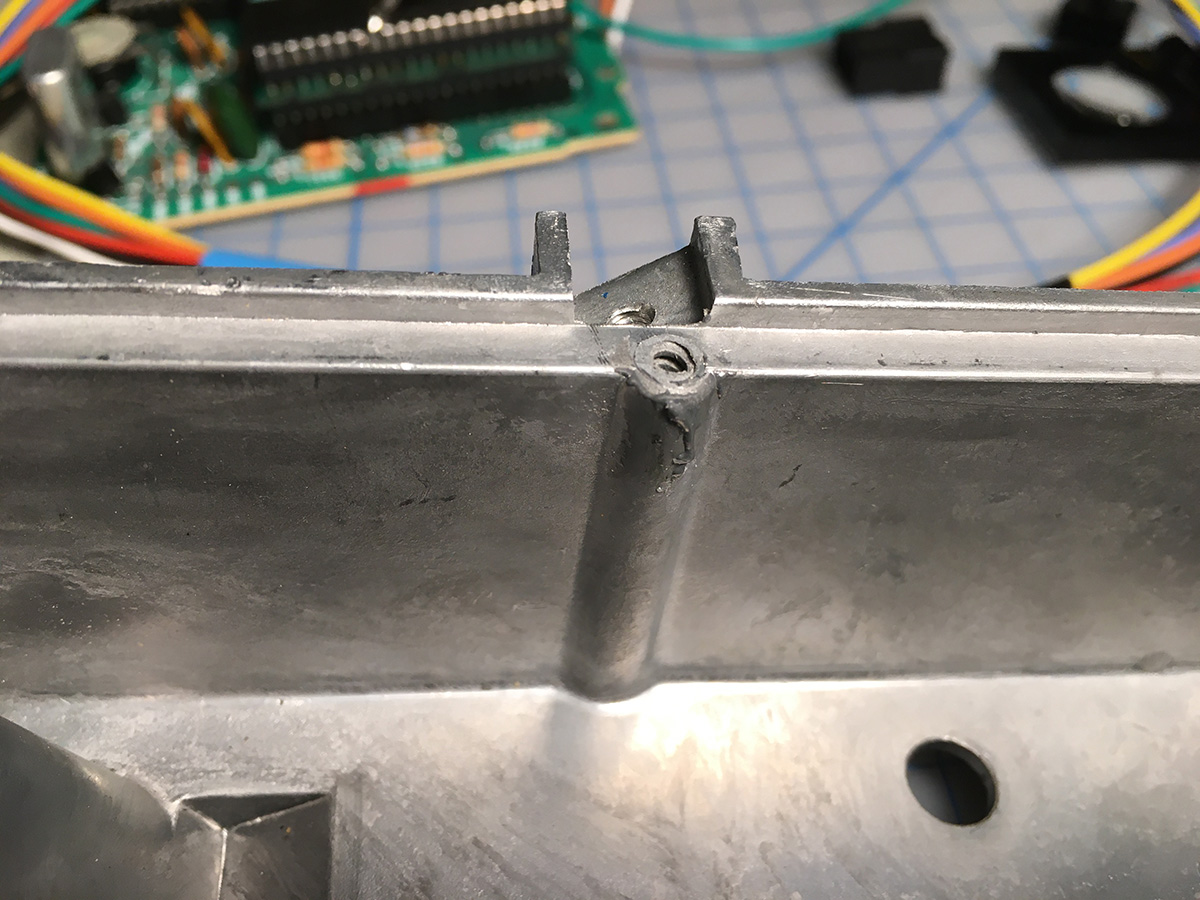
And one along the edge, which is used to attach the lower half of the case to the 2600's internals. So this one is kind of important!
With James' console I used quick-setting epoxy. But for this, I used the slow-setting version. I didn't want this setting up before I could get the screws in. So I mixed up some epoxy, and filled up the holes:


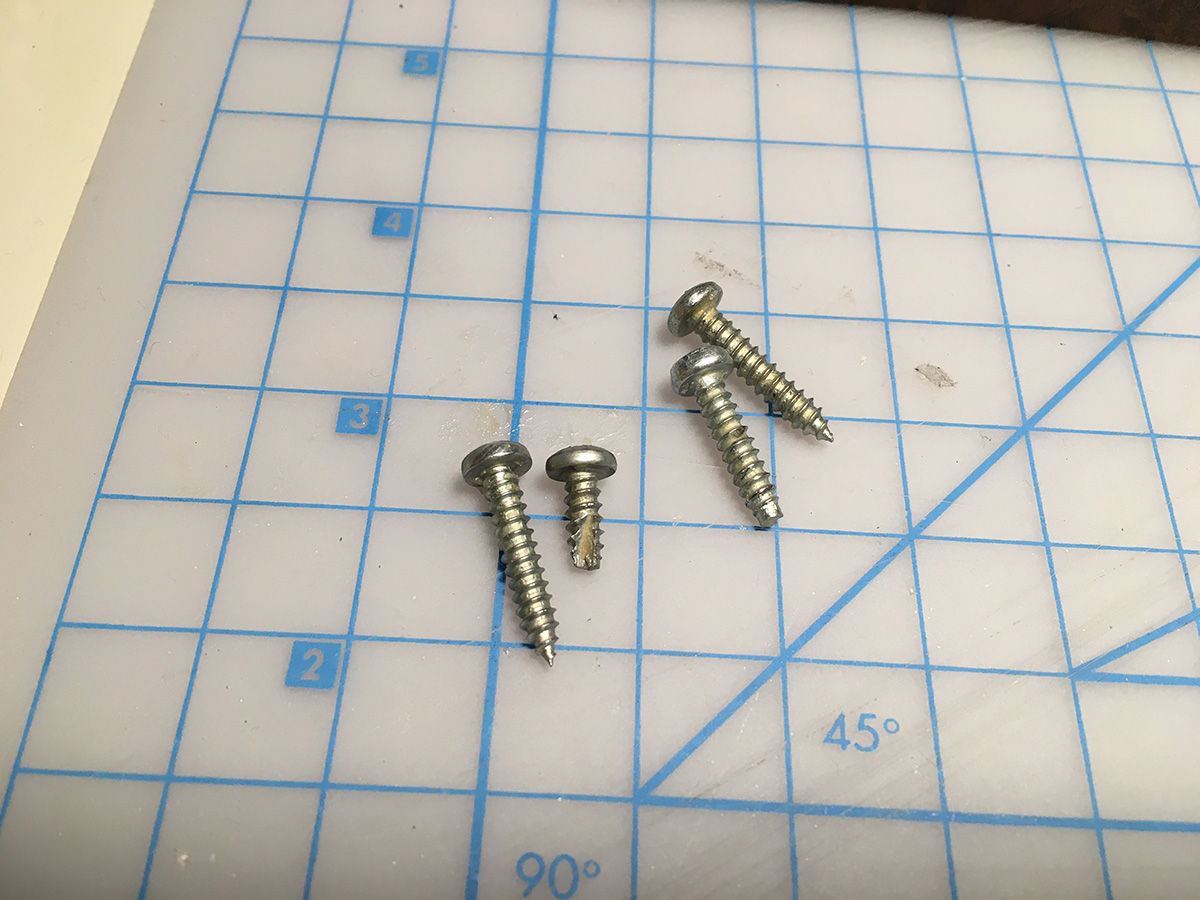
Next, I coated the screws with the paste wax (and believe me, they were greasy!):
Then, I simply reinstalled the screws until they bottomed-out:
And waited 24 hours for it to cure.
The worst case scenario at this point would be if the screws wouldn't come back out. I wasn't going to try and force the ones in the plastic to come out, since they could just break more plastic around them, causing more damage. I figured with the metal I could probably get some vice grips on the screws and give them what-for if needed. But if nothing budged, I'd simply cut the screw heads off with a Dremel. Those holes weren't holding screws anyway, so my console wouldn't have been any worse off than it had been before.
First up, I tried removing the ones in the metal.
It took a little bit of effort (and a screwdriver with a really good Philips bit), but they backed out of the holes, leaving threads behind!
But would it work with the plastic? Or would the torque I had to apply be too much, and crack the plastic?
Well, no! Actually, the screws in the plastic backed out almost effortlessly! Again, leaving nice, threaded holes:


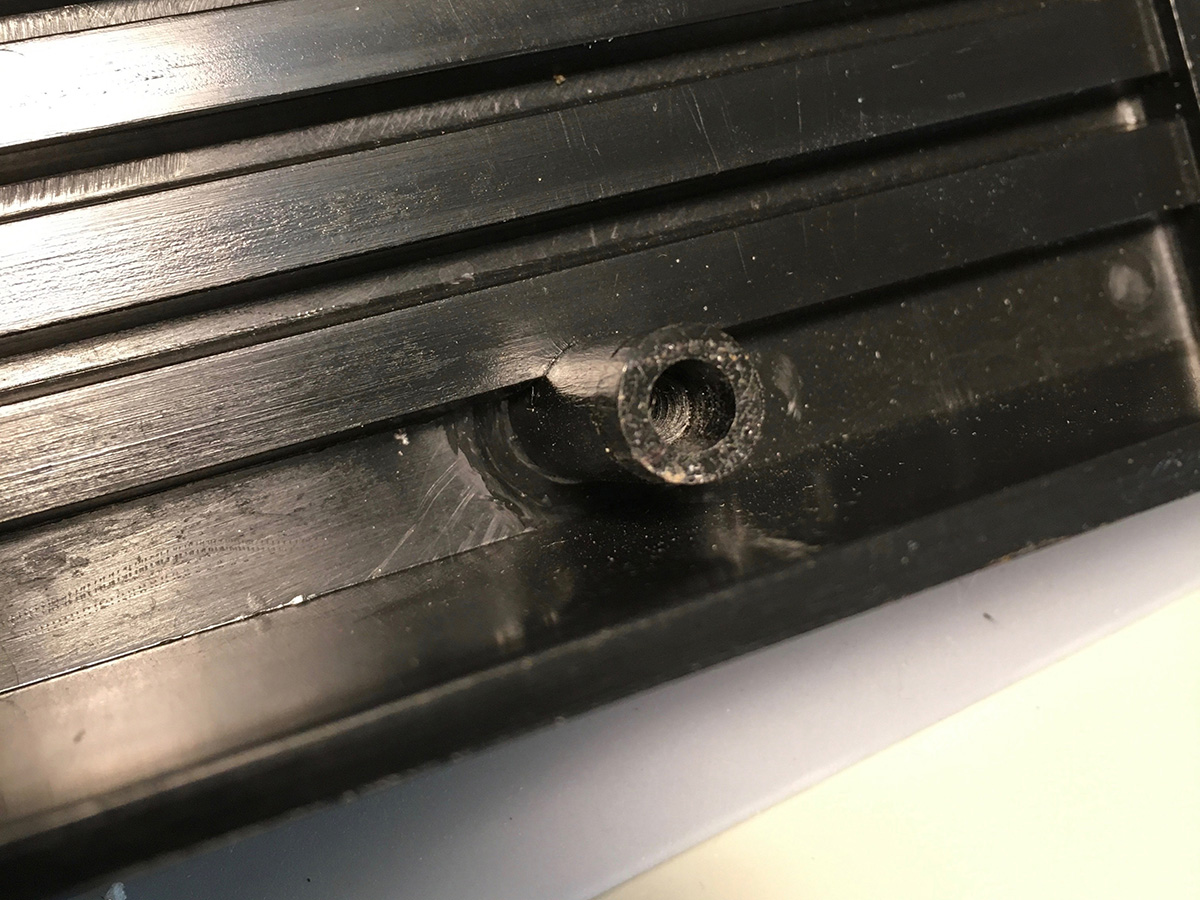
I couldn't figure out why the screws in the plastic came out easier, until I realized that the screws in the metal have self-drilling tips on them. Basically, it's a groove that allows a screw to drive itself into materials without needing to drill a hole. So some epoxy had filled those grooves, and had to be broken loose before the screws would turn. The screws in the plastic don't have that groove, so there was no resistance when removing them. You can see the groove on the short screw, below. (The longer screw with the blunt tip also has a groove, but it's facing away.)
Anyway, the fix worked, and the screw holes are now repaired! Now, how durable they're going to be is another matter. But I'm not going to torque down the screws in those holes very much, and I'm going to be very careful while installing them. If they last long enough to hold the console together for now, I'll call that a win. If in some future disassembly the threads break again, well, I now know how to fix them.
Well, this seems long enough for Part 2. Also, I'm about 2/3 of the way through the photos I took, so I think I'll wrap this up in Part 3. Coming... now!
-
 6
6
-
 1
1


0 Comments
Recommended Comments
There are no comments to display.