

Cheap New Camera

Entry posted by ubikuberalles
1,219 views
On Black Friday I visited Walgreens to get a few groceries. While I was there I found this camera:
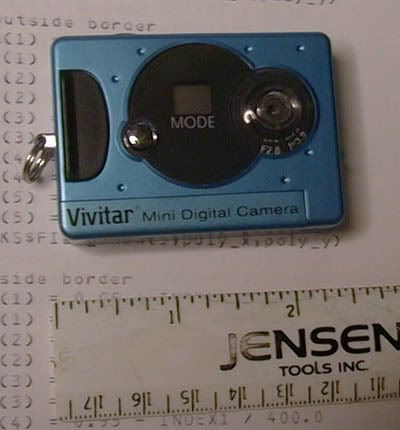
How much did it cost? Ten dollars. That's $10! Only ten dollars. OMG! Naturally, I bought it.
Back in March of 2006 I found a cheap $30 camera at Radio Shack (here's my blog entry about that. That was the cheapest camera I could find at the time and I had all sorts of cool ideas with it. One idea was to get a second camera and build a stereo camera rig:
Blog entry about stereo rig with the $30 cameras.
I had even more ambitious plans with them. One idea was to connect the camera switches to a cable and then mount the camera on a long pole. That way I could take pictures from a bird's eye view and see things I normally can't see otherwise (bird's nests in trees and so on).
Another idea was really ambitious: buy thirty or forty of the cameras, mount them on a circular track, connect them via cable to a series of microcontrollers and take Matrix-like action pictures. It's doable and within my technical capabilities (although I had never before done anything with that much logistics required). The main issue was the cost. This project would cost me nearly two thousand dollars. I had thought of doing a scaled down version of the project - using only ten cameras - but that $30 price tag was killing me. I was hoping Radio Shack would lower the price over time. Instead they simply dropped the camera from their shelves (I may have missed a inventory closing sale - oh, well).
Another factor was that the muse comes and then it goes. This is a big reason I keep a paper journal of my hardware and software projects: to reduce time lost relearning when the muse returns. However, the biggest factor was the price, at least for my more ambitious projects. Now with a $10 camera, perhaps the muse may return.
Let's check this camera out. Here's the first picture I took:

The camera takes pictures in one of two resolutions: 352X288 and 176X144. Much smaller than the $30 camera (1280X1008 and 640X480). In high resolution mode you can only store 20 pictures. However, the camera also offers compression and so you could hold as many as 60 high resolution pictures or 243 low resolution pictures. Don't take the battery out before you upload
Some more pictures. It was late Friday night and I just took pictures of whatever was in the room. The TV:

Even the bottom of my glass:
This camera does very well in low light situations. My $30 cameras would not have taken the above pictures very well. There would be a lot of artifacting and I would have to use PhotoShop to enhance them. So, even though the resolution is smaller, the Vivitar camera can do a lot better in low light situations.
The TWAIN that came with the camera is not all that great. It's pretty basic, first of all, and does not offer many options. One problem I found early on is if you try to save your files via a shortcut "My Documents" for example, it doesn't save the pictures even though it says it does. The pictures are saved in the file name format of 001.jpg, 002.jpg and so on. If you already have files with those names the program automatically overwrites them without warning. So you either have to rename your old files right away or store the new files in a different directory.
One cool feature of the TWAIN software is you can use you camera as a live monitor. Naturally, the first thing I did with it is point the camera at my monitor:
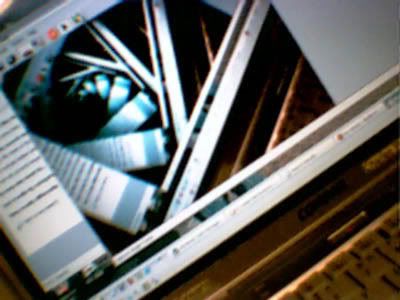
As you can see, I can save a screen shot of the live camera. I can't save a movie made of the live camera, however. Let's try out some other things.
The lens is set up as a pinhole camera and so it automatically keeps everything in focus.
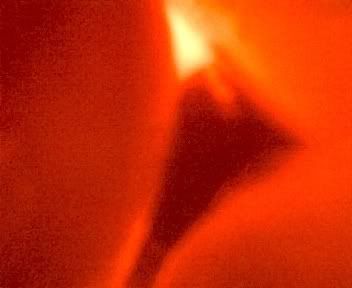
Well, sort of. If it's closer than five inches, it's fuzzy. The above picture was taken only two inches from the red calculator. Keeping the aperture lined up properly is also a problem since there is no LCD screen on this camera. Practice makes perfect,.
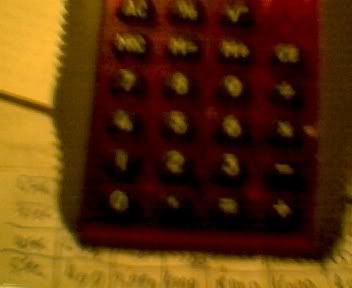
Here's a picture of my keyboard at three or four inches. Still fuzzy, but much better:
[imghttp://img.photobucket.com/albums/v453/ubikuberalles/blogstuff/Vivitar-camera/camera07.jpg[/img]
Another problem:
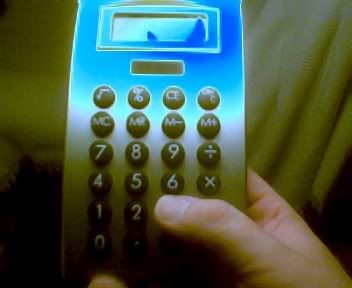
The above calculator is supposed to be silver but the overexposure from the florescent light makes it look blue (it did the same thing with my face in the first pic I made above).
One lesson I learned from this camera. Never leave it unattended. You never know who might be using it.
The camera has two other features that are cool. One is the continuous shot mode. Hold the shutter button down and the camera takes a picture a couple times a second. Great or action shots. I made a little GIF with my first attempt:

OK, maybe I didn't get the frame rate right. I'm not really that crazed in real life!!
The camera also can make movies. The manual doesn't say how long the movie can be but I'm sure it would be less than a few minutes. Here's a link to the first movie I made:
Despite its limits, this camera is pretty fun. I have other plans for it. Since it is so cheap I plan to buy a bunch more and even hack a few and see what I can do. I bought four of those $30 camera last year and yet only took about 80 pictures so far (I need to correct that). That's like $1.50 a picture! So far, with the Vivitar, I've taken over 150 pictures (not including the continuous shot pictures I took. If I included those then I took over 400 pictures). I think I got my money's worth so far.
1 Comment
Recommended Comments