

Keepin' it clean
Entry posted by Nathan Strum in 2600 repair
713 views
Yeah. Let's see you get that song outta your head. It's apparently been stuck in mine since 1977, since I remembered it verbatim while writing this blog entry. Note for note. Over and over.
What I'd forgotten until looking up the commercial is that it was basically an angle grinder for your face.
Anyway, I thought I'd briefly go over the repairs I did for John Champeau's other console, and also cover some tips about how I cleaned it up. Everyone has their own tricks for cleaning a console, and these are mine. Hope you find them useful!
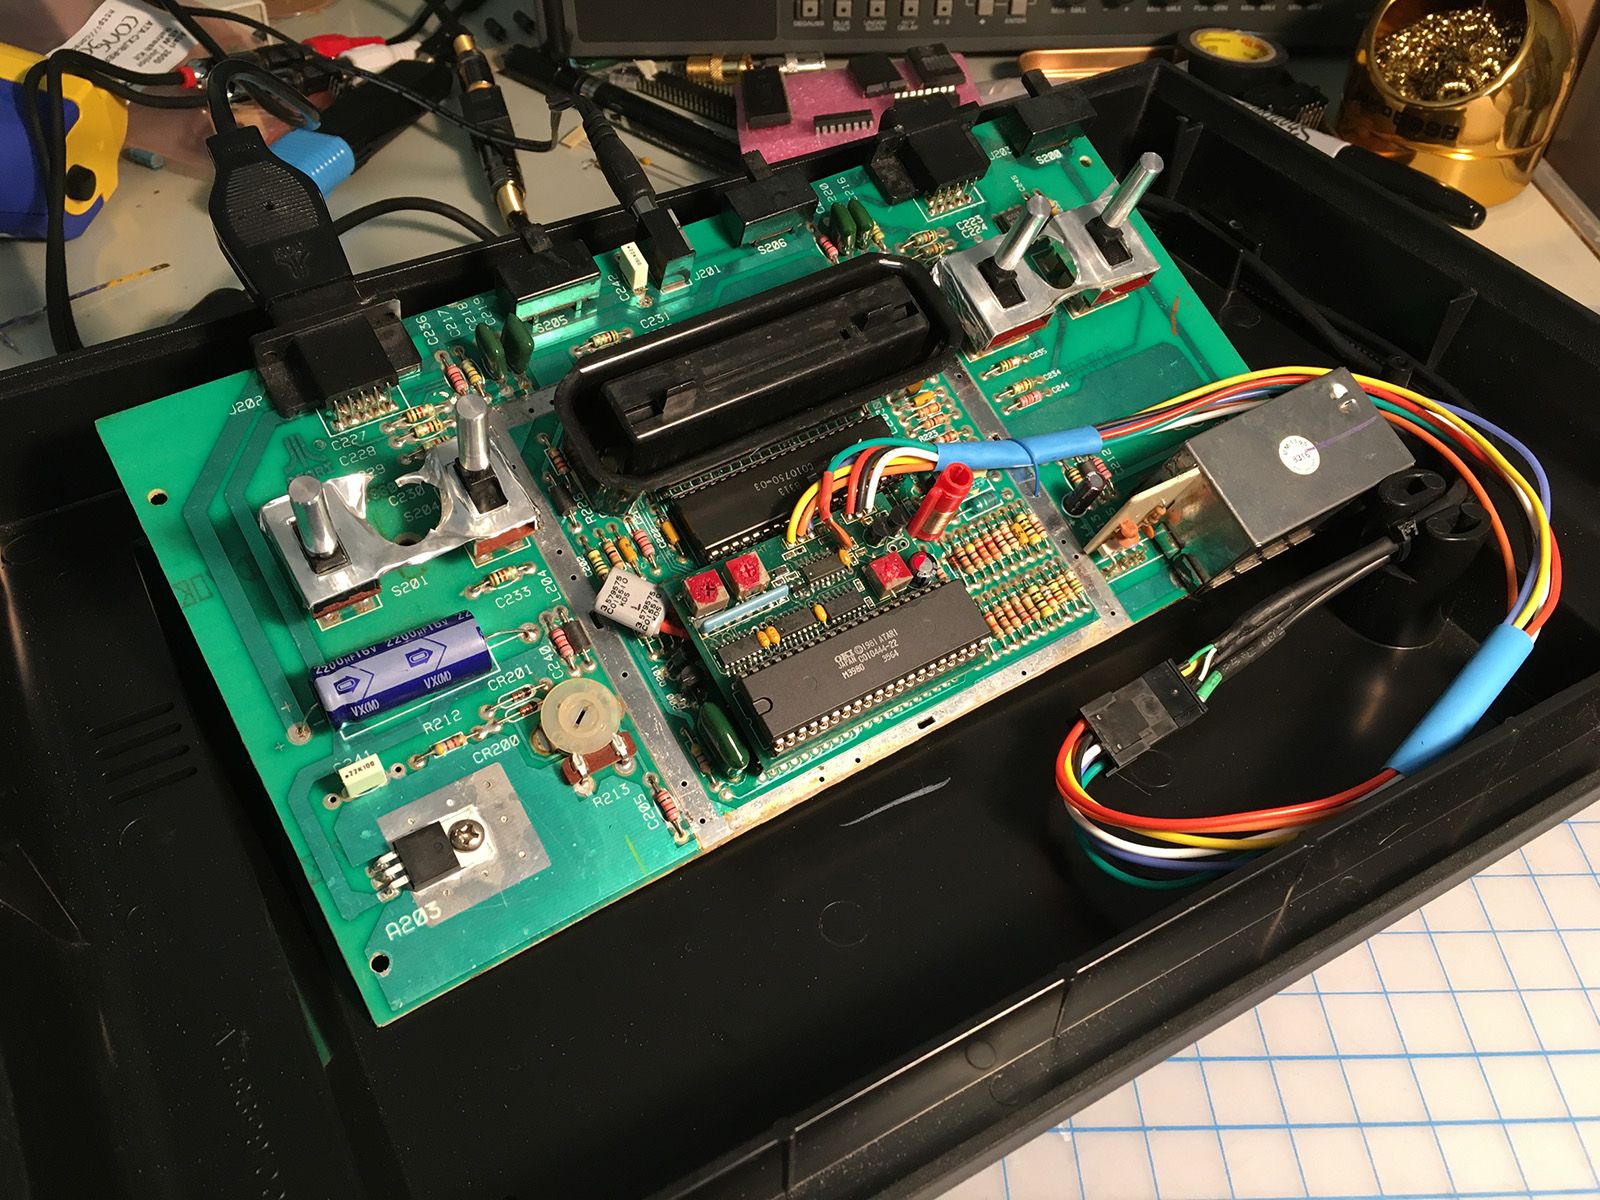
This particular console is a four-switch Woody, and has a CyberTech S-Video mod in it. The issue with this console, is that when a cartridge (any cartridge) is plugged into it, the console behaves as if nothing's there. It powers up, but doesn't "see" the cartridge.
As with the other modded consoles I've recently repaired (James' and mine), the first thing to do was remove the mod, and see if the console itself worked. It didn't. As an aside, John says both of his consoles perished after lightning hit his house. For what it's worth, I'd highly recommend getting a Tripp-Lite Ultra surge suppressor. I've been using these at work for years in our Mac labs for computers, monitors, peripherals, video projectors, AV systems and printers, and I use them at home as well, and have never lost a piece of equipment to a power surge (and we've had historically bad power at work). A couple of the surge suppressors have sacrificed themselves in the line of duty, but that's what they're supposed to do. Make the investment. (Admittedly, they haven't been hit by lightning... but you've gotta start somewhere.)
So, I went through John's console, installed a console5 recap/refresh kit, and tested all of its chips in another 2600. Both the TIA and RIOT were toast. So I replaced those, and... still nothing. At this point, there's either a bad trace somewhere, or some other component that's cooked on the board that would require more troubleshooting than I presently have the time (or equipment) to do. Fortunately, I had a backup plan: McCallister had sent me a couple of dead donor 2600s. One, a six-switch, is going to become the home for my working spare six-switch boards. The other, a Vader, is going to be repurposed for an appropriately sinister project that doesn't require the original guts to work at all. So, with John's permission, that became the new board for his console. It still has his original console's brain in it though, as the 6507 was fine. (Someday I'll take a poke at fixing John's original board. It never hurts to have a working spare.)
I had to move the joystick ports from John's board to the Vader board, since one of those ports had a broken pin, and both ports were slightly melted on the underside (where a plastic clip is supposed to anchor each port to the board). I have no idea how they got that hot, unless this was put into a reflow oven at some point, with the plastic parts still installed. After that, and installing a console5 kit and a few chip swaps later, the dead Vader board from McCallister was brought to life. One of the donor chips came from yet another four-switch board that someone had sent to me years ago for my (now catastrophically out-of-date) Video Mods Comparison page. So this system was cobbled together out of (at least) three 2600s.
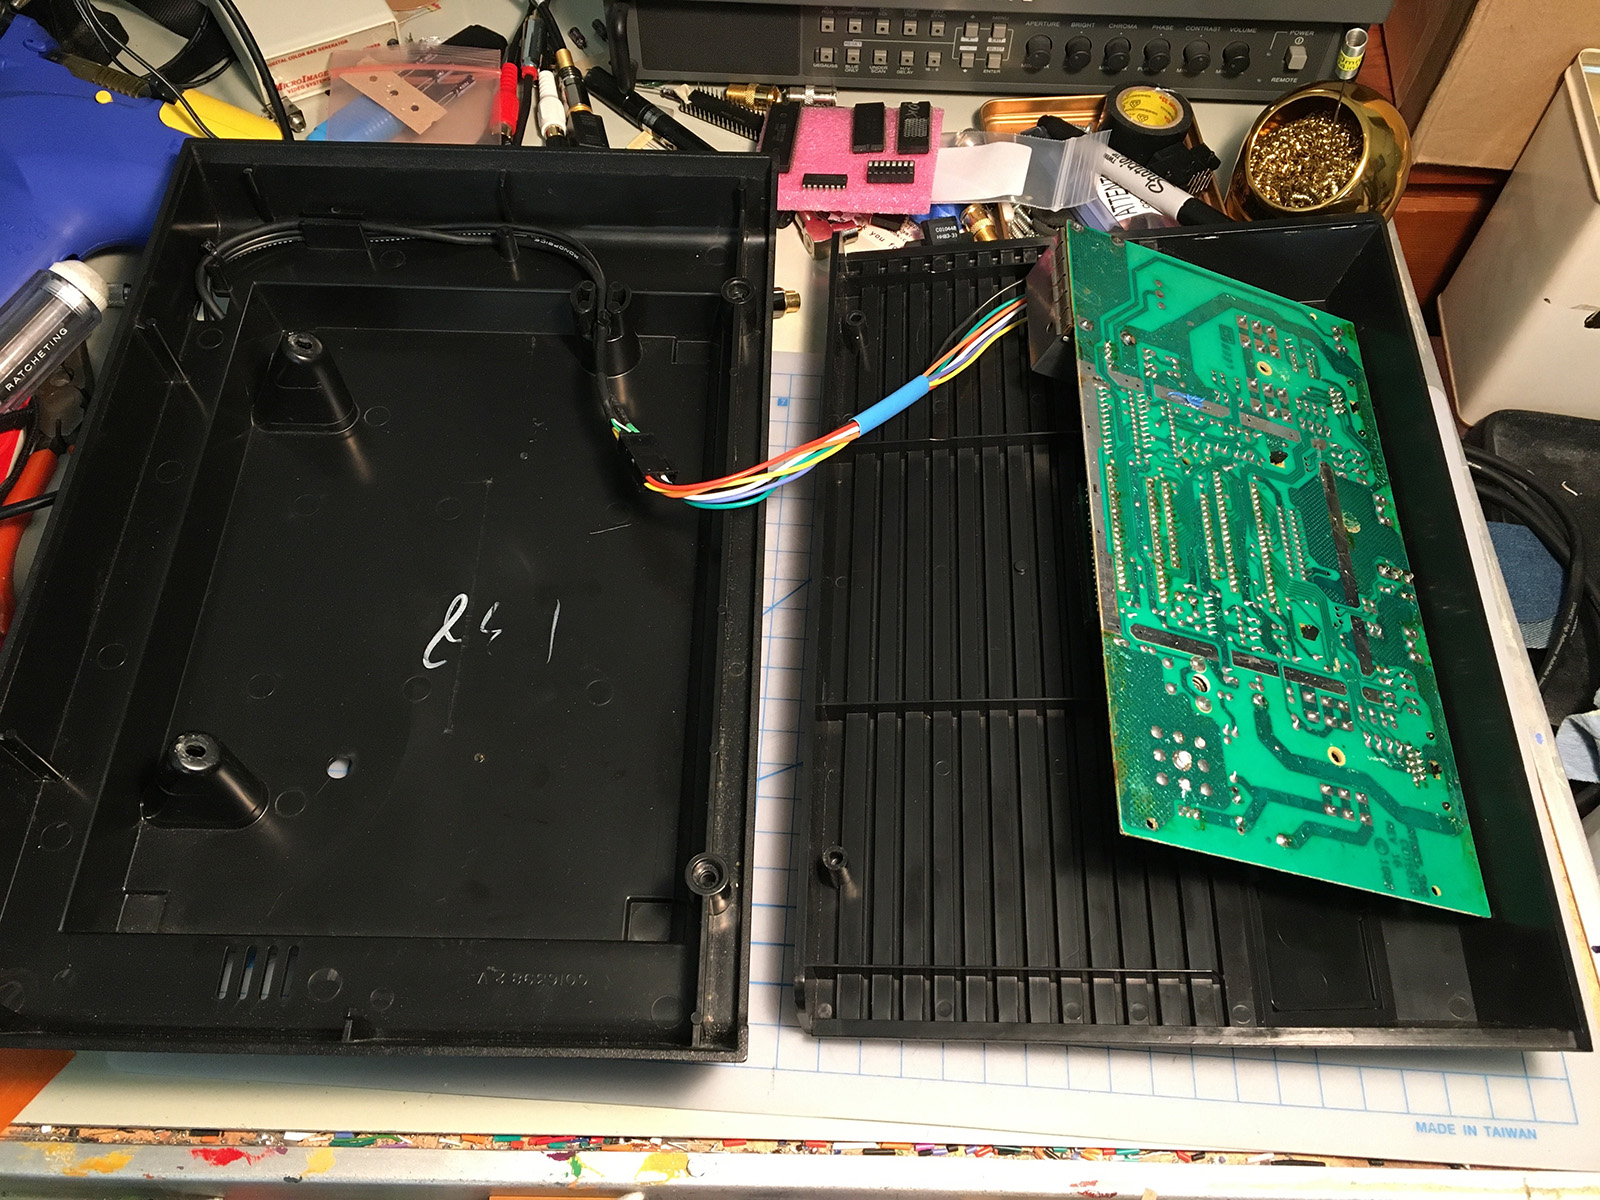
The S-Video mod tested out just fine, but the original wiring was sketchy. The audio and S-Video cables were soldered directly to it, and the wires were very thin and had been twisted up into a knot.
So I went through and redid all of the wiring using my usual favorite wire and Molex connectors.
This makes any future repair work on the 2600 easier to access.
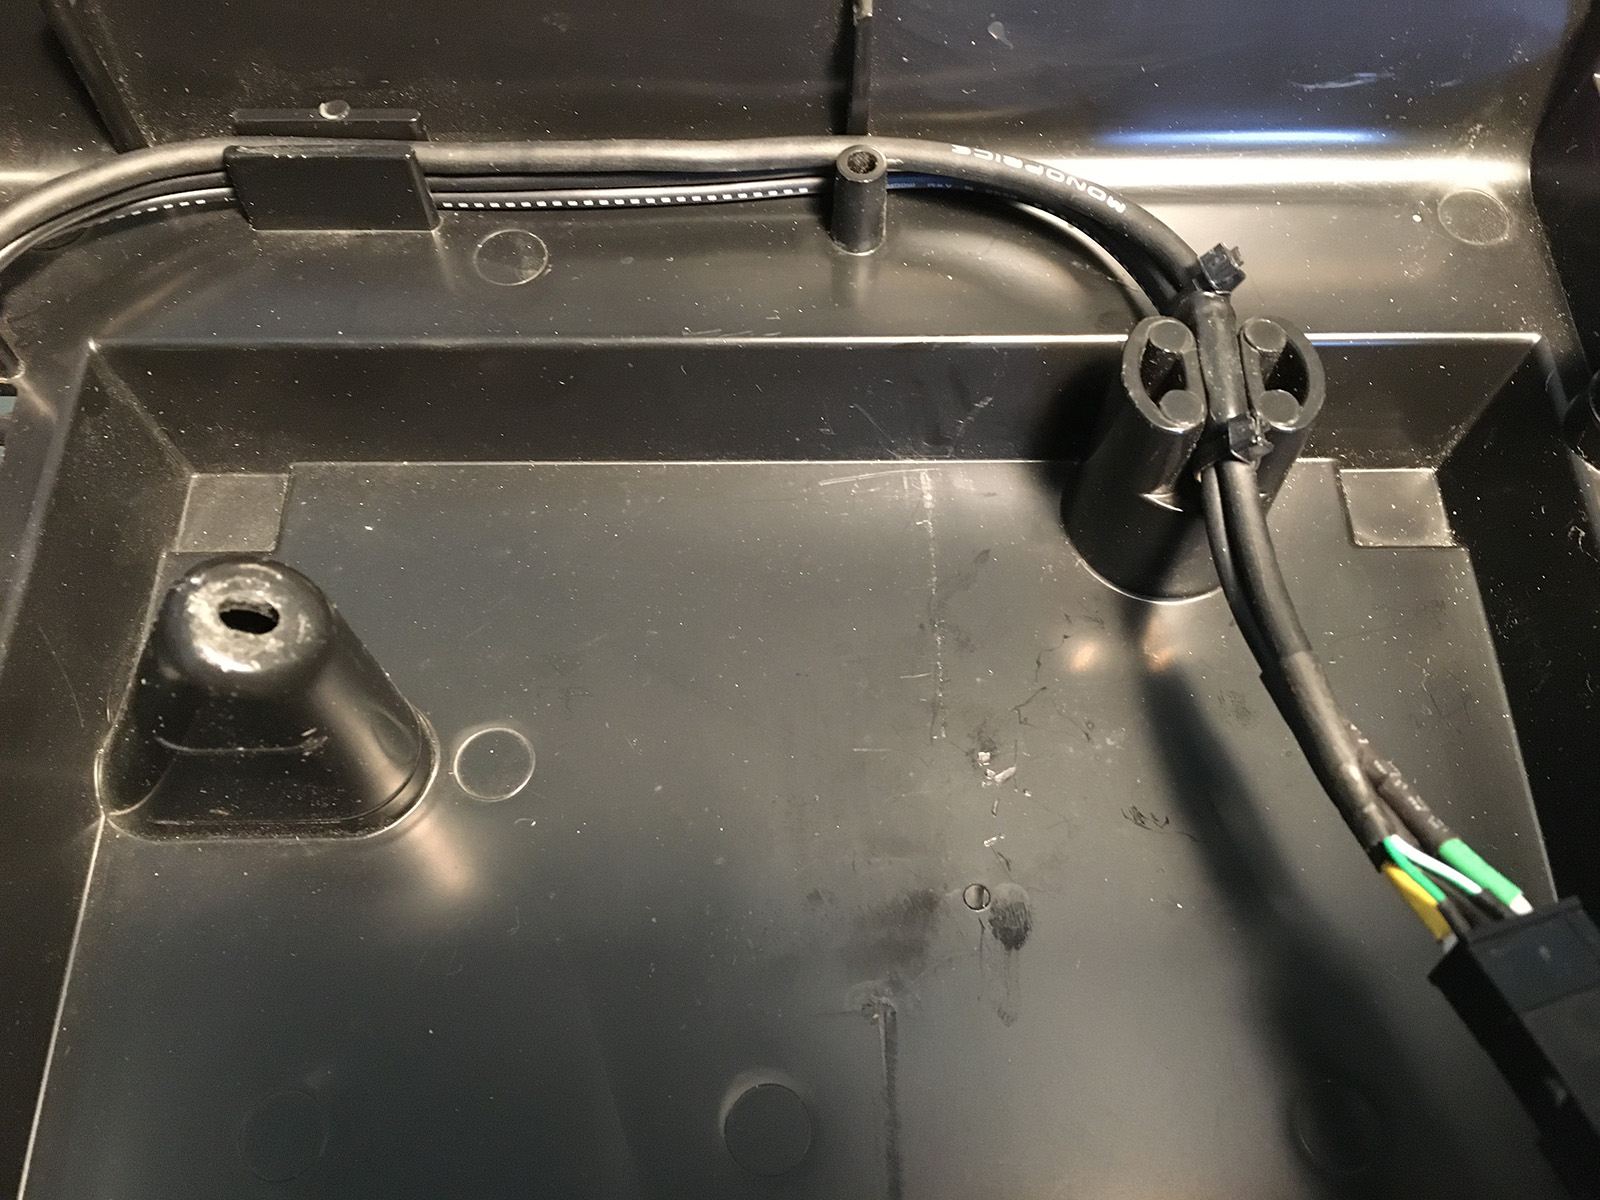
I routed the wires through the RF cable guides in the case. These didn't fit as snugly as they had in my console (plus, I'm shipping this) so I wrapped a little electrical tape around them, and threw a couple of zip ties on there for good measure:
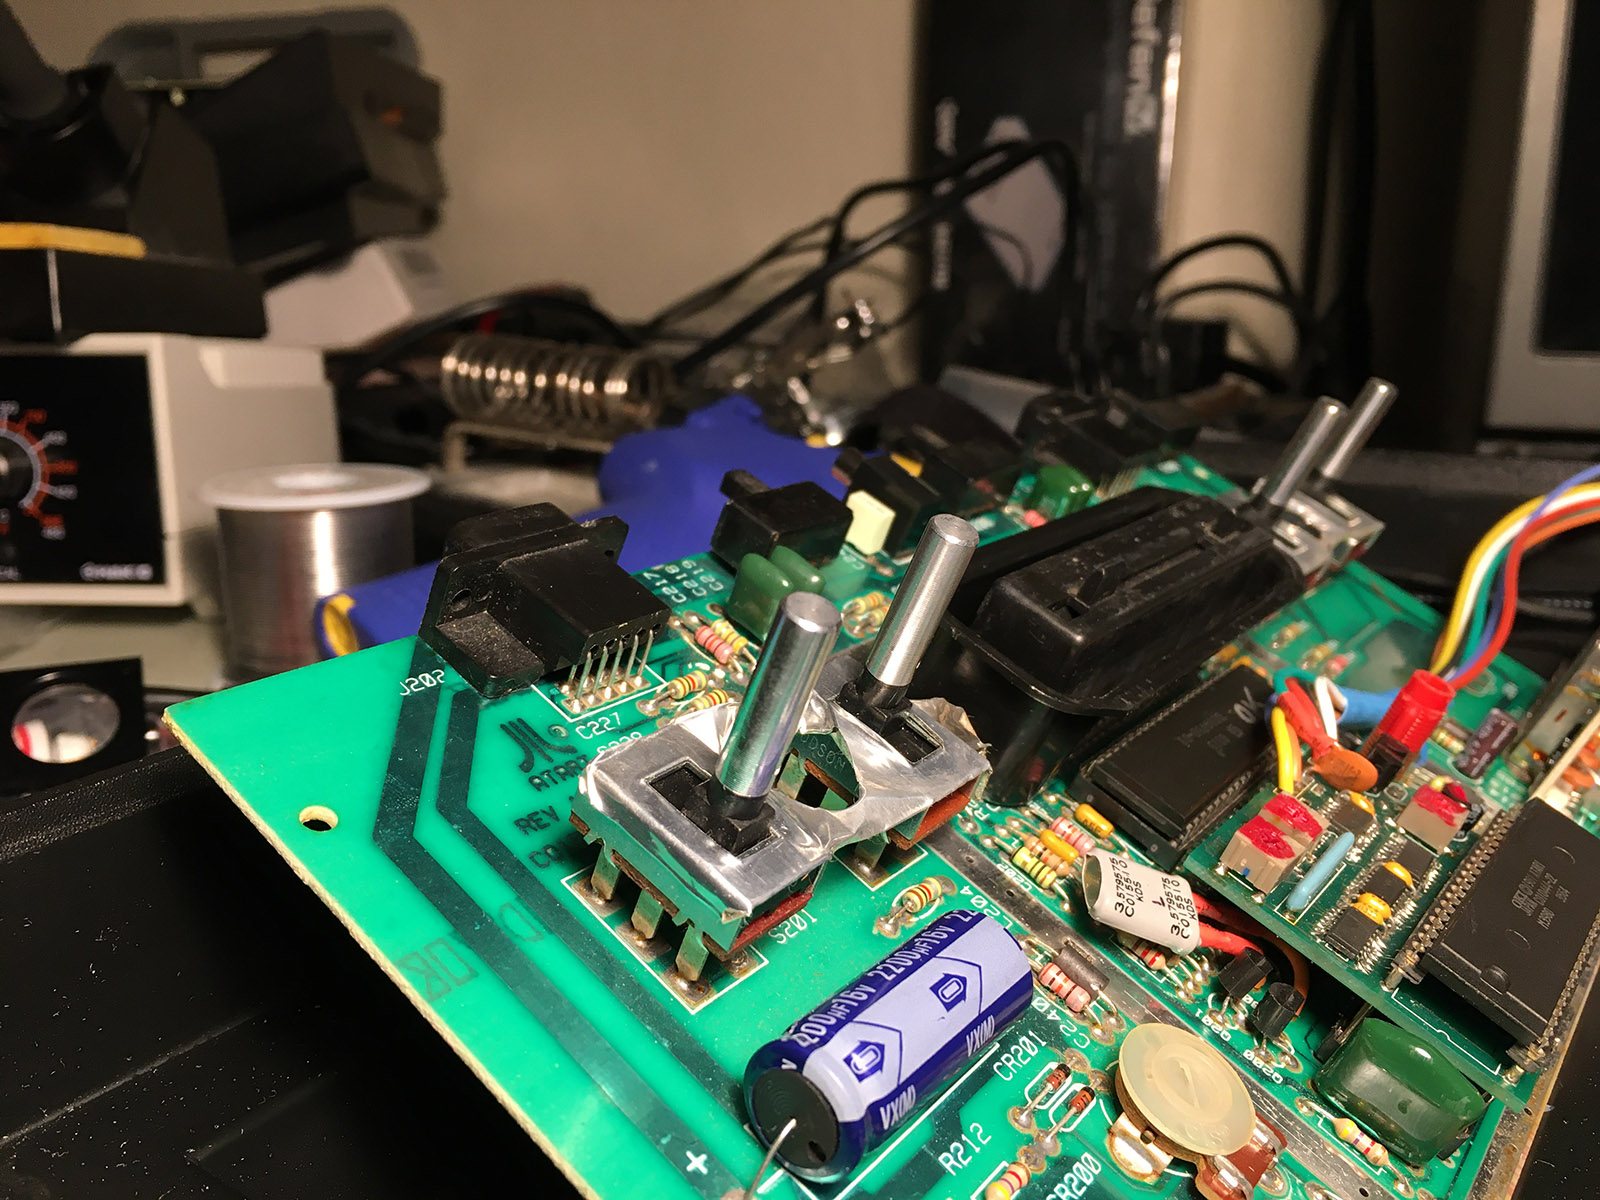
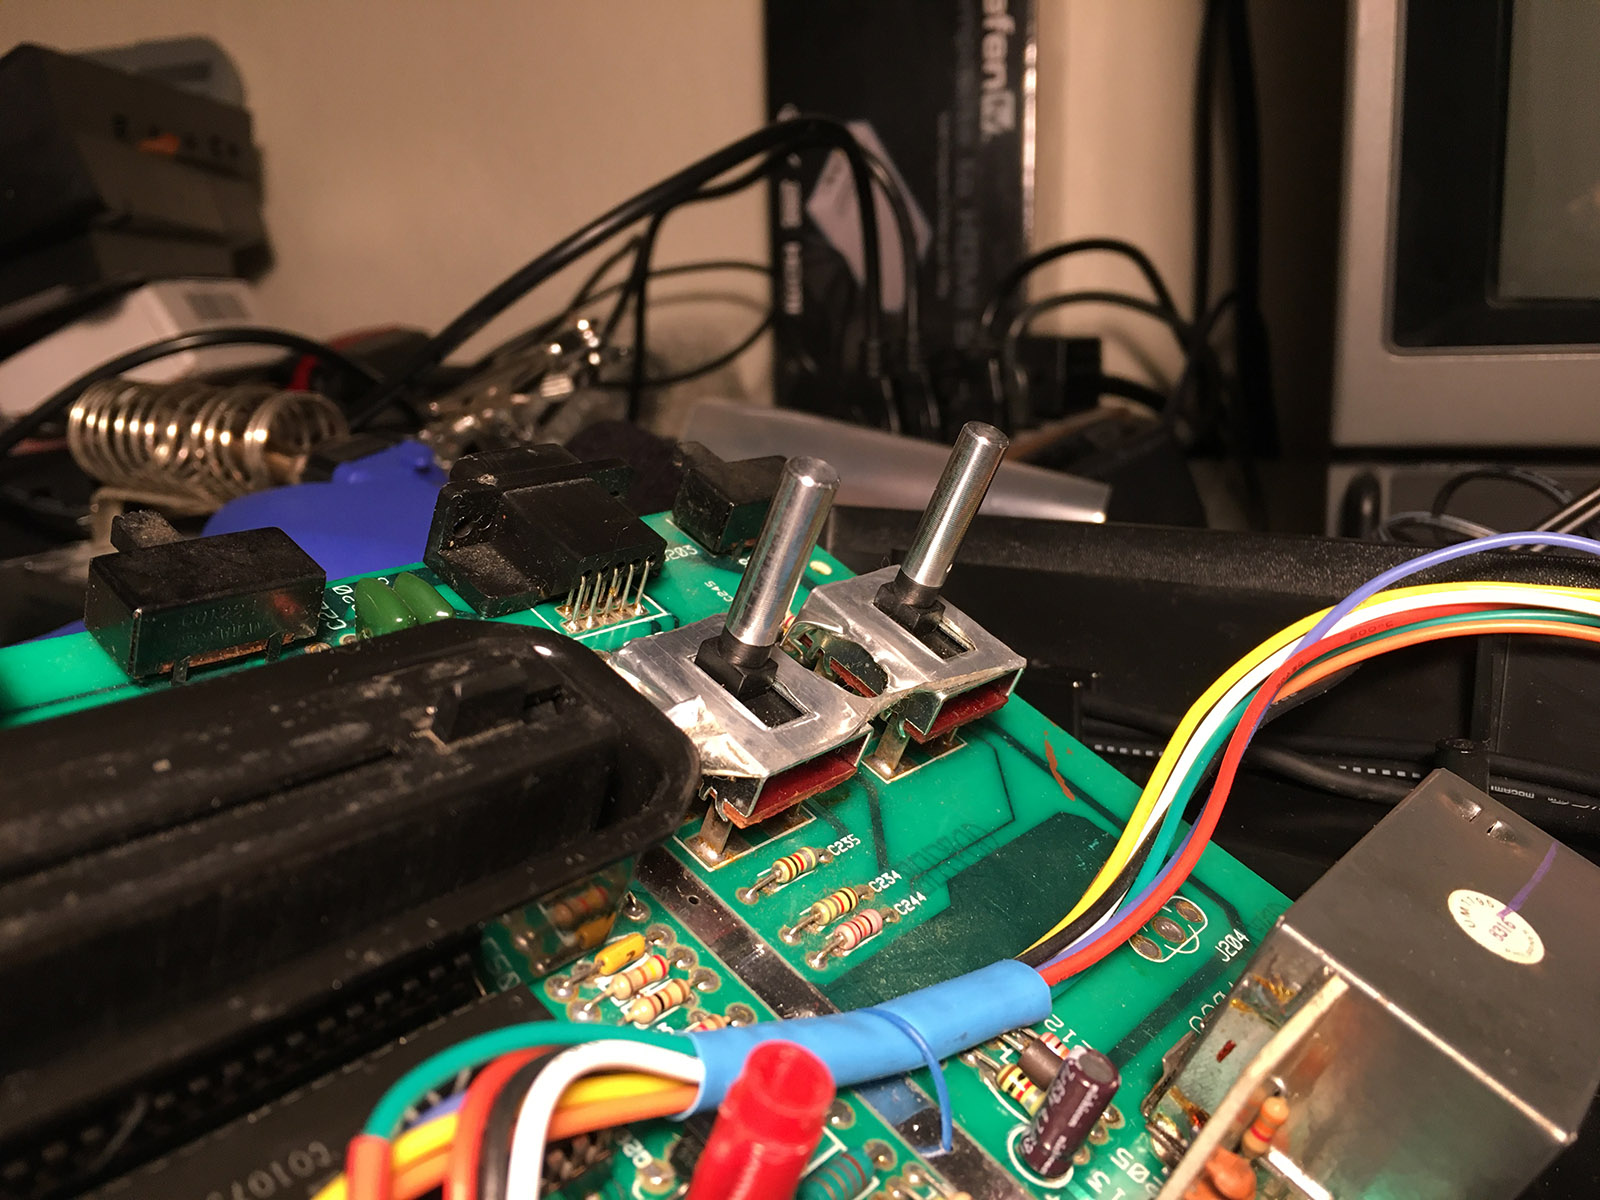
I had to make two minor modifications to the main board. The Vader is a different revision than John's 2600, and the crystal clock (the gray chiclet thing) was in the way of the CyberTech board. So I desoldered it, added some extensions to the leads, re-soldered it and just folded it out of the way. (In case you're wondering about the lack of RF shielding, the mod is too tall for the shielding to fit. It didn't arrive with it, so it's going back without it. But since we're not using RF, we're okay.)
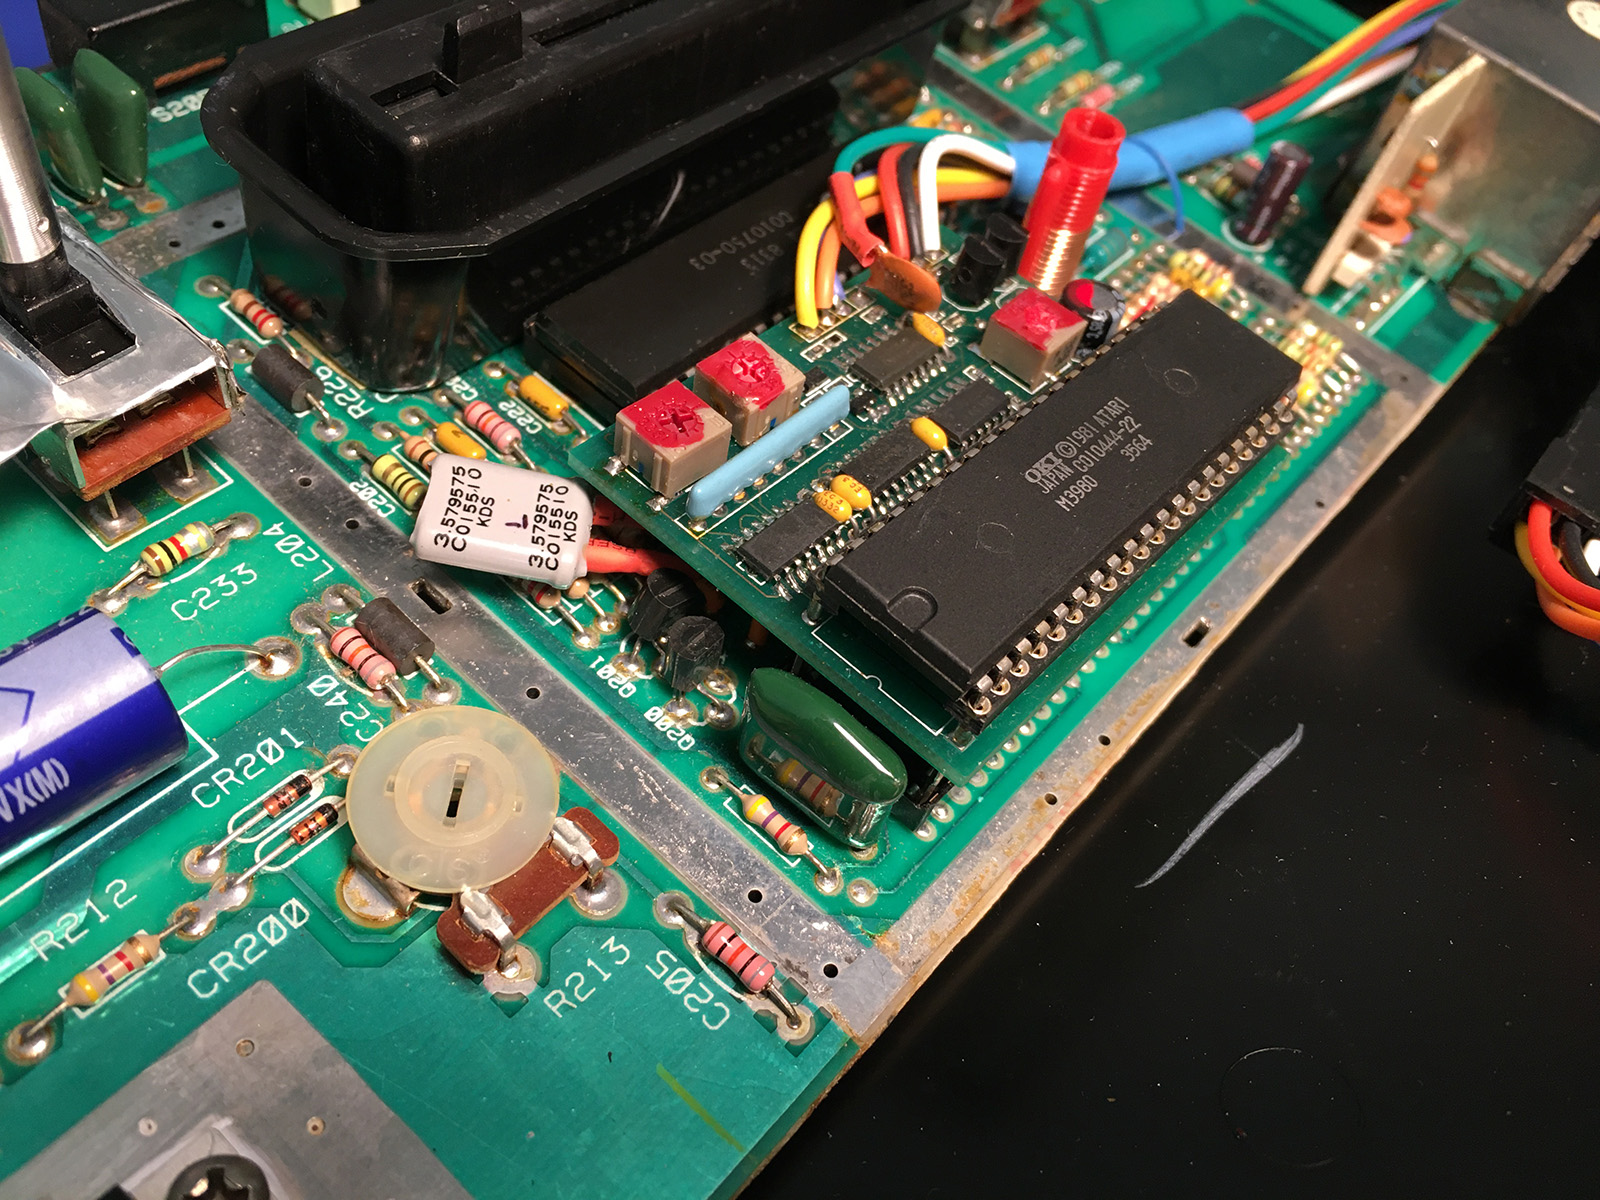
The other issue was that the pins on the CyberTech mod just wouldn't fit into the new TIA socket. They're just way too thick, and to force them in there felt like I was going to crack the circuit board. I'd run into this with my own console, and had fixed it by replacing the standoffs. For John's console though, I simply inserted a pushpin into each socket, one at a time, gently spreading the contacts. I did this a few times, until I got to the point where the mod's pins fit snugly into the socket, without forcing them. (I tested continuity, to make sure everything still made solid contact.)
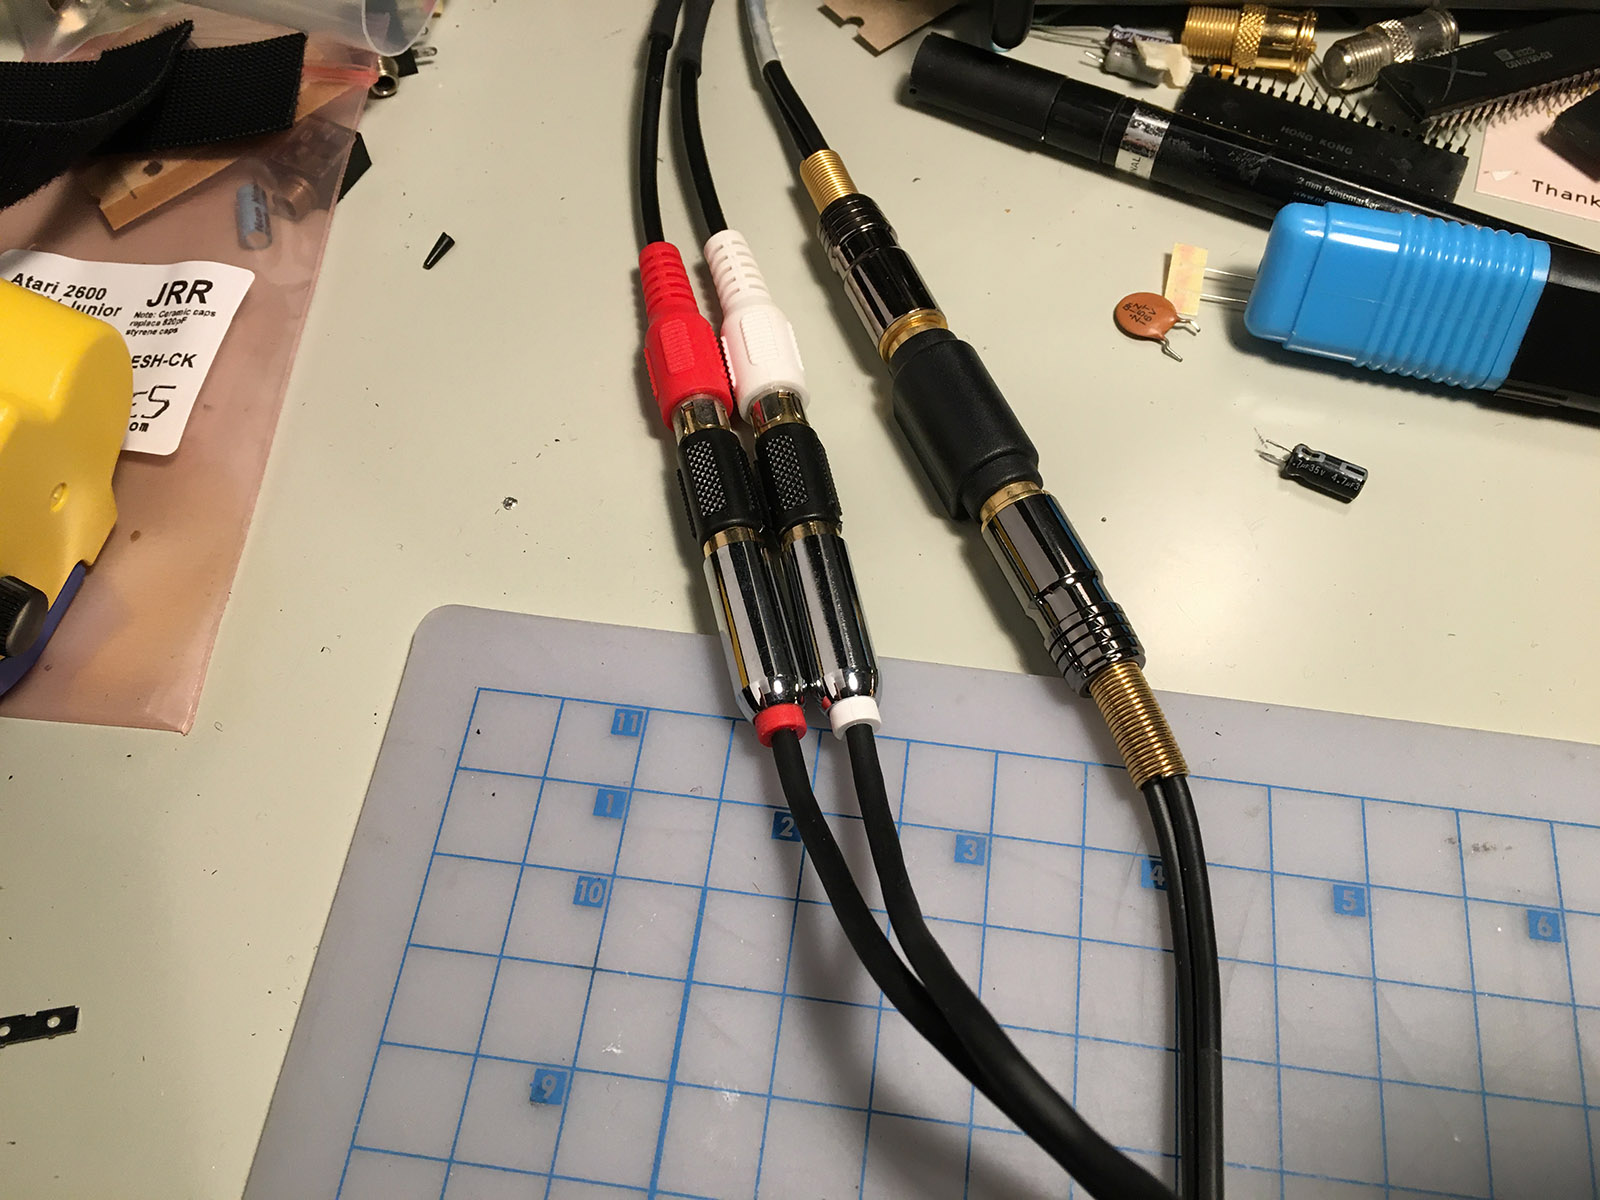
I replaced the AV old cables with new ones, the same type I used on my 2600. They end up only about 2 feet long, so John will need to use barrel connectors to hook them up, but I checked with him and he said this was okay. The alternatives were long, unwieldy cables hanging out of the 2600, or drilling holes in the case for AV jacks.
With the system all tested and working, it was time to give it a good cleaning. Any console almost 40 years old is going to be kind-of gungy, and while the exterior wasn't bad, the rescued board from the dead Vader needed some work.
Here's what I used:
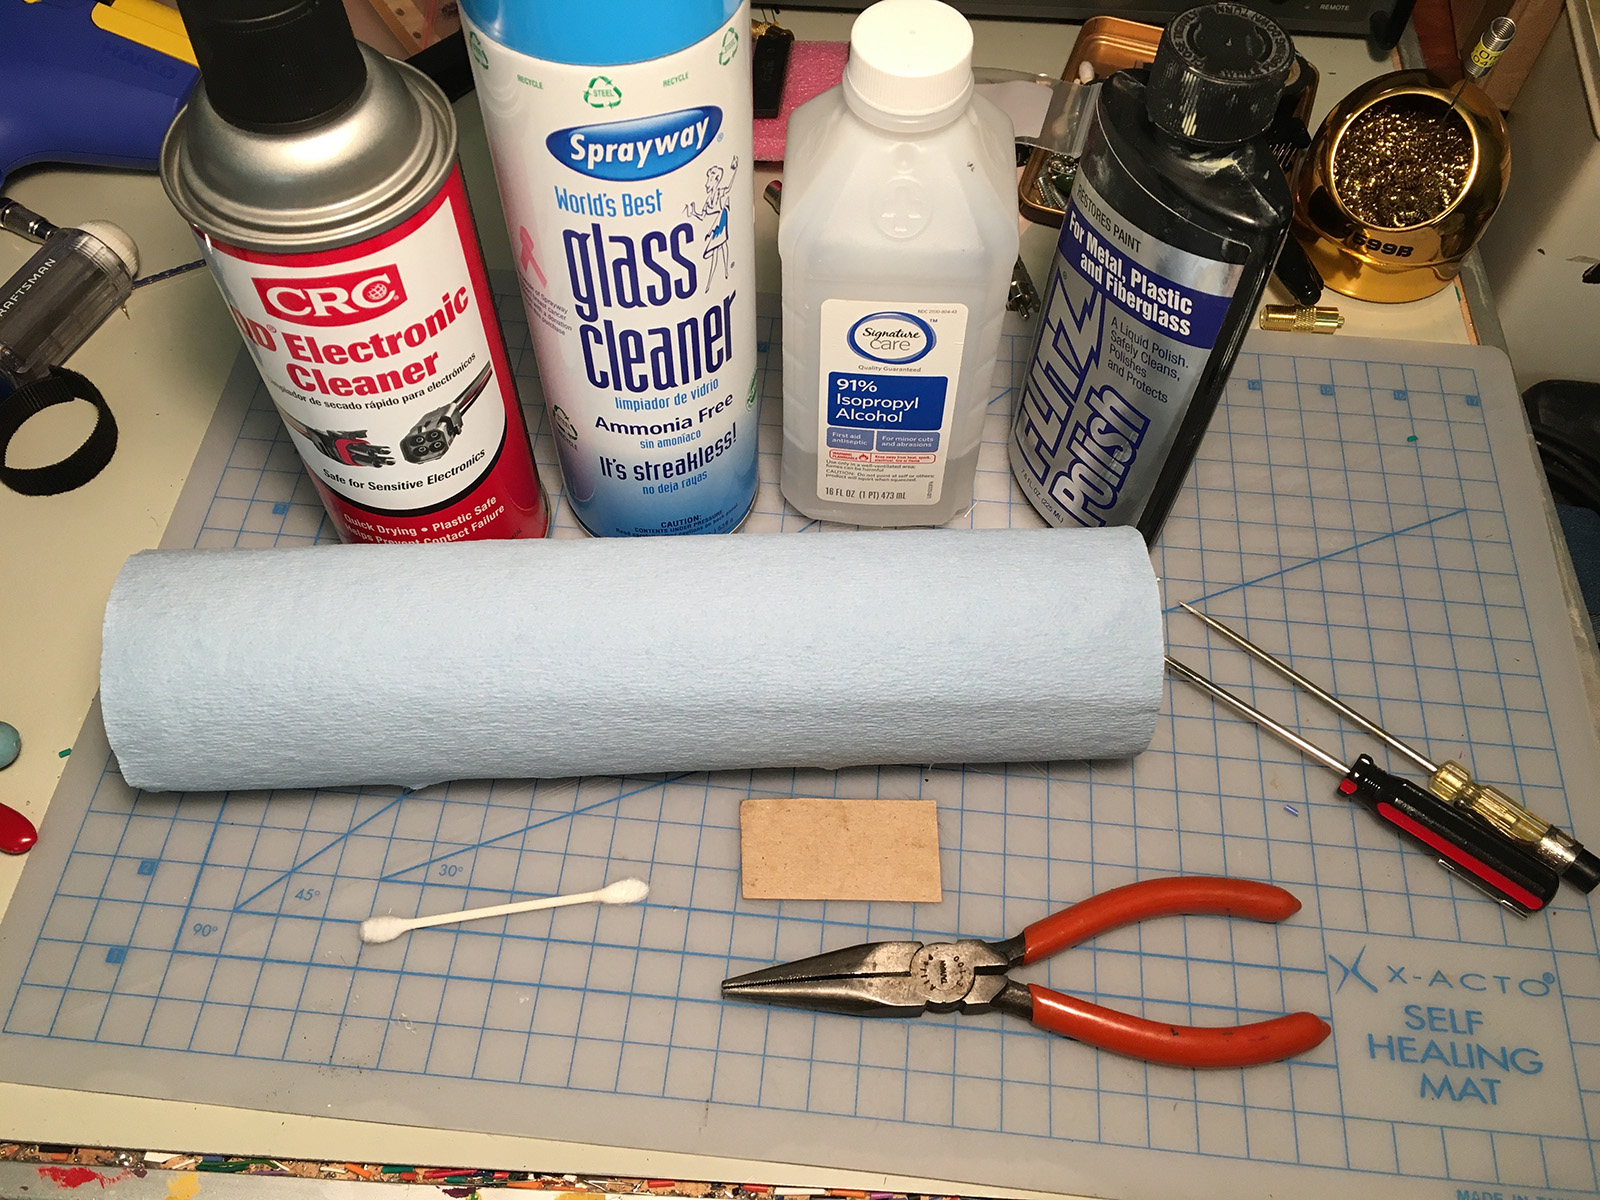
First up, the switches. Now, cleaning the switch contacts is easy. Just get some good contact cleaner spray, and give them a quick hit, and work the switches back and forth a little.
Cleaning the aluminum posts on the main switches... that's something different.
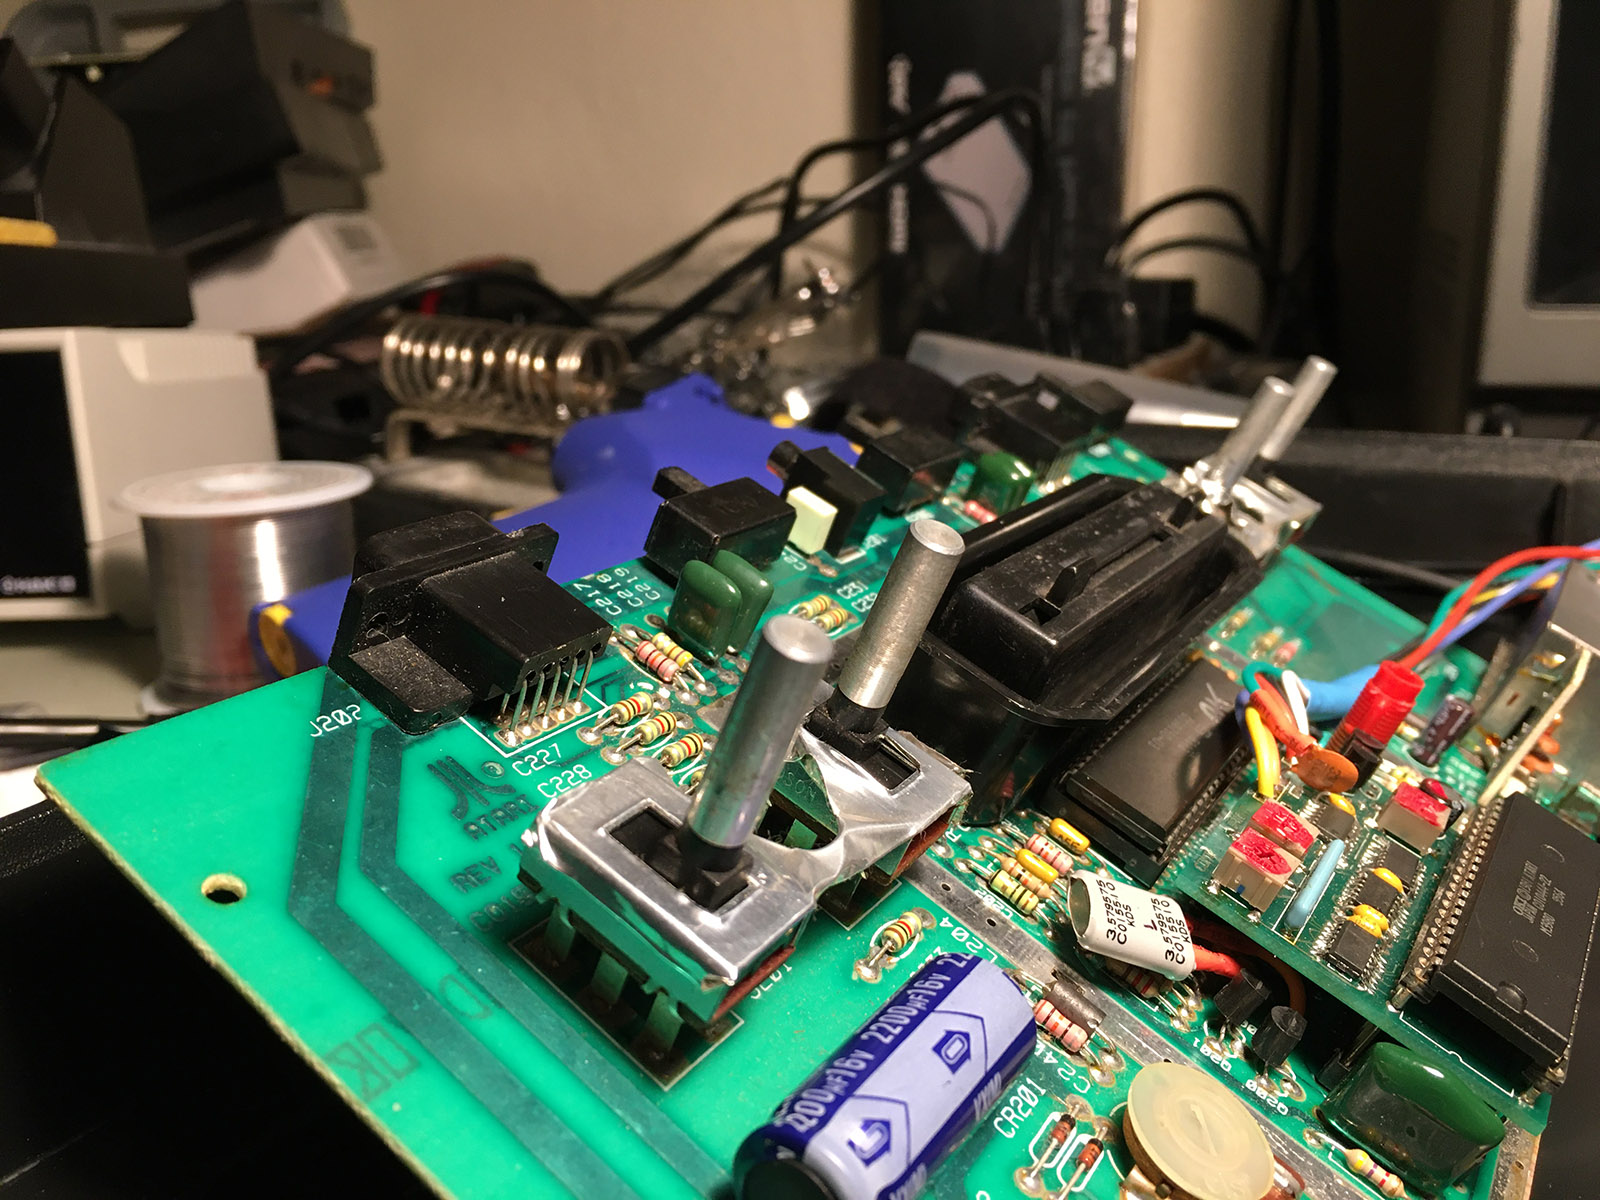
They were gross. Have you looked at yours close-up? May not want to.
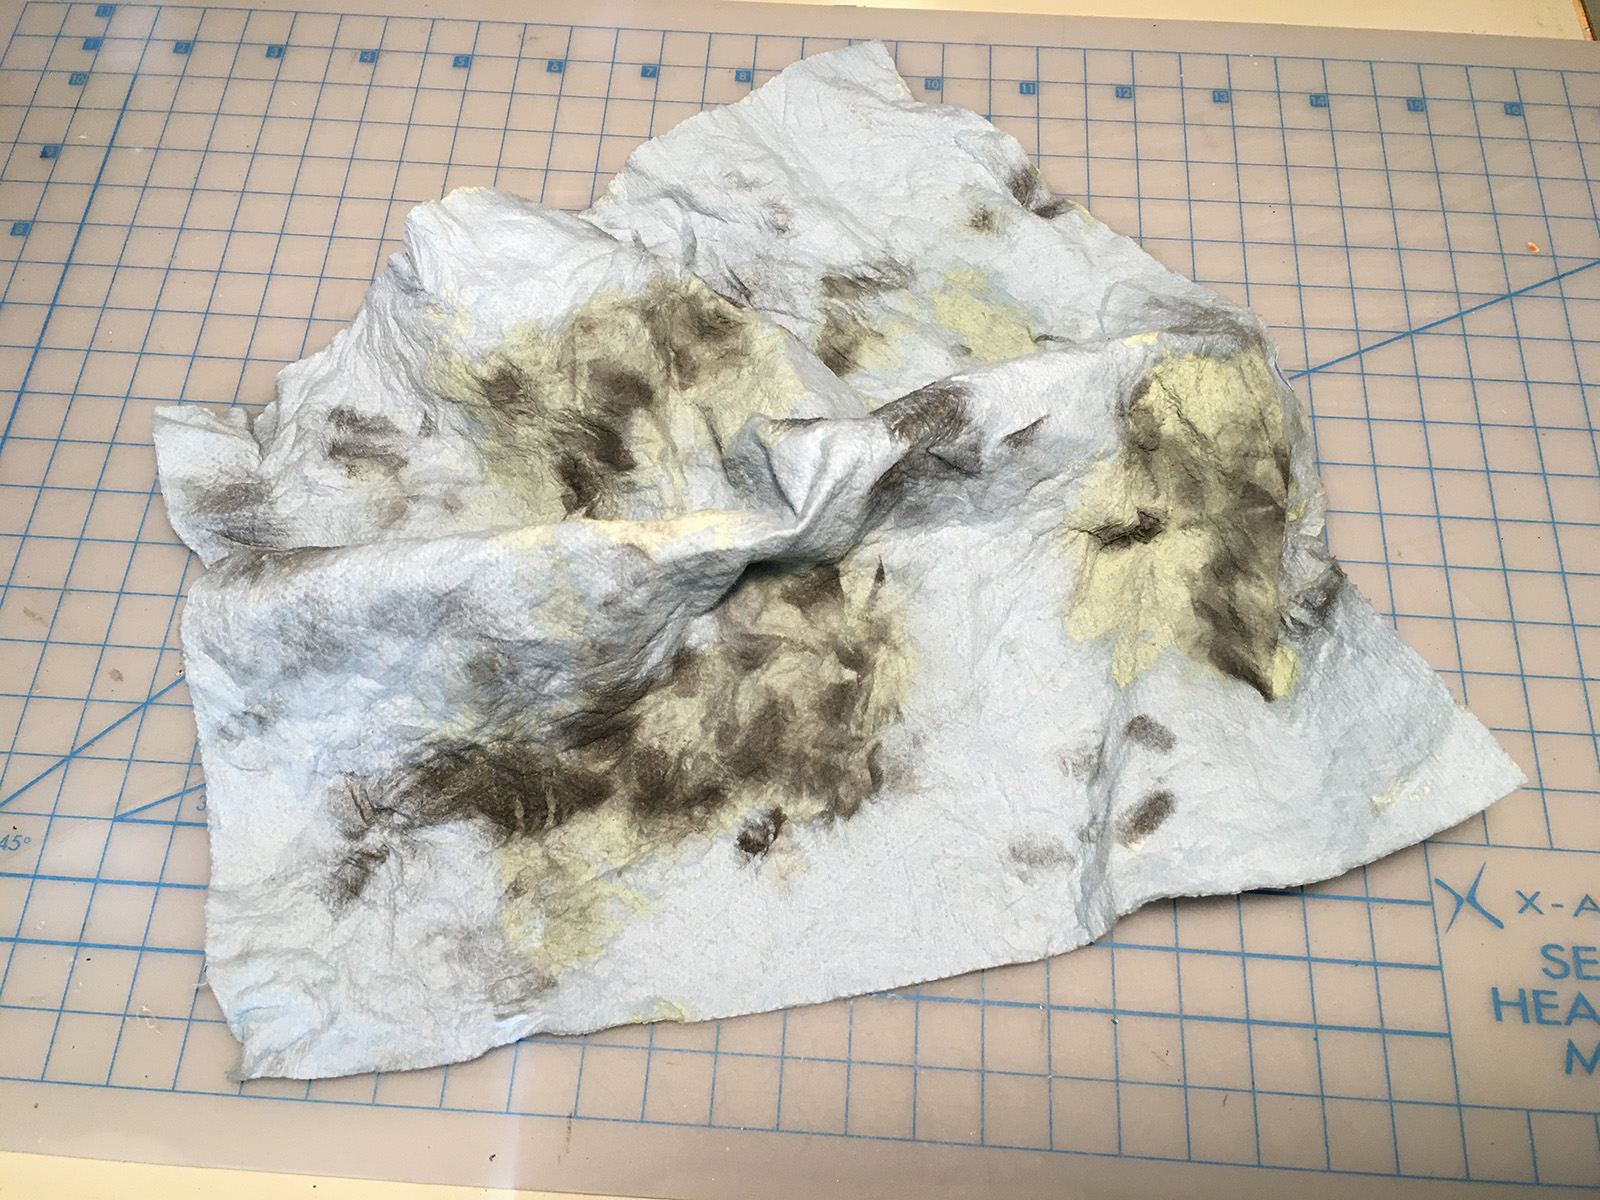
I use Flitz for this. It's a metal polish I've been using since back in my trumpet-playing days in high school. And if something can clean up a high school band instrument, it can clean anything.
I just apply it sparingly to a shop towel (the blue paper kind), and start polishing. The key is to keep moving to clean spots on the towel, until the black gunk doesn't come off anymore.
This is what the towel looked like from just these four switches. And this is only one side of the towel. The other side is equally dirty.
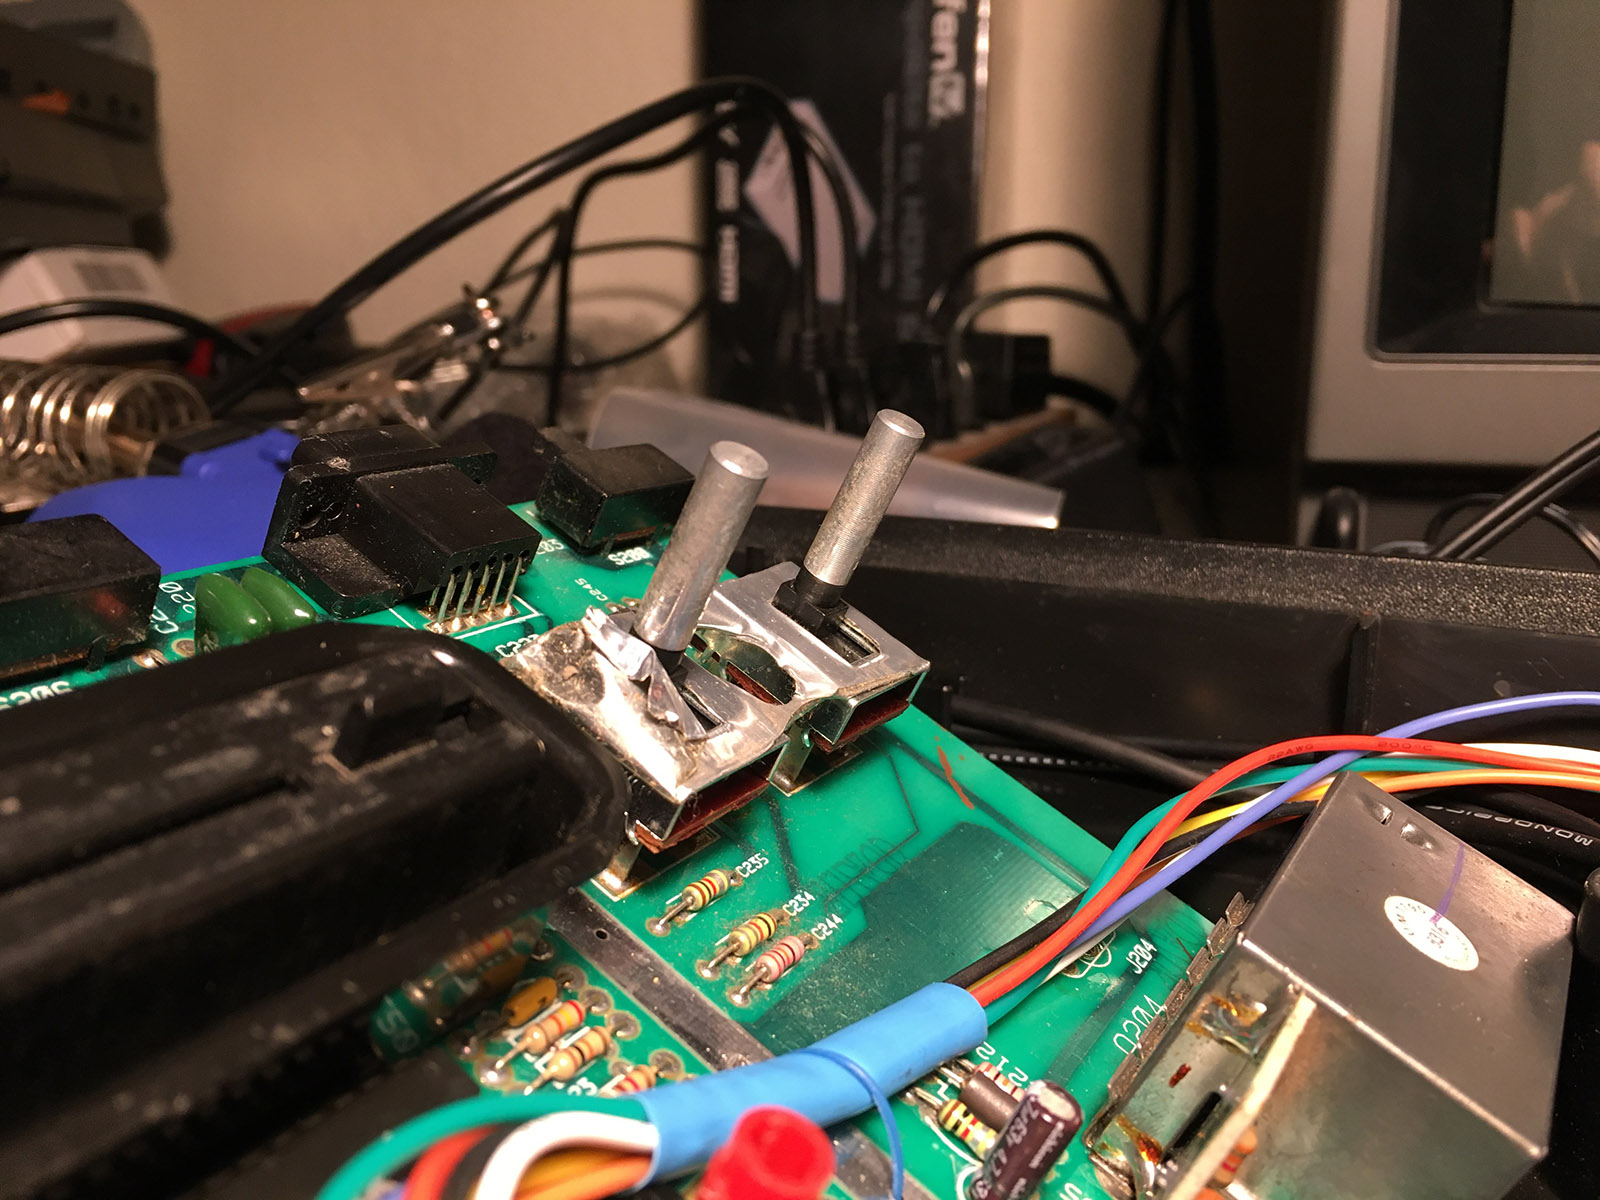
And afterwards?
Almost like-new!
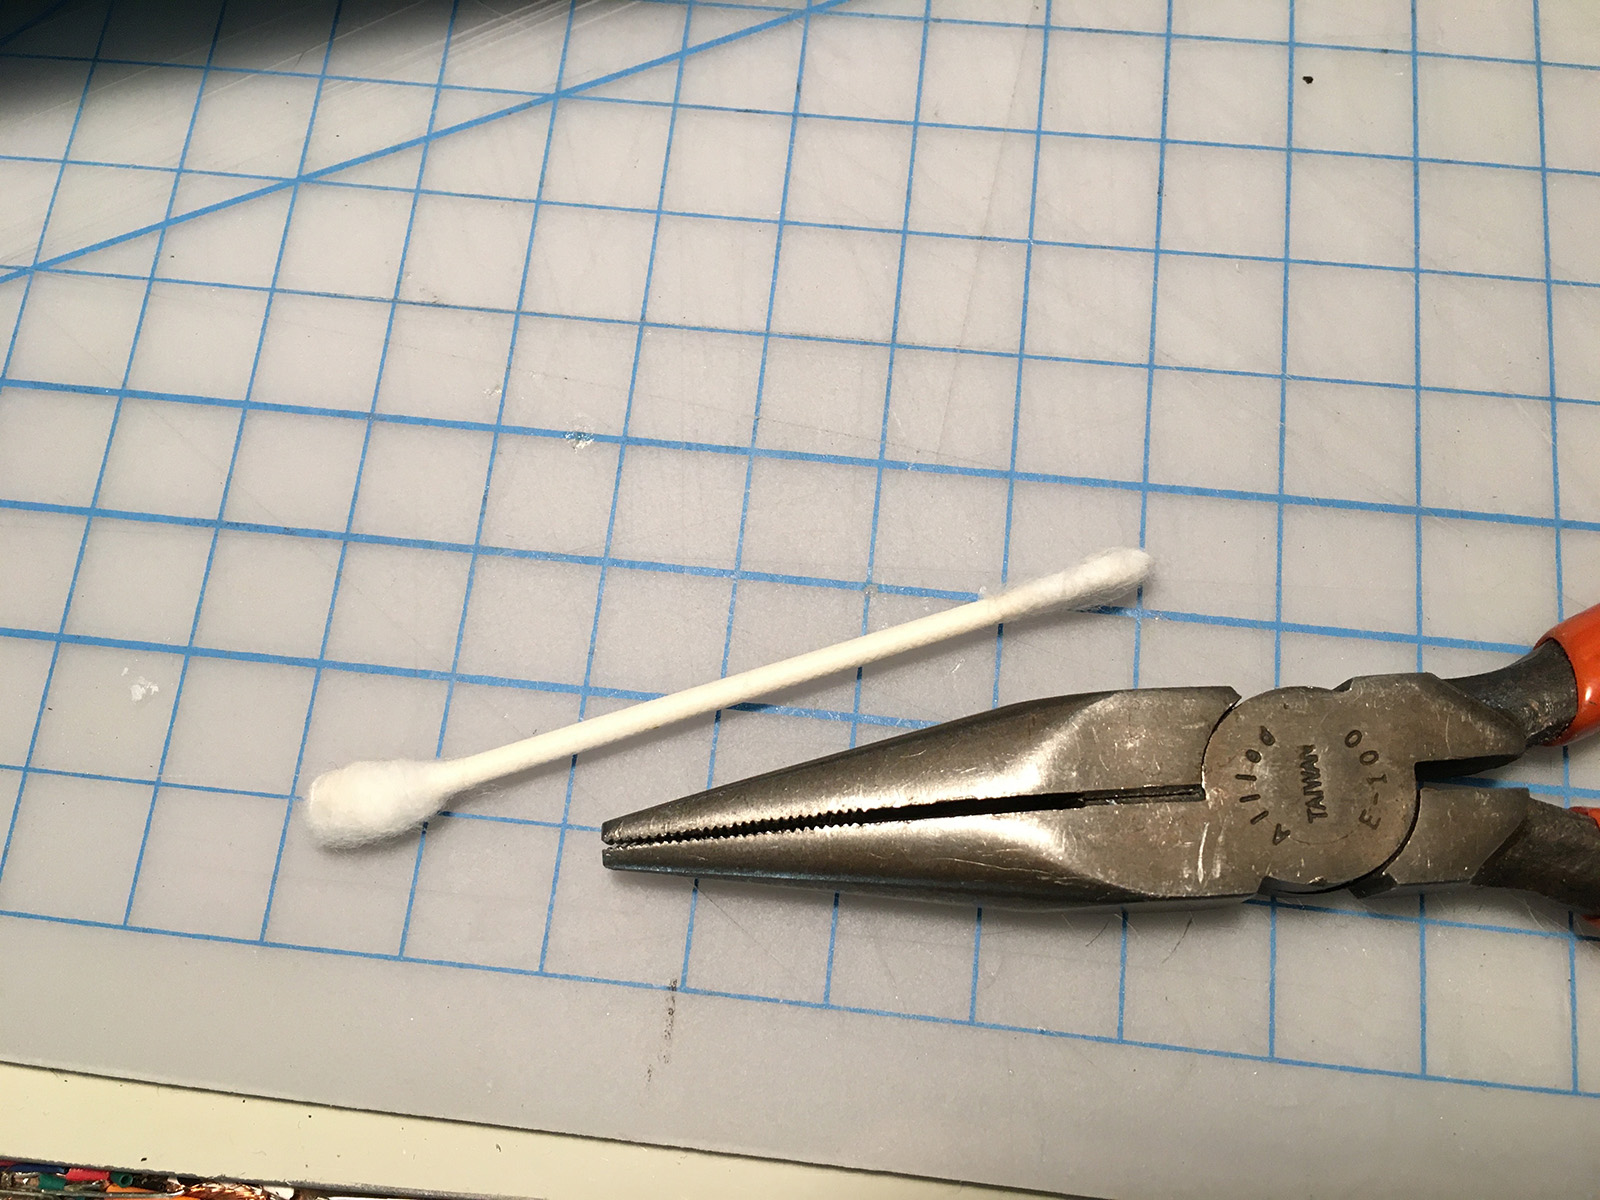
For cleaning the case, I used the glass cleaner, shop towels and Q-tips. Lots of Q-tips.
If you can't fit a Q-tip into a tight space, just flatten out an end with some (clean) pliers, like so:
I don't use Armor All though. It leaves a slimy mess on the plastic. I'd rather have the plastic clean than artificially shiny.
Now, onto that tip I promised last time.
I cleaned up James' console before sending it back, but spaced-out and completely neglected to clean the cartridge slot. Probably because it was working.
Previously, I would use a flattened-out Q-tip and some isopropyl alcohol (or contact cleaner) to clean a cartridge slot. But Q-tips never fit properly, often shredded, and just weren't a great option.
Then Fred discovered that a console James had borrowed had all manner of debris from prior cleanings. That sounded not-good. Bits of fuzz and fluff could get stuck in the contacts, making the connections worse. So I thought, "What could I use to clean a cartridge slot, that didn't leave fuzz and debris behind?"
And no... NEVER use sandpaper on metal contacts. Shouldn't have to tell you that.
So I looked around my work table, and discovered the answer - sitting right there in front of me!
By sheer coincidence (again!) I had come up with this cleaning method before James talked about the 1UPcard cleaning cart on his show the other week. The 1UPcard cart looks to be a standard Atari shell, with a pad of some sort where the circuit board would normally be. You add some cleaning fluid (99% isopropyl alcohol), insert and remove the cart a few times, and it cleans the contacts in the slot.
For $19.95.
My solution?
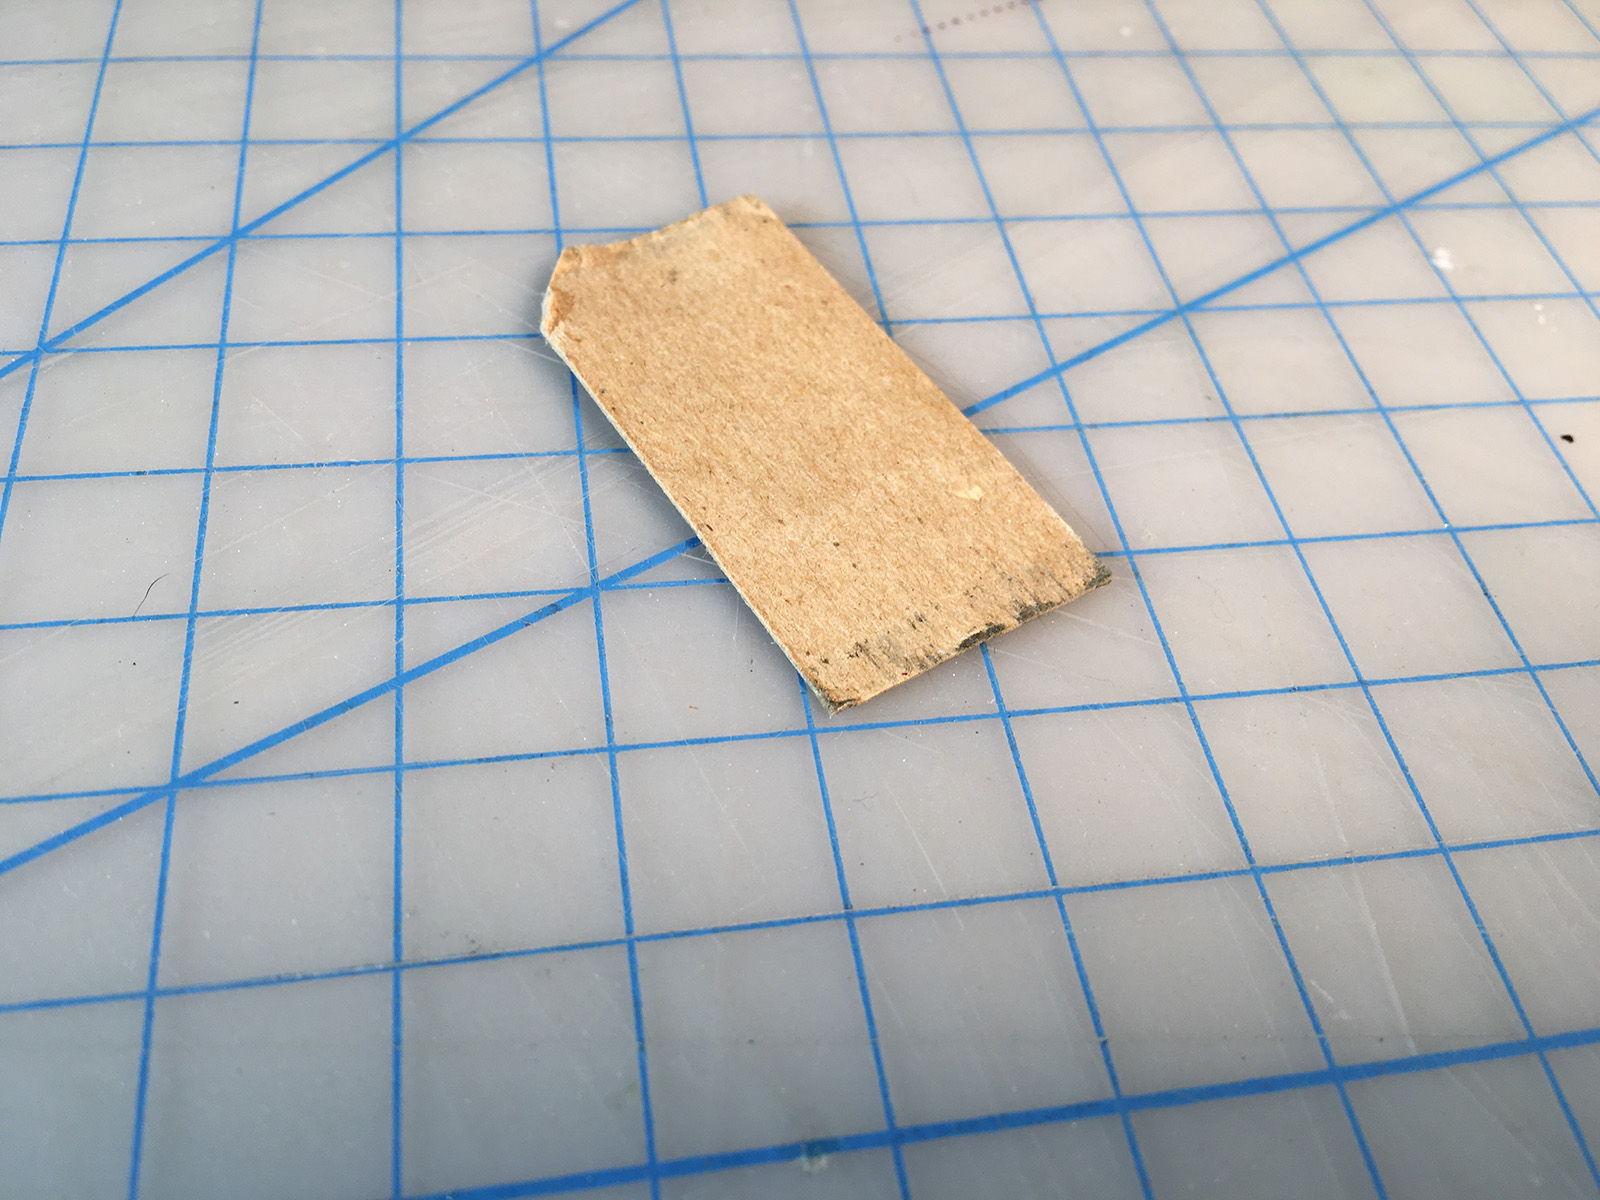
Cardboard.
Thin pieces of cardboard. Like you'd find on the back of a small notepad:
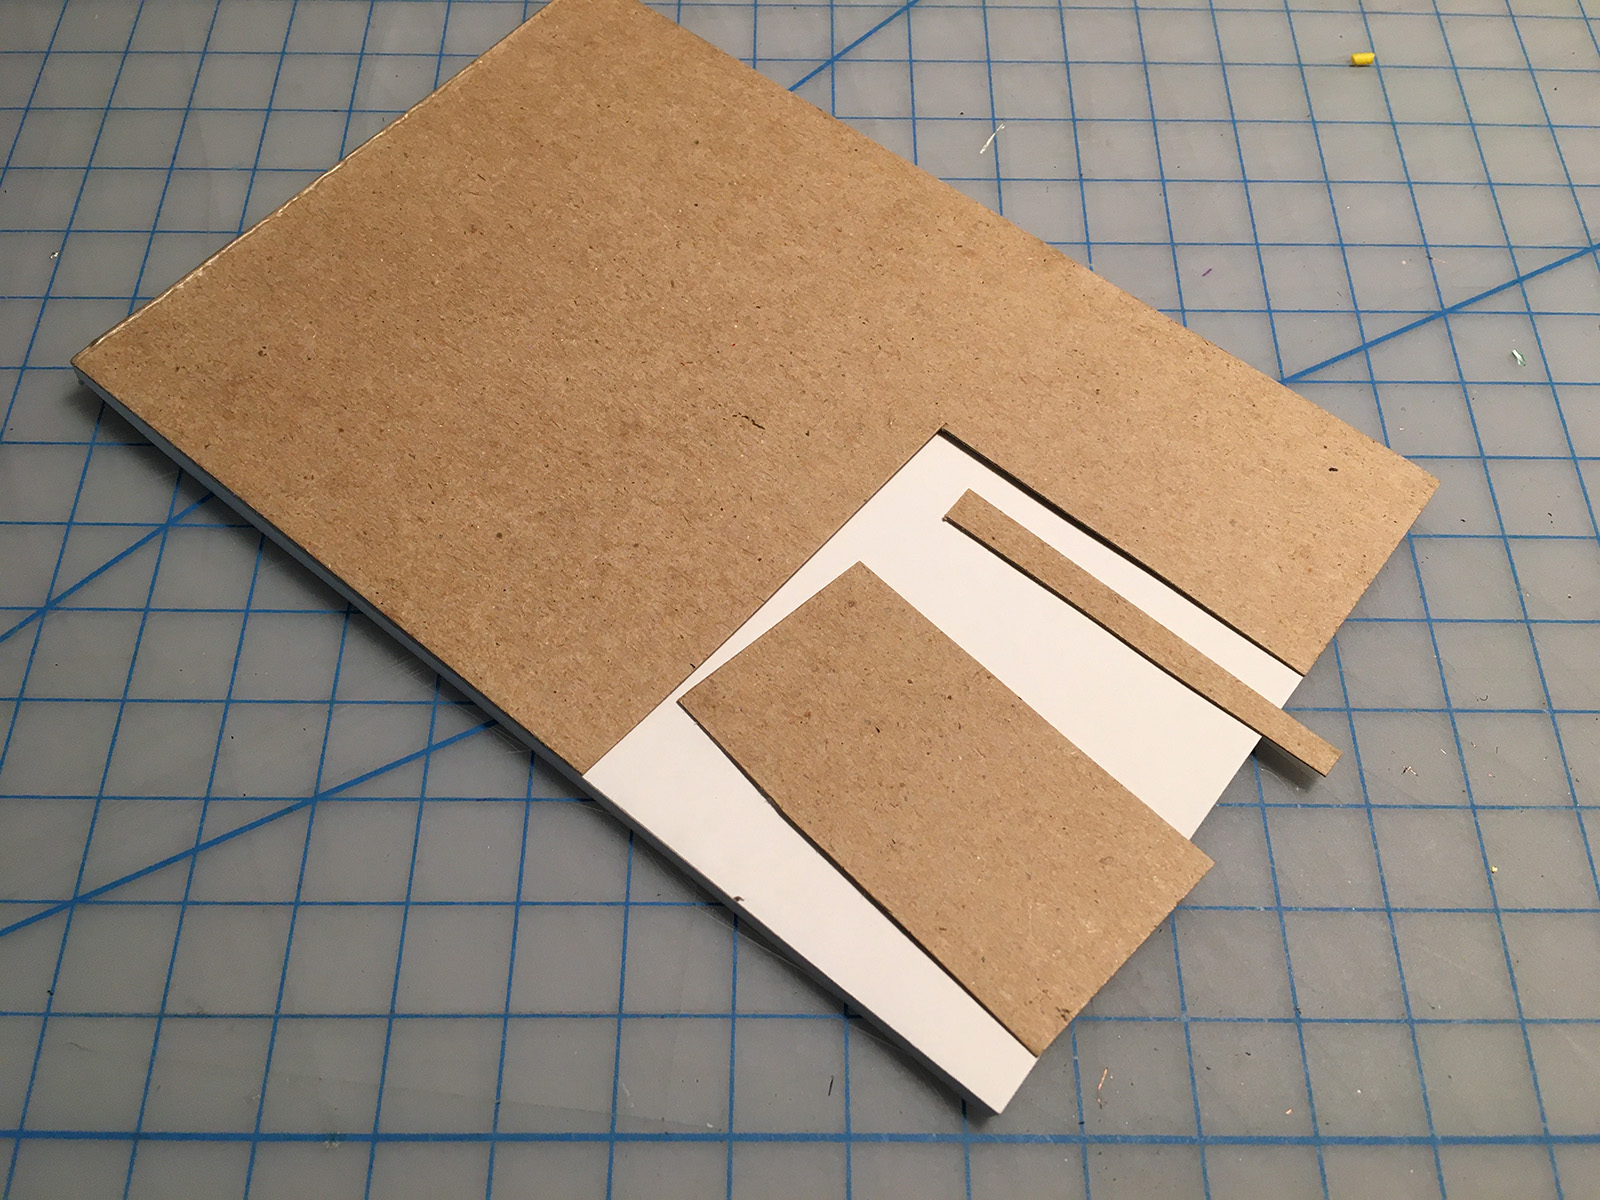
Find some cardboard just a little thinner than an Activision circuit board (which tend to be thin themselves), and cut it so its a little narrower, and a couple of inches long (which is... some number of centimeters... just wing it). This will let the cardboard make full contact in the cart slot, without forcing the contacts apart (or catching on them). Cutting it narrower means you won't catch it on a corner of the slot (you just need to make sure to clean the whole slot by working over the whole width of it).
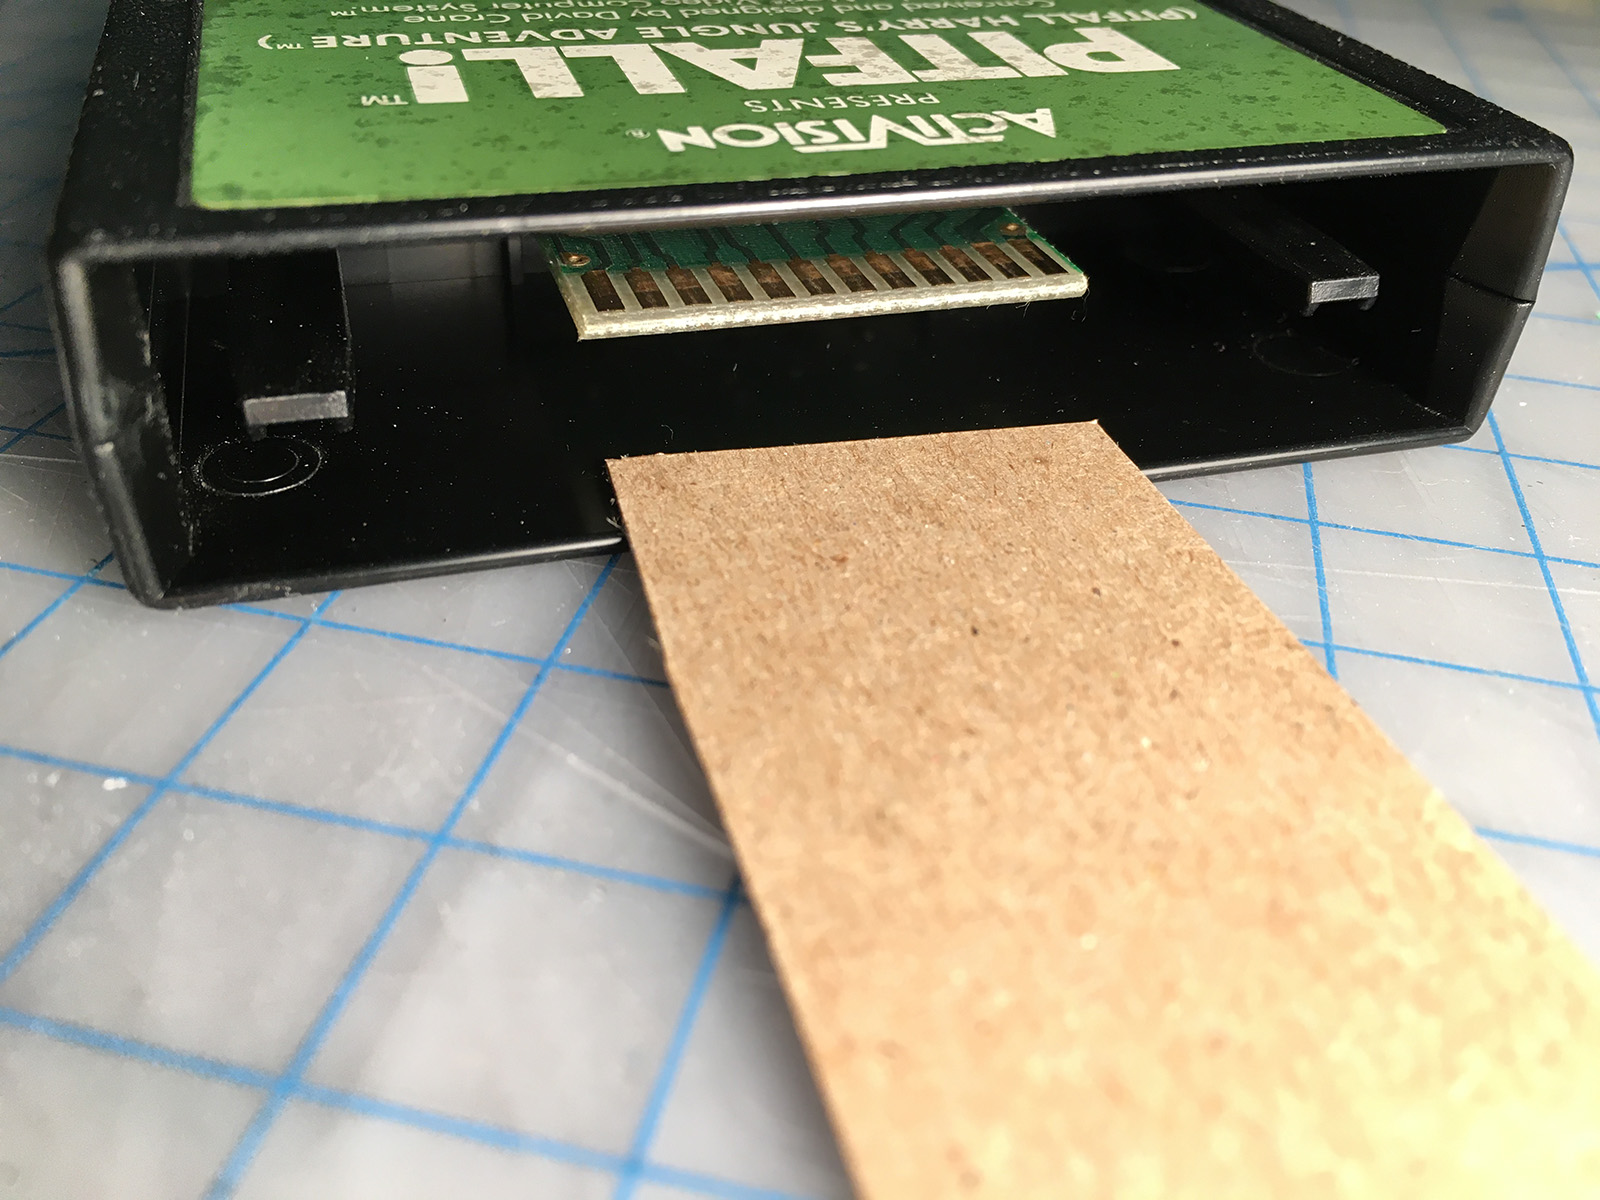
Just give the cardboard a good soaking with some isopropyl alcohol. If you can't find the 99% stuff, 91% is fine (avoid the 70% stuff, because the other 30% of that is water). You can alternatively use electronics contact cleaner.
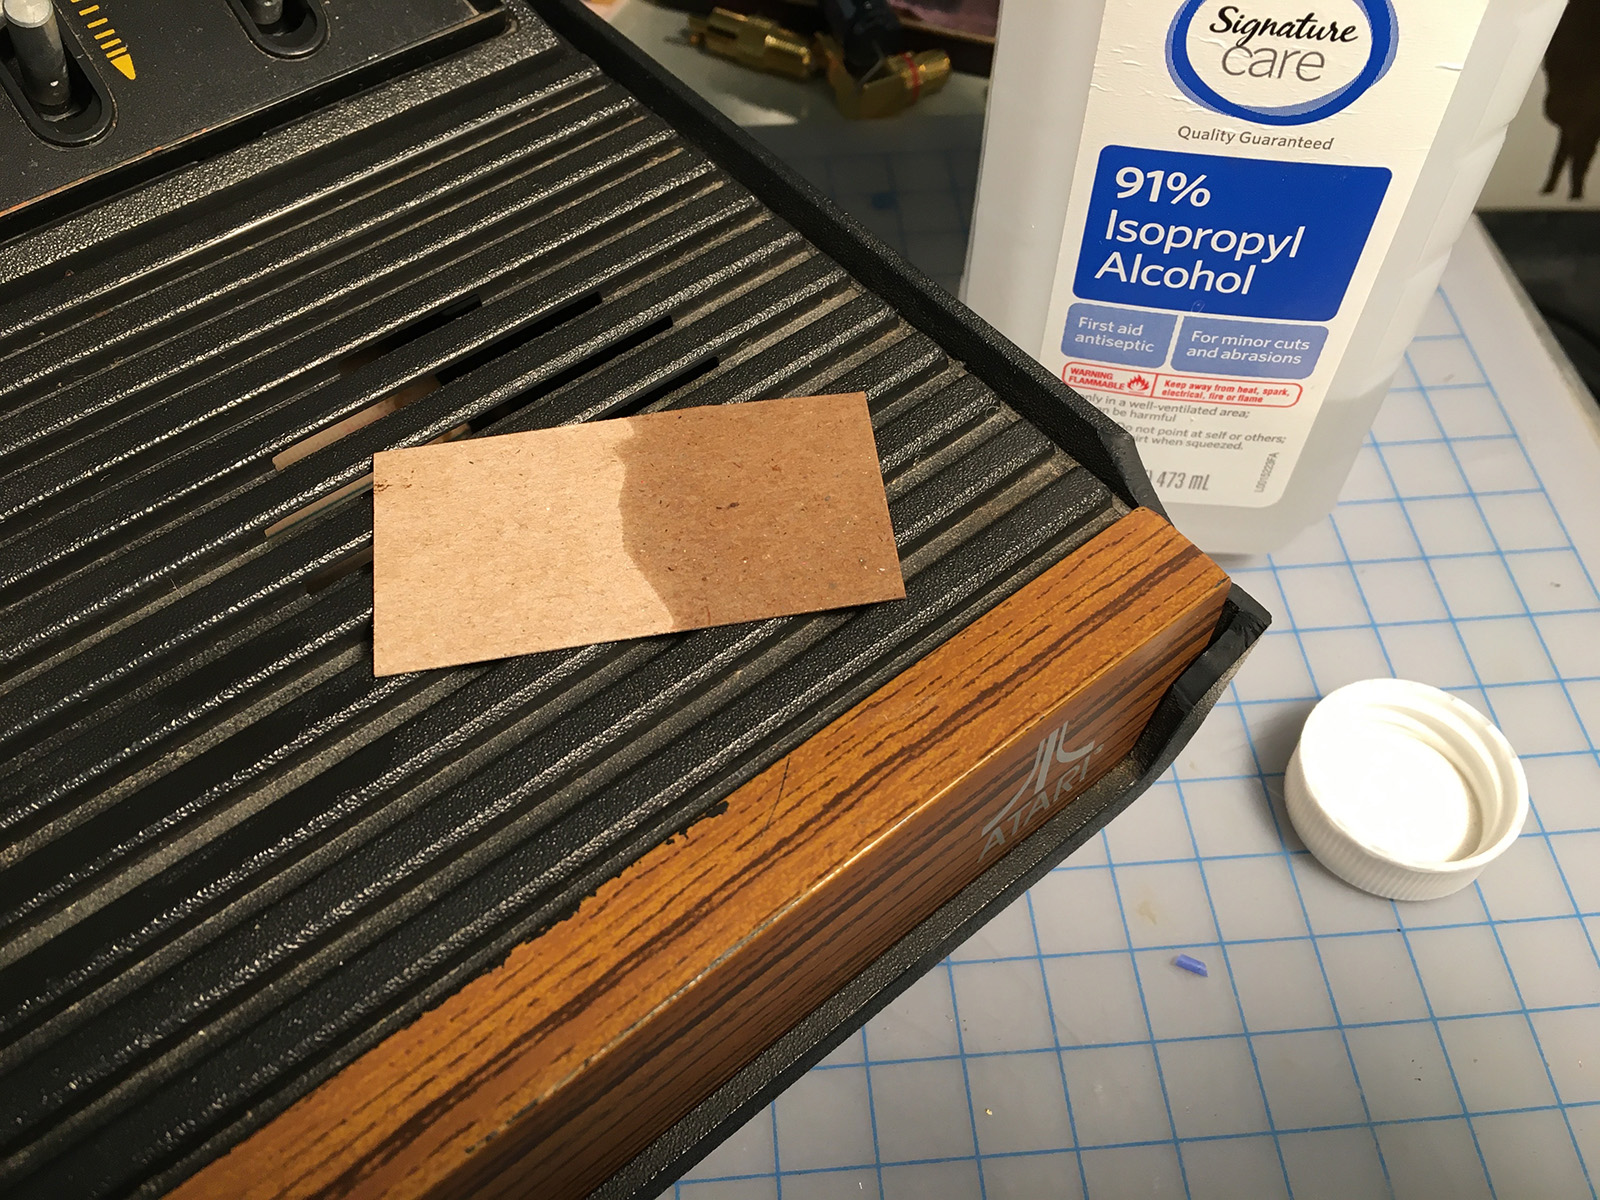
(And no... I didn't chip the corner off of John's console. This is the dead sixer from McCallister. It had some shipping issues.)
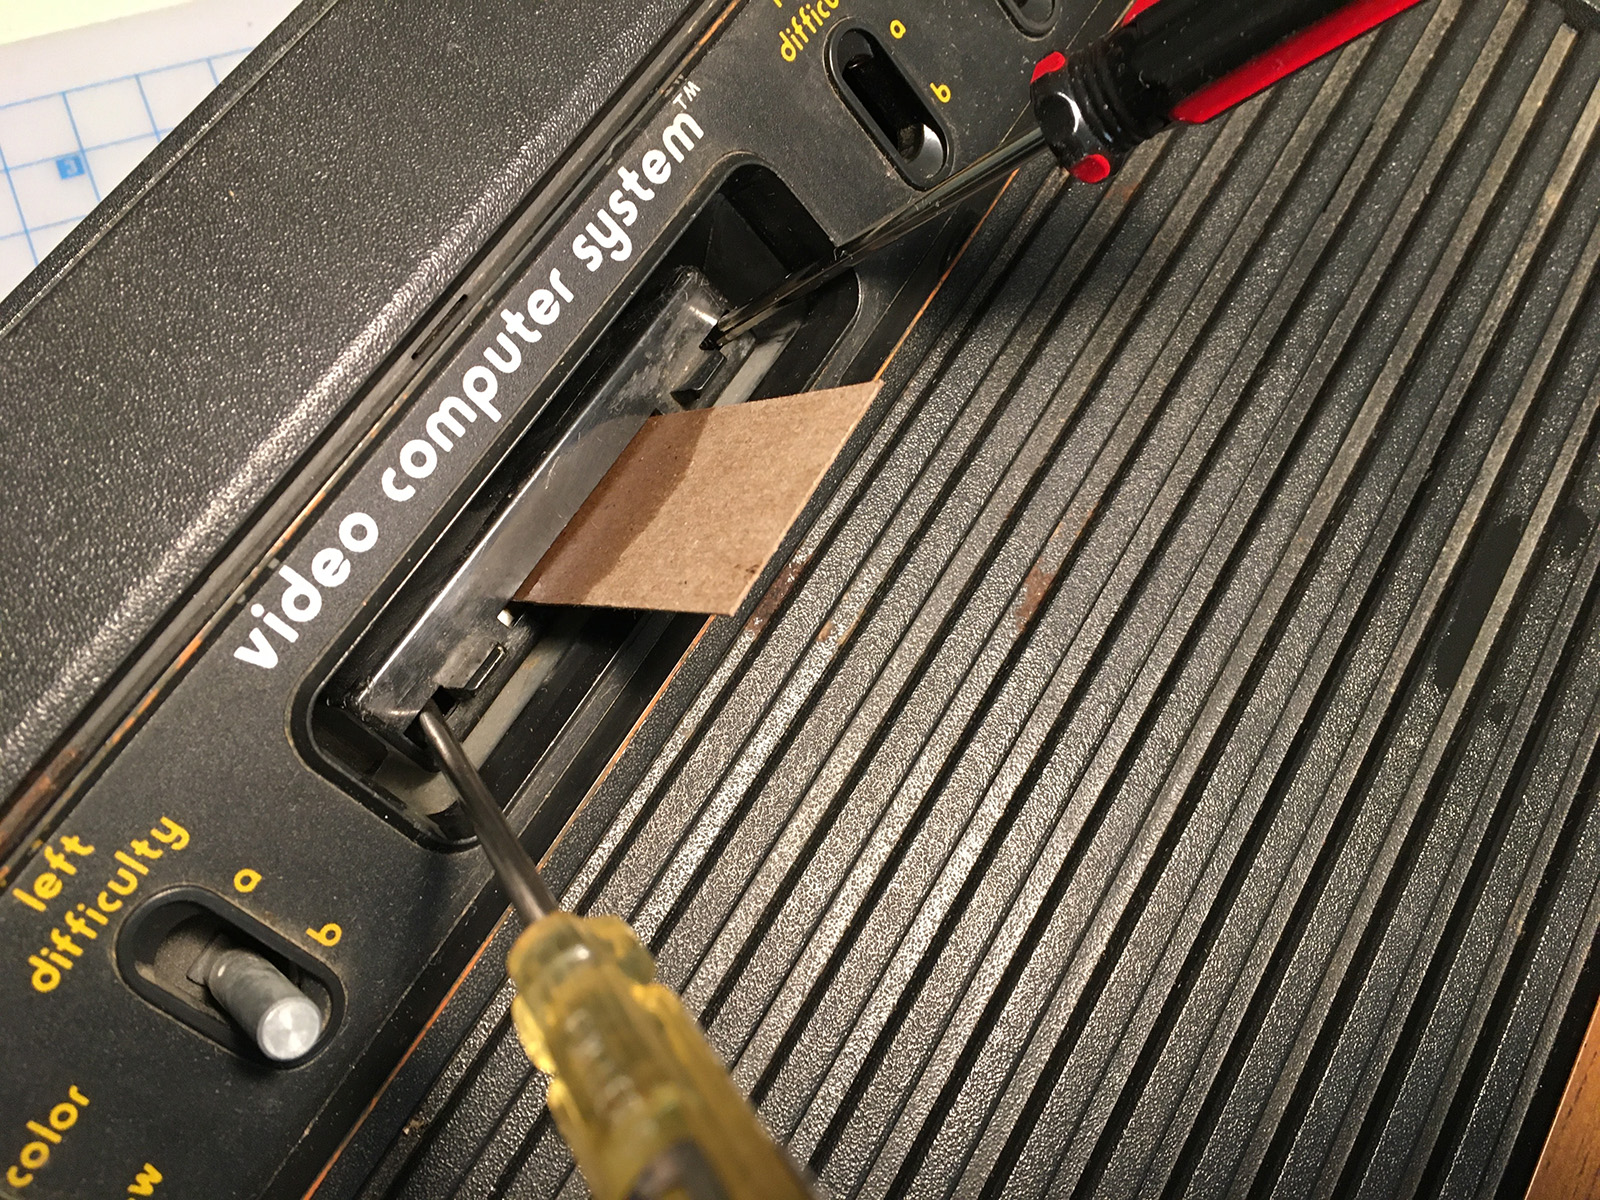
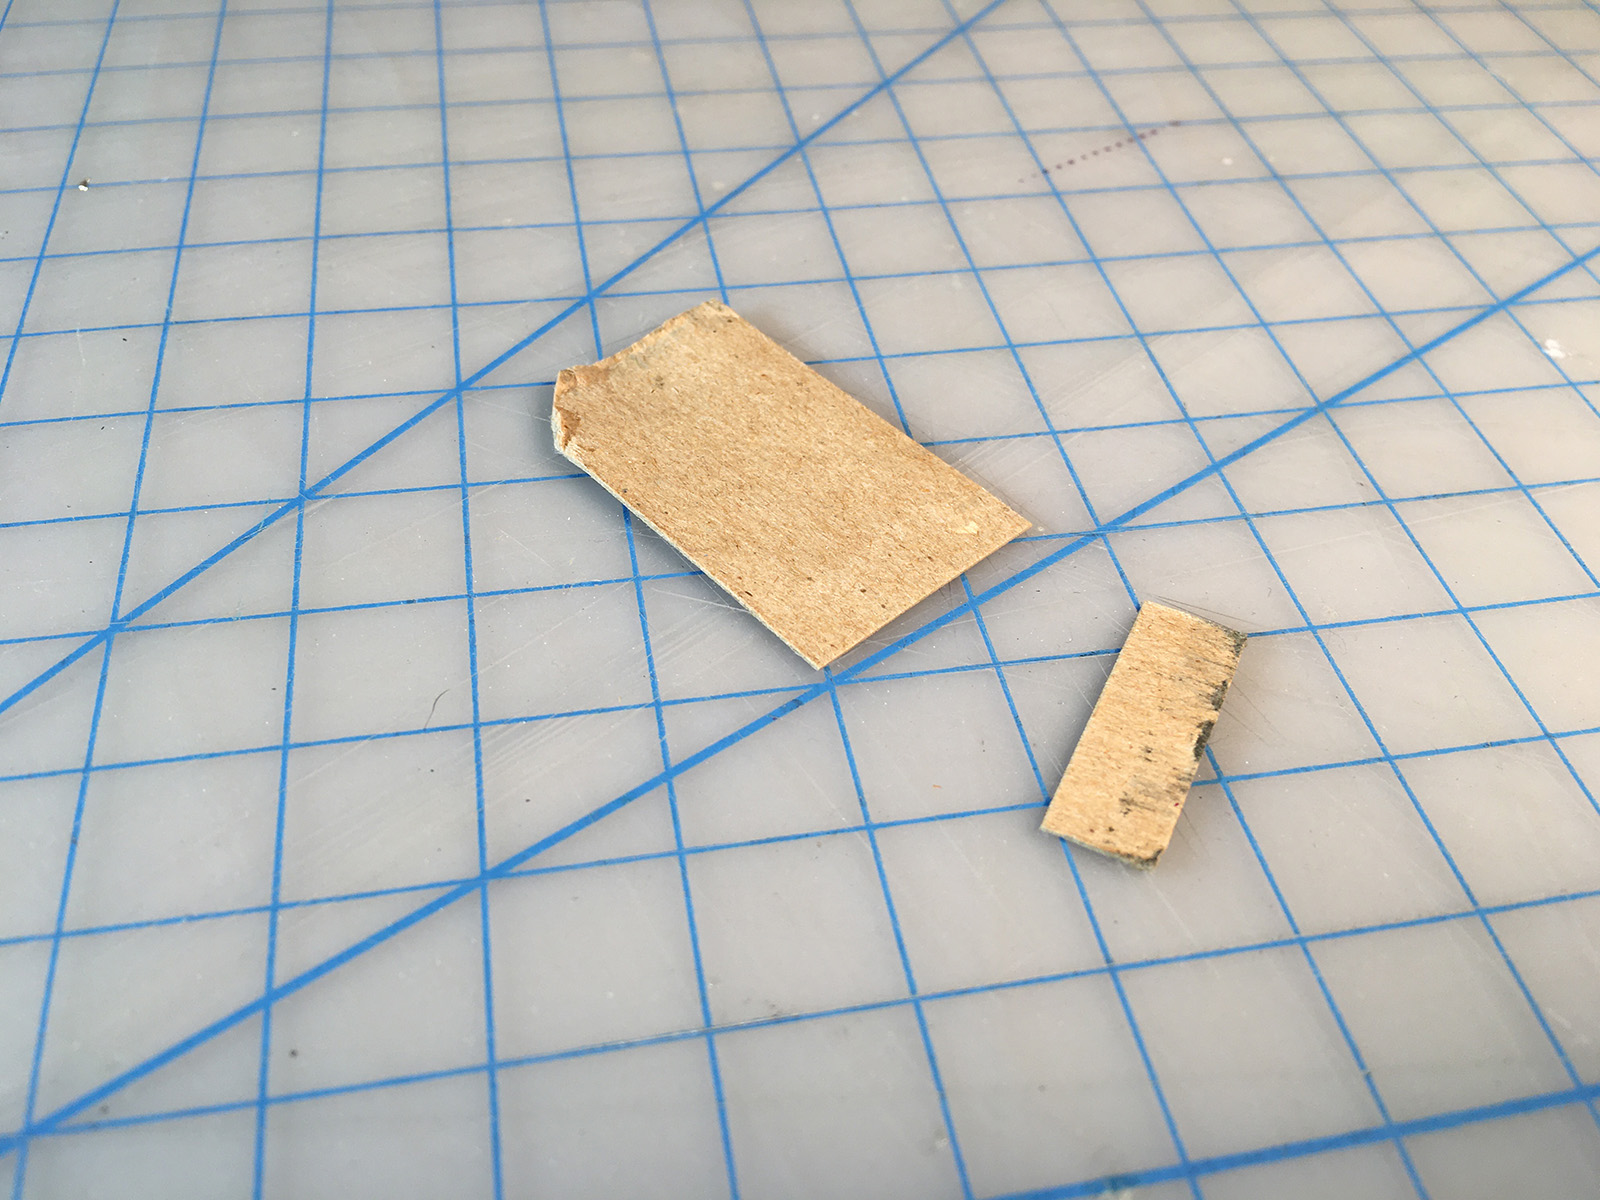
Just hold open the cart slot with a couple of small screwdrivers (or coffee-stirrers, or whatever), and insert/remove the saturated cardboard a few times.
Does it work? Well, this is from one cleaning of that six-switch:
Gungy, indeed! The best part? If the end gets dirty or frayed... snip it off! Now you have a fresh cleaning pad!
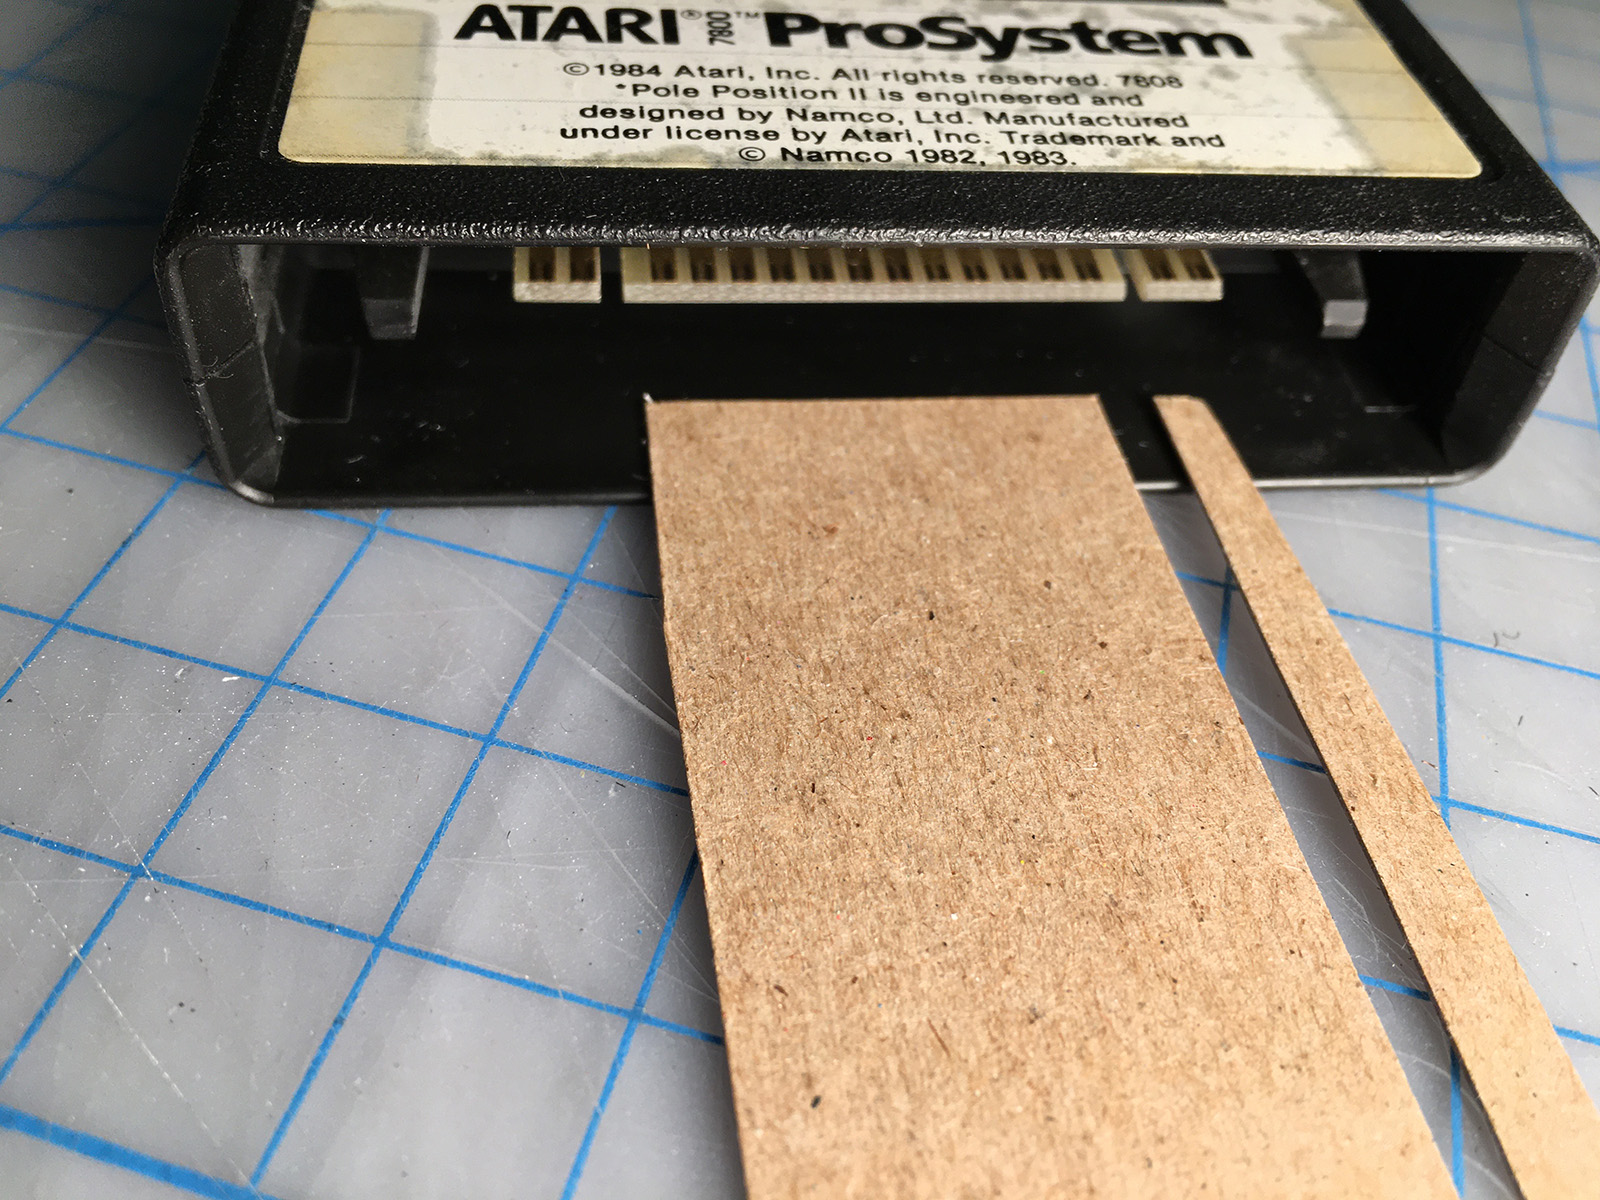
This also works for the 7800. You just have to also cut a narrow strip to do the two sides:
I cleaned John's consoles and all of mine using this method, and it worked great. I was kind of surprised how dirty the cardboard came back, when I know I've cleaned some of those consoles before, and not all that long ago.
One console in particular was really problematic playing Activision carts before being cleaned. Afterwards? No problem. Even my Pitfall! cart works, which has been historically sketchy.
(Be sure to clean the contacts on your carts, too. A Q-tip and alcohol or contact cleaner works fine for that. Again, NO SANDPAPER. Were you raised in a barn or something? I shouldn't have to keep reminding you.)
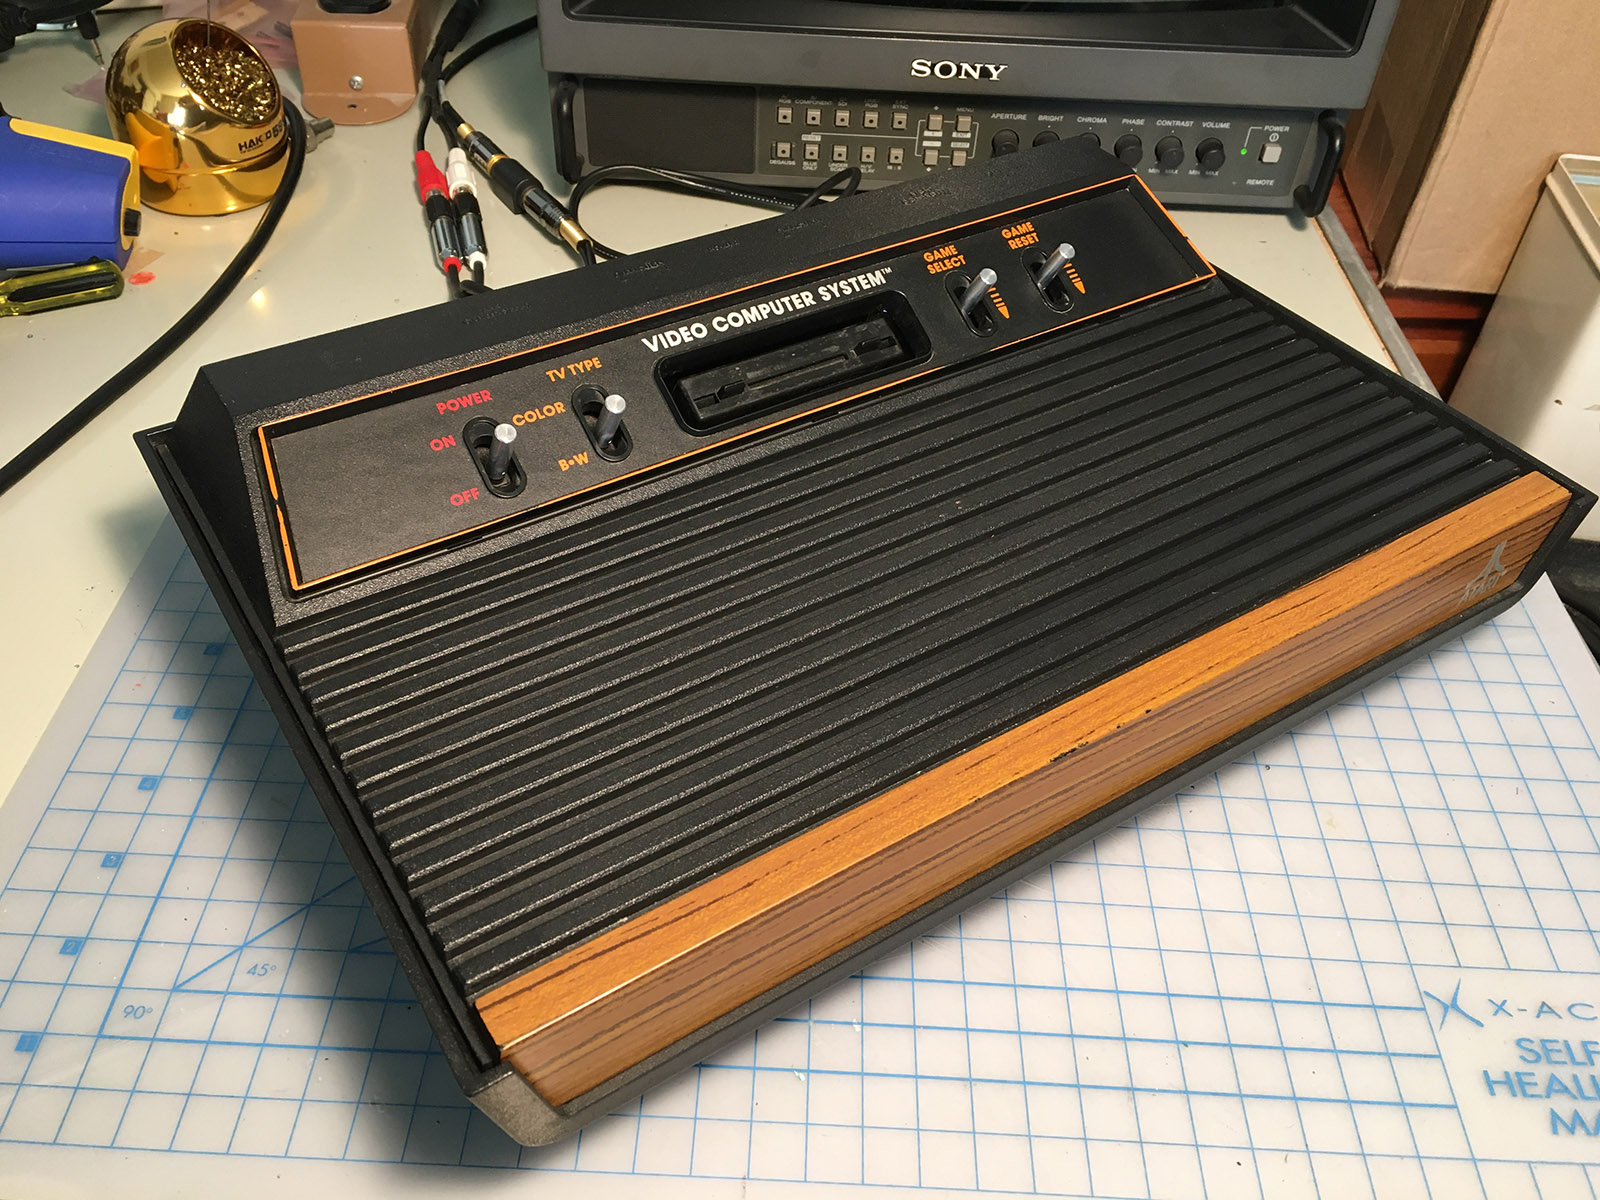
Anyway, here's John's S-Video console, all spiffed up, tested, and ready to ship back.
Nope. Don't have anything here this time.
-
 7
7

1 Comment
Recommended Comments