
Blogs
Our community blogs
-

 Latest Entry
Maze Generation in Dragon's Descent
Dragon's Descent Level Generation

The latest build is here:DragonsDescent_2019_8_15_2019.bin
A recent build is here:
DragonsDescent_3_19_2019_Beta7.bin
A fairly recent build is here:
DragonsDescent_3_5_2019_Beta6.bin
An older build of the game is here:
DragonsDescent_1_10_2019_Beta5.bin
...an an even older version here:
DragonsDescent_12_16_2018_Beta4.bin
When I posted my Atari 2600 game "Dragon's Descent," I said, among other things, that it was an experiment in maze generation for the Atari. I'm fascinated with algorithmically generating virtual spaces, from VR to arcade games. When given only a few kilobytes to work with, using procedural systems almost becomes a necessity. I wanted to see if I could make a "desert island" game that someone could play multiple times while still getting a sense of novelty - one of my favorite parts of a good Roguelike.
I learned to program for the Atari 2600 using batari Basic, which has proven very handy and fun. I'm using the 16k SuperChip template - this gives me four banks to work with, a little more resolution, and extra RAM, but still keeps things relatively simple. High end games in the early 80s could use this setup.
One caveat - Some of this comes from my imperfect understanding of how rand works in batari basic. In practice it seems that using the 16-bit random generator means you can set each byte of the "seed" independently, either by setting rand = <value> or z = <value>. It seems to work pretty well for me, but there's still a lot I can learn...
(click to enlarge)
Each level generated in Dragon's Descent comes from a specific random seed based on the 16 bit random function used by batari Basic. Using the same seed will produce the same maze. Since the random seed uses two bytes, I can vary each byte, and in this case I usually pick one as a "world" byte and the other as the "level" byte, adding 1 to the "level" byte to create a new, but replicatable maze level. I even allow the player to select the seed they want using the "Select" switch, acting as a de-facto level select mode.
The random seed primarily drives where the actual rooms exist within an 8x8 grid (7x8 after a fix, a silly story I might get to later). I allocated 8 bytes in RAM, and used their bit values to indicate if a room exists (1) or not (0). Using the array function I could see what each row maze rooms looked like. Going into this, I thought that getting the bit value would be relatively easy, but alas Batari Basic cannot use a variable when checking a specific bit of a variable (variable{2} is fine but variable{x} is not). The other way to check a given bit in a byte is to bit shift, but that required a bit of assembly. My clumsy implementation produced a bug I only found much later, but the system seems to work.
As for the generation of rooms within the maze, the algorithm is pretty simple. Each maze has several rooms, but specifically includes a Starting Room, an Exit Room, a Key Room, and a Treasure Room. Each of these rooms is placed in a separate quadrant of the 8x8 maze, although which room gets which quadrant is randomly determined. Separating the rooms like this guarantees that they won't be placed on top of one another (bad) and -usually- spreads them out to make a more interesting maze. If I just did this, though, there wouldn't really be any dead ends, and the odds are high of each room being very close to each other (there's a chance they'll all be next to each other, and a 4 room maze is not really a maze). To help add potential loops and dead ends I also add in 2 "spare" rooms placed randomly but each on specific areas of the maze, roughly corresponding to opposite corners of the maze, away from the center, to make sure the maze is properly spread out, and entertain the possibility of a dead end or two.
To connect a room I check to see where the rooms are in relation to each other - I then create a horizontal corridor until a passage of rooms is vertically aligned with the target room, and them vertically connect them. In a larger maze array this would show up as a fairly obvious set of "L" shaped passages, and sill kind of does, but an 8x8 array is small enough that the resulting patterns aren't too obviously L shaped. As the passages criss-cross you get loops, dead ends, and large internal spaces, creating new rooms as I make my way towards a special room.
I don't connect all rooms to each other - that would pretty much fill the 8x8 array and always leave a fairly open maze. Certain rooms will always connect with certain other rooms, which in sum total means you can eventually get anywhere you need to. The start room always connects to a spare room, while that same spare room always connects to the exit. This increases the probability of more interesting maze - while a straight shot to the exit (or just having it next door) can still happen, you generally have to turn a few corners, even before you try to find the key.
The 8x8 bit array just stores if there is a room or not. I also store the location of each of the 4 special rooms in their own byte, being a value between 0 and 63, accounting for the 64 possible rooms in the 8x8 grid. At any given point I might need to convert this 1D array value to a semi-2D bit/byte location, which results in some clumsy code on my part.
What I outlined above accounts for the maze room placement, but not the actual contents of the room- this involves another system. Each of the special rooms has their own playfield data, and I have around 10 different room designs defined as playfields for non-special rooms. In order to determine what kind of room will be in a given place on the 8x8 array, I have an array of 64 random "noise" values stored in ROM. A simpler maze setup would just equate one value to one type of room, so the array bit at (2,3) would always have room 7, for instance. Instead, I also take into account what level the player is currently on (0-7), and add a further lookup table of rooms for each level. While mixing things up a little more, this also allows more difficult or wall-heavy rooms to have a higher chance of appearing the deeper you go.
What I've outlined here is the "pseudo-code" for generating the mazes - implementing this all in batari Basic was interesting, and required a few tricks. Explaining everything would take a while, but I'll say here that key components involved referring to 8 adjacent variables in RAM as array data, and bit-shifting/ORing binary values in order to actually set the room values.
According to my calculations, there are potentially 255x255x(8 variants dependent on level depth) = 520,200 different mazes. A lot of this depends on the quirks of the random generation system, and I'm certain there are repeats, but I did a few experiments in outputting a few dozen mazes and found a pretty good variation - below are a few maze shapes that have been produced (I ended up outputting the data to the player sprite and making screenshots to make these):
And here's level 001-001:

I might go into further detail on how the code actually works in a later post, but I wanted to get some of this knowledge posted, and show how some of the game works "under the hood." -
- 61
entries - 107
comments - 53222
views
Recent Entries
 Latest Entry
Board Game Development 5 Sometimes You Gotta Commit
Ok, so after much hemming and even more hawing (it wasn't pretty), I think I'm going to build this game primarily as a solitaire game with multiplayer options. It was conceived as a solitaire board game way back in the day and I think that is where it's the strongest. That takes a lot of the pressure off making sure that the game is fun for 2+. I think if I focus on making the game for 1 it will be an overall better game. THEN I can figure out the best ways to translate that experience to multiple players and make it even better.
I'm also committing to making the game a set, fully developed, "open and play" experience and allowing the "open source" nature to be a secondary bonus feature for the advanced gamer. I think this makes the game more instantly accessible, but doesn't diminish the fact that this is still a "build your own adventure" game for those that would enjoy such an experience.
I've also started locking down some of the elements that will be in the base game. I am calling these elements the Core elements. I've narrowed down my character set to 30 characters. 10 Heroes and 20 Villains. I think that should be a fair mix. Plus whatever heroes do not comprise your party get shuffled into the villain deck for use as enemy characters, so that will make about 25 total villains per game. In the play testing I have done thus far that provides a decent mix of characters without seeing the same faces over and over in a given game and without asking the customer to break the bank buying a box full of miniatures. I'm committing to a final group of treasure/items characters can find in the game. That should put a cap on all of the massively expansive ideas I've been spilling out onto the page and give me something finite to work with.
I'm in Scenario building mode right now. I want to get a set of 3 scenarios just to test the overall game mechanic and make sure it works. I have completed what is basically a tutorial scenario that will give the Player a chance to familiarize themselves with the basics of the game. The other two scenarios will be more indicative of what the full blown game has to offer. I plan on play testing all three of these a couple dozen times myself and then pass it off to a close associate who will basically try to break the game to make sure there are not obvious cracks in the mechanic. Once she is done destroying my game, I will go back to the drawing board and troubleshoot.
Meanwhile, I am ready to move to the design stage. I have someone who is willing to do the prototype designs, but she's not sure she will be able to do the final art for the finished product, so I guess I'll be shopping someone who loves to draw/paint and who would love to donate hundreds of hours of work up front for a meager shot at profit on the back end if this thing goes to market. Translation, I'm gonna have to draw this thing myself and that's going to be a sad mess. But I guess we will see. I also need to get Bill working on some prototype miniatures that we can use for play testing. The good news is, I don't need new minis for this, we can use existing minis and Bill can paint them up so they look nice. Hell, I can do it with wooden pegs if I need to. But I will need something I can hand to people and say, "this is an Ogre, use this for the Ogre character."
So things are moving along well. In some ways it kind of coming to a head, and it other ways a playable demo seems forever away. But I've waited 30 years, I can wait a few more if it means a really awesome game that people will want to play. We shall see.- Read more...
- 0 comments
- 61
-
 Latest Entry
My Random process for choosing a Super NT Console
Hi all!
This may end up being a boring read, but I thought I'd document my Super NT purchase in a Blog. Just a one off... Mainly because I'm going to pick the color at random.
First, I've wanted an Analogue Super NT since they were first announced. SNES in HD here I come!
For what it's worth (FWIW), when I could afford one, at first they were still in "Pre-Order" mode...Then they only had black. Then they appeared to be out of stock at one point when I had money so I bought a RetroN 77 instead, Which may have been a mistake...But That's another story.
Now the MEGA SG (A sort of HD SEGA Genesis FPGA Console) will be coming out and I HAVE To HAVE one of Those too!!! Damn you Analogue! But, the MEGA SG is in "Pre-Order" mode now and will be coming out in April 2019, so I have time to save for that separately and get this (SUPER NT) NOW.
Back when I was in college I bought a SNES in January of 1992 and then later bought a Sega Genesis, also in 1992, and that also marked the first time I bought a console that was Not the latest thing. I've Loved both ever since. I had an MGH (or Multi Game Hunter ) that worked for BOTH SNES and Genesis allowing me to put games on discs. I've also bought tons of games for each system. And now I have Everdrives too...Moving on.
I'm picking the color of the console AT RANDOM. I thought it would make an interesting purchase and I'd document it here. Even if just a couple of people read it or comment, I'll be happy. Otherwise it's just for me and that's cool too
They discontinued the transparent color (which I didn't want anyway) so there's 3 color choices: BLACK, CLASSIC, and SFC (SUPER FAMICOM).
So initially I wanted CLASSIC....Purple and gray, Just like my SNES. FWIW, I still have my SNES from '92 plus a couple more in case one breaks (Perish the thought!)...
Then when all they had available was BLACK, I set my sights on it...
Now, with all color choices available to order I've given new thought to SFC because nobody really thinks about it and they'll likely be more rare, I assume. Not that I'm not really worried about rarity or anything. If I were to guess, I'd think Black was the most common since it seemed the most widely available, but that could also imply they sold out of the Classic color scheme quickly because of its popularity...So perhaps Black and Classic are the most common while SFC would be less popular here I'd predict, but bigger in Japan (as everyone matches their nostalgia with a color scheme haha)...The Transparent (See-Through) one, Now discontinued would be the rare one for collectors, but it was easily my least favorite anyway.
And matching wireless controllers are available from 8BITDO for any color choice.
So...Here's my thoughts currently:
CLASSIC Matches my SNES and I've always liked that color scheme.
BLACK Matches my soul and my PS2, plus my Retro Duo is black,... and my Vader 2600, my Black Dreamcast... Also might look neato parked next to my MEGA SG, once I get one of those (It will be mainly black).
SFC Matches some SFC controllers I have and might be spiffy to be the oddball who goes for this choice, since I predict this one will be bigger in Japan.
Below is a pic of the matching controllers, but from what I've read I assume (but don't know for certain) all of their controllers will work with the Super NT if you have the Retro Receiver...I think you can also use these on the SNES/NES Classic if you have the Classic Receiver (So I'll get a couple of those too)...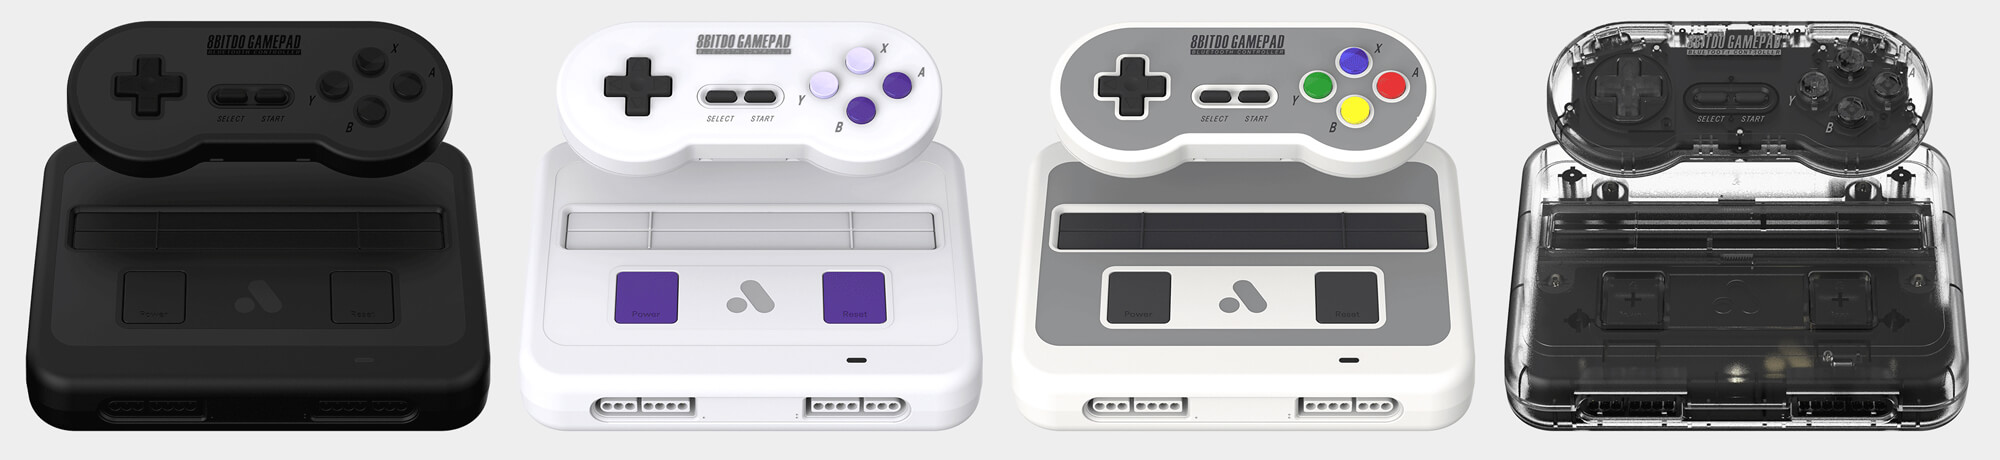
OK SO now to trust in the RANDOM ENERGY of the Universe!
 (Skulls and Spidey are pretty Random ...Hmm so is Jango Fett...maybe next time)
I do this often, for example, rolling dice to see which CD Comp I will listen to....Including randomly picking which spool of CDs, which disc and which song...
I could just roll a die, but then the saga would end too quickly...
What I'm going to do is this: Collect points for each color choice based upon die rolls and then the winner will be the first Color to a certain amount of points.
I'll explain as I go...
First the Winner will need X Amount of points.
X will equal 3 dice rolled. I will Add them up.
(Rolling 3 standard 6 sided dice now)...
X = 2 + 1 + 4 = 7
The Winner needs 7 points!
OK Now for each die roll the following COLOR gets a point: (I'll list the colors alphabetically)
1 BLACK
2 CLASSIC
3 SFC
4 BLACK
5 CLASSIC
6 SFC
I'm making a Matrix below and will add one hashmark (Represented as "I") for each die roll until one color gets to 7 (For example, rolling a 2 would give CLASSIC a point. Does that make sense ? I hope so)
Here goes Nothing!
***At this point I roll the dice, and tally the points until one color reaches 7 points***
BLACK CLASSIC SFC
I I I I I I I I I I I I I I I I I
And after all is said and done CLASSIC is The WINNER!
There was a lot of back and forth that would not have been easy to put into a Blog (I didn't want to be too confusing), but before that final die roll, both Classic and SFC had 6 points...
I am now going to order a CLASSIC SUPER NT!!
And later on,... a Controller for the Super NT, A CollectorVision Phoenix, a MEGA SG ...And I should also keep saving to get out of debt haha...
Thanks for reading! -
 Latest Entry
HSC Season 8 Week 1: Dragonfire
And so begins my first ever blog, and what better subject to start on than HSC Season 8!
For you not in the know, season 8 of the AtariAge HSC started today (Friday 5th October) and this will be my little corner of the web to document my journey through it.
http://atariage.com/forums/topic/283665-season-8-week-1-dragonfire/?p=4127906
My Mission for HSCS8 is thus:
1) To play in EVERY round – this is easyer said than done for two reasons, first, Im moving house in two weeks, and second, I only started collecting Atari again after a decaded long break so my cart collection is minimul to say the least. Yes, I can (and will) play some games on Stella, but im still waiting on my USB-CX40 interface and playing on a keyboard is shocking!
2) To play on original hardware for each round – Obviously if super rare games start cropping up this wont be an option, likewise, when it comes to homebrews, the logistics of buying the carts in time for the torniment will make it impossible. As someone coming back into the hobby after a long break with a very small collection I think this will give me some incentive and direction into building up my collection again. Can I source the games intime though!!!!! We will see!
3) To have fun – And that IS the name of the game, to enjoy a bit of friendly competition with like minded folk...I really cant wait to get started!
…...and I wont wait……
So….. Game No 1: Dragonfire by IMACIC
I do not own it….. tried playing on keyboard….. no hope!
Five Minuted on ebay came up with a few options but for the sake of a couple of pounds (Yes… Im from England) I have bought a boxed copy for £12….. heres hoping it arrives in time!

I’ll check in again soon, hopefully with a score! -
- 9
entries - 2
comments - 2776
views
Recent Entries
 Latest Entry
Mission 16 surprise
Went to KG348 and to my astonishment, there was another (friendly) human. Amazing to be honest, never noticed that
- Read more...
- 0 comments
- 9
-
Latest Entry
Update
I've decided to stop development for 2 reasons:
1. My computer is not allowing Admin mode
2. because of the above, Adrift, Inform or any other interactive fiction software in unavailable to me
sorry for the inconvenience- Read more...
- 0 comments
-
 Latest Entry
AtariAdventure 2600 Review #1: Combat

Hello everyone, and welcome to my 2600 Reviews blog! On here I will review through my current collection of 2600 cartridges and when my collection continues to extend. I will also gladly take requests for games to review, if I have the game in my collection. Let's get this started!
Combat was released on the same day as the Atari 2600 on September 11th, 1977. It would be the pack in game for the 2600 from 1977 to 1982, the golden years of the console. Combat was included with the console, along with an AC adapter, TV box to plug the system into your television, two joysticks, and a pair of paddle controllers. Eight addtional games were available at launch, but sold separately.
Combat boasted of having 27 games in one cartridge, but they were variants of the Tank, Biplane, and Jet game modes.
The main objective in all game modes is to shoot the other player more times than the other player can shoot you before the time runs out. (The game was two player only.)
The first and most iconic mode is the Tanks. Using the Game Mode switch, you can switch between straight missiles, guided missiles, Tank Pong, in which the missiles you fire are deflected off the walls, and Invisible Tanks, in which your tank is only seen if you fire a missile.
The second mode is the Biplanes. This time there are no walls, you only come out on the side parallel to the side you exited the screen on. This time, you can decide between straight missiles, guided missiles, and machine guns. You also have the option of a one on one, two on two tandem, or a three Biplane tandem against one giant Bomber that equals the size of the three Biplane tandem. Instead of the maze with the Tanks, you had the option for two clouds you can fly behind to hide yourself from your oppenent.
The third and final mode are the Jets. This mode is very identical to the Biplanes, with the same map being used as the Biplanes. You could decide between straight missiles or guided missiles, the same map options as the Biplanes mode, and the option of a one on one, two on two, and a three on three dogfight.
Opinion:
I really love the Tanks and Biplane game modes. Tank Pong and Invisible Tanks are the most entertaining along with the Bomber vs. Three Biplanes. Only if your the three Biplanes. (LOL!)
Only complaints I have is there is no single player mode, as this game is two player only. The Bomber is one large target and only fires one giant straight missile while the three Biplanes each fire their own missile, which you almost can't avoid as a bomber. (Bullshit and Unfair!!! But fun if you are the Biplanes.) The Jet mode is almost an exact clone as the Biplanes mode excluding the Bomber matchup, and is pretty boring.
Overall Grade: B-
Final Thoughts:
Combat was a solid launch title and helped get the system off the ground, along with getting consumers to buy the other games. This game is lacking a single player mode, leading the game to be super boring without a second player. But, with the second player this game is fun and entertaining with the Tanks and Biplanes, but boring with the Jets. This game reminds me of Tank Trouble, without the powerups. The Tank battles and different game modes, along with the dogfights with the Biplanes are also fun and oddly intense, with you trying to avoid your potentially competitive friend or family member. Overall this is a fun and intense game for two players, but very boring for the single player.
Tell me the next game you want to see in the comments below, and I will also gladly take other's opinions on the game I reviewed.
Happy gaming!
-
- 16
entries - 31
comments - 50879
views
Recent Entries
 Latest Entry
SV2K17 Price
Was nicely surprised last week when I received this package
Thanks Grey!


- Read more...
- 0 comments
- 16
-
 Latest Entry
Imagic Kiosk games

Please anyone help me with what games can be played on the Imagic kiosk. I am told only certain games can be played on it. I need your knowledge. Thank you Laurence allatari.com
-
 Latest Entry
New Atari Portfolio Page on Facebook

I am starting a Facebook Page for The Atari Portfolio which will be Closed,and I need 3 admins that really know their stuff around The Atari Portfolio........... Russ Campbell (Mr Portfolio)
Yes I wrote the article , What Good Is An Atari Portfolio way back in the old days.
- Read more...
- 0 comments
-
- 10
entries - 5
comments - 6276
views
Recent Entries
Thirteenth (13th) Leader BBS
June 8, 2018pjones1063
Telnet: 13leader.net:8023 SSH: ipnot.click:8022 Software: Mystic Connection: Telnet Nodes: 24
Location: Vineland, ON, Canada
13th Leader is a reboot of an 8-bit Atari 800 XL BBS from back in the late 1980’s! Originally hosted out of Hamilton Ontario Canada! Back in the 80’s we ran on 8-bit “Home Grown” BBS software on 2 x 5.24 floppy drives. Still hosted in Southern Ontario but now on an Ubuntu LXD container running Mystic BBS. New users are always welcome!


A reboot of a ATARI BBS?!! Nice!!
Some good starting message activity. Actually enjoyed that because there is a lot of conversations about the Atari 8-bit there and other talk. Check it out! Hard Core BBS
June 5, 2018scottnlou75
Telnet: hardcore.synchro.net Connection: Telnet Nodes: 7
Location: Louisville, KY, USA
Free speech for all. The place on the Internet to come if you have an opinion about something, and without worrying about being Zucked or censored by The Zuck (Mark Zuckerberg).
Sub-boards of Local Posts* [1] Sysop Notices 1
[2] General 0
[3] Debate 0
[4] Entertainment 0
[5] Freedom of Speech 2Which, Quit, or [1]:
So I sent a message. It is nice when you have the control keys and live editing. I had this in Wildcat mode so maybe that had something to do with it.
There were two messages in the freedom of speech area, so I checked them out. And I've decided going forward, especially from this visit, that what is said on a BBS needs to stay there. But saying that for a new BBS they had messages, and so we'll see how this goes.

Sounds promising. I like the idea of old BBS craziness! Love the name. The telnet address defaults to port 23... I bet that gets a lot of hits from Chinese spammers.
So this was a C=64 C-Net BBS. My favorite BBS software of all time since that was what I used on the Unknown BBS back in the 80s.
So from there to Amiga 3000 and then to a Winserver. The future is a "old school with a touch of today." Sounds good.
250 games with 6 discs of PD software for downloading. Nice!
Local message base had four messages on it. First message May 29th. Tried to reply but I guess I need to be validated. Fine.
Looks like this sysop has alternate set ups going...

Four new BBSs down, 16 more to go.- Read more...
- 0 comments
- 10
-
- 3
entries - 13
comments - 5742
views
Recent Entries
 Latest Entry
Next music to compose after Africa by Toto?
The way I've selected Africa by Toto was by searching the Greatest Hits of 1982. The number of views on Youtube for the song Africa released in September 1982 is very high, but the song isn't present in the Greatest Hits of 1982, but in the one in 1983, which surprised me.
Anyway, the list of Greatest Hits included the obvious "Survivor - Eye of the Tiger", but also a whole bunch of songs that could have been interesting to Coleco-fy.I'm curious what could be your picks of 1982 Hits. I've set a poll but couldn't include all songs in it.
Since I don't think I can compose any song with the ColecoVision sound chip, I'm asking you to pick several of your favorites in the poll.
- 3
-
- 8
entries - 4
comments - 6327
views
Recent Entries
 Latest Entry
Project 65XE: eh maybe we should do something
Yea its been since September of 2017 since I actually did anything, but I was re-arranging my shelf of stuff the other day and said "hey you do not have any projects that are paying you money for a couple weeks, put down the brand new (to me) coco 3 and work on the Atari!"
In my last update I cut a gigantic hole in the front of my case to accommodate the LCD that goes with the integrated SIO2SD, since then I have trimmed it out, added a acrylic front and replaced the 65XE name badge. The badge I had was actually in pretty good shape, I did not want to cut it in half, so I gave it to a buddy who needed one. I ordered a silver and black plastic replacement off of eBay, and it looks good, but my only complaint would be the material is a bit too thick so it stands a tiny bit proud of the case, though not that big of a deal.
With the LCD fitted into place its now time to figure out where the SIO2SD buttons will live, which is when I noticed the LCD screen crashes directly into the keyboard. The only sensible choice at this point is to cut a notch in the keyboard! I took the keyboard apart figured out where I needed to cut and how far I could cut before I would need to cut the Mylar circuit sheet, I did not want to cut that so if I ever have to replace it, it would be a drop in without a problem.
Now that the keyboard is able to fit back into the case, I can go about deciding where to place the buttons. I am leaning to a row above the function keys, as that seems like the most logical place without accidently hitting buttons while using the keyboard. I had considered going down one of the sides of the keyboard (and yea I would have clearance, I checked) but in fake typing I hit the cut tape of buttons off the keyboard pretty quickly ... not that they would be standing a full quarter inch off the top of the case, but its something to think about
I also obtained a ultimate cart in a trade deal, I printed a new case matching my blue black and grey color scheme (remember the power LED is now blue, the LCD is black text on a blue background, and the buttons are blue), but our beater i3 printer at work is leaving some funky artifacts in the starting layers. That sucks but I am not bothered to fiddle with it too much since I already spent time printing a cart shell at work heh


eventually I need to give a strong dose of retrobrite to those keycaps, but not today
- Read more...
- 0 comments
- 8
-
- 2
entries - 0
comments - 1813
views
Recent Entries
Remember, i was looking a tutorial about Atari 2600 programming.... my idea in that moment the same that now.
YAY!! AYE!! WANNA KNOW HOW TO PROGRAMME A VCS PYJAMARAMA!!!
i was a little less anxious than now, lol, and i think i was reading :
Session 21: Sprites
Started by Andrew Davie, Aug 20 2003 7:59 PM
so... IS POSSIBLE TO READ A TABLE GRAPHICS?! WOW!!
when i read the excercises on Session 21 i wasn't able to do them all, but.... that table thing..... wtf is a table?!! read a table?

then i remember my hunger of code, just to see what is all this about, graphics....sound!! BUT HOW?!! (we are always on the run)
then, i read code... and code and code, being a newbie is something stresant and sometimes even confusing.
and may be--- that afternoon i found a table related to a playfield, then a playfield editor, so i think i found THE TABLE WORD.
That was enough to lead me at google and search again about graphics.
there it was, the SKIPDRAW thing!! jesus!! was too much for my newbie brain so in a matter of days i did at GOOGLE a new search .
SKIPDRAW site:atariage.com
SKIPDRAW couldn't use or understand it so i did it work my way, a bad and erroneous version of skipdraw, but it did work lol ...... the important thing was that I had learned my rainbow (from davie's tutorial) and my first graphic.
funny to remember. pure anxiety
- Read more...
- 0 comments
- 2
-
 Latest Entry
Opinions on Harmony
I have a question for those of you who code homebrews: What is your opinion on the Harmony Cartridge? I found out about it yesterday(3/18/18) and took interest in getting one so I could play Princess Rescue and DK VCS along with other Homebrews using the Binaries acquired from the website, but, I want to support the homebrew scene by purchasing physical Homebrew games from the AA store. My question(s) for you guys is: what is your Opinion on Harmony? Would it be better to purchase the physical games when possible or save money and just get Harmony?
-
 Latest Entry
Entry 1- My start: pick update June 20th 2017

These games are the start of my Atari 2600 game collection. They were picked up from my local games store, I will be getting more from then in the near future and i will be updating this blog accordingly. The goal of this blog is to update my process in completing the Atari 2600 library.
- Read more...
- 0 comments
-
 Latest Entry
IBM Writing Assistant
MEMORIES LIMITED TO 640KB - IBM WRITING ASSISTANT
Sometime around 1985, I got my first personal computer, an IBM PCjr. Sure, sure, laugh... the Junior was and continues to be the brunt of many a joke.
But I learned a LOT on that PCjr. It's not really an exaggeration to say that it launched my career. I learned to program in BASIC and Turbo Pascal on the Junior. I learned a little about Assembly Language. I was introduced to the early online world of BBSes using its slow - even for the time - 300 baud modem. I played lots of games on it. And, I wrote papers for school on it.
Our PCjr came with a copy a word processor called IBM Writing Assistant. While I had used a computer before we the Junior, I'm almost positive that I had my first experience with a word processor on that Junior, and it was Writing Assistant.
Honestly, Writing Assistant was a pretty good, if basic, word processor. It had all the features I needed at the time: a nice WYSIWYG text mode interface that allows you to lay out text on the screen pretty much the way it will print out on paper, easy intuitive keys to move around the text, on-screen help, spell checker, the ability to mark text as bold and underlined, basic cut and paste operations, headers and footers.
It was good enough that I don't think I ever even considered switching to another word processor the entire time I used the PCjr. I think I stuck with it right until I switched to Windows 3.
I was dedicated to Writing Assistant to a fault. In fact, after I had been using Writing Assistant at home for many years, they "introduced" us to word processing at school. They taught us to use a program called "PFS: Write" on the Apple //'s. The first time I saw PFS: Write I blurted out, "They ripped off IBM Writing Assistant!" Of course, much later, I would come to find out that it was much the other way. "IBM Writing Assistant" was in fact an OEM rebranded version of PFS: Write, which had started out in the MS-DOS world.
Eventually, I did move on from Writing Assistant. Sometimes by force. In college, we had to use Enable. I had a job that forced me to use WordPerfect. That Windows word processor I mentioned earlier was WordStar Legacy. Eventually, like everyone else, I settled into Microsoft Word.
Recently, in a fit of nostalgia, I wondered if IBM Writing Assistant was as good as I remembered it. I still have the manuals, and the original 5.25" disks. And thanks to the wonders of DOSBox, it is now running on my modern computer. In fact, I wrote this little article using it. And the truth is, it's not that bad. For all the years of "advancement", the truth is, if you just want to write a short paper on something, it still works really well. Maybe I'll actually continue to do some writing with it. And thanks to its "print to file" feature I'll be able to import the text into
whatever I want.
How about you? Do you have any old programs that still hold up many years later despite being "obsolete"?
-
- 7
entries - 1
comment - 5436
views
Recent Entries
 Latest Entry
File Data
This is how the data is stored in files on this type of computer.
NOTE: This is a work in progress. I will be updating this post as I think of stuff to put on here.
Bytes $20-$7F represent the standard ASCII character set. Character $7F represents the cursor symbol.
Bytes $00-$1F are control codes.
$00 - ROM Section Header
$01 - Palette
$02 - Graphics
$03 - Mappings
$04 -
$05 -
$06 -
$07 -
$08 - Set Tab Width
$09 - Tab
$0A - Line Feed
$0B - Comment Tab
$0C -
$0D - Carriage Return (same as $0A)
$0E -
$0F -
$10 -
$11 -
$12 -
$13 -
$14 -
$15 -
$16 -
$17 -
$18 -
$19 -
$1A -
$1B -
$1C -
$1D - Change Label Line Color
$1E - Change Label Line Toggle
$1F - Toggle Show/Hide Labels
Characters $80-$FF are more control codes.
When the file is saved, it is compressed using LZSS.- Read more...
- 0 comments
- 7
-
- 2
entries - 0
comments - 2577
views
Recent Entries
Just met Gerry Conway, the man who co-wrote Atari's original Swordquest series for DC and creator of the Punisher. I asked him about working on the unreleased Air World comic and he told me they never got far beyond a basic plot sadly and couldn't recall how the story would have ended. He did tell me about the process of writing a comic based on games though. He was invited to Atari's Sunnyvale HQ several times to test play and even take home many games for the VCS in order to get a feel for the direction and tone the comic should take. He even told me the story of how he was a tester for Tempest.
- Read more...
- 0 comments
- 2
-
 Latest Entry
Atari 8-bit Game Scene
I've been watching videos of upcoming game releases on various platforms and I've noticed that sometimes developers get in a rut and we see far too many of the same types of games and not a lot of innovation. I guess what bothers me most is hearing of some new game coming out and then finding out it fits the following template:
1. Amazing full-color RastaConverter title screen. Probably a bigger executable than the game itself.
2. Amazing title screen music.
3. Pressing Start dumps you into some ho-hum puzzle game or some other simple concept that doesn't live up to the extravagant intro.
I realize we have tools to make impressive images and music now, but they make a simple game look worse by setting the standard too high. What I really want to see on the A8 is innovation. Either bring something to the A8 library that's been missing or come up with an experience no one's seen before.
I look at what's going on in the (admittedly larger) C64 community and it's pretty incredible what people are attempting there. People are writing impressive game engines for the Spectrum too even though they know they'll always look kinda mangy in the end. Of course, they can do stuff we can't do and we can do stuff they can't do so let's find more of those things. Then we can slap 70 color title screens on them.
And oh yeah, why do I find SID music to be so irritating after a while? Somehow I find myself suffering from sawtooth overload after just a few minutes. -
 Latest Entry
XEGS UAV Installation
I recently purchased a couple of UAV kits from Bryan, so I thought I'd document my installations.
http://atariage.com/forums/gallery/album/2096-uav-installation/
Initially I found it difficult to find installation information, but I soon realised that it was in all the forums, it just wasn't all in the same place.
The installation of the UAV mod in the XEGS was extremely easy. The most difficult part was deciding how I wanted to implement the mod, and my decision changed a few times and still is not yet complete.
I usually want to keep my machines in mint condition, unless something about them indicates that its not really worth it...maybe a broken case, repaired electronics, or I have more than one machine of a particular type in my collection. In this case, the machine I chose to mod had already been repaired by me.
http://atariage.com/forums/topic/258432-xegs-repair/?hl=%2Bhawk+%2Bxegs
I had originally planned to remove the 4050 chip when I installed the UAV but realised that if I did that I would lose the RF output. I don't use the RF output if I can help it but I wasn't sure whether I wanted to totally remove it. From the monitor photos you'll see that I went to the trouble of replacing the original LCD driver board with a TV tuner LCD controller board. https://www.ebay.com/itm/LCD-controller-board-Kit-diy-VGA-HDMI-USB-TV-for-LCD-LED-Display-Monitor-Panel/152446068465?hash=item237e7e66f1:g:PlsAAOSwdGFYxLsS that allowed me to use RF in for some of my older machines including my 400.
I ended up soldering the socket that came with the UAV kit directly onto the pins of the 4050 chip and then plugging in the daughter board. It almost worked first time, however I hadn't realised that I had to provide a colour input signal to the daughter board. I removed the centre pin of the composite out socket from the motherboard and wired the UAV output directly to that. I also included the extra ground wire. I didn't have any small shielded cables so I used regular hookup wire.
You'll see from the photos in the album that there was not a great difference in the compisite signal before and after the mod. To be honest, the image was pretty good to start with. However, the S-video output made a big difference. I'd forgotten that my LCD monitor couldn't handle S-video, so I had to test it out on a CRT TV. I had yet to take photos of the S-video. I am also deciding how to fit the S-video socket on the rear of the XEGS. The socket I was able to buy locally is not the one that I'd prefer so I'm putting off installing that for a little bit longer.
I'll update again after I've completed that mod...then it will be on to the 400.
The 400 will be delayed until I can receive an Audio mod card from Bryan so that I can also get sound after bypassing the RF.
- Read more...
- 0 comments
-
 Latest Entry
HomeBrew Zaxxon 32K
Has anyone experienced Gliches in the Zaxxon HomeBrew ? At least once every session my screen freezes or goes haywire. I also find it impossible to defeat the robot ... even with a dozen direct hits .... any feedback ?
-
- 7
entries - 15
comments - 8506
views
Recent Entries
Latest Entry
Install - UAV & AC in the 5200
Recommended board: Plug-In (if 4050 soldered in)
The 5200 may either have soldered or socketed 4050. This will affect the procedure somewhat so we'll start with instructions for a soldered in 4050:
Position the main PCB with the cartridge slot toward the back.
Soldered-in 4050:
1. Solder the 16-pin socket on top of the 4050. It is only necessary to solder pins 1, 3, 5, 7, 8, 9 and 11. Soldering pin 16 is probably a good idea as well just to secure all corners of the socket. With a reasonably small iron tip, you should be able to work between the 4050 and the Antic chip behind it.
2. Connect a wire to the front pad of R17. This is the rightmost 1K resistor in front of the 4050. This will be the Color In wire.
3. Make sure the jumpers are configured for the 5200 and install the UAV in the socket with the green terminal toward the back.
4. Connect the Color-In wire to terminal 1 (the terminal closest to the right back corner). Make sure the wire is clamped in securely.
5. Attach your video cables to the UAV. The remaining terminals (2-6) are Ground, Chroma, Luma, Composite, and a 2nd Ground.
Socketed 4050:
I am currently revising this section as the 4050 is necessary to retain the reset hardware and the jumper method isn't reliable enough.
Removing the 4050 to plug in the UAV will disable the RF video. If this isn't a problem, then follow these steps:
1. Remove the 4050.
2. Connect a wire to the front pad of R17. This is the rightmost 1K resistor in front of the 4050. This will be the Color In wire.
3. Make sure the jumpers are configured for the 5200 and install the UAV in the socket with the green terminal toward the back.
4. Connect the Color-In wire to terminal 1 (the terminal closest to the right back corner). Make sure the wire is clamped in securely.
5. Solder a jumper across the back pads of R2 and R3 (only do this if the 4050 is removed!)
6. Attach your video cables to the UAV. The remaining terminals (2-6) are Ground, Chroma, Luma, Composite, and a 2nd Ground.
If you wish to retain RF video, then you'll need to keep the 4050. However, soldering a socket on top of the 4050 will raise the UAV up too high to replace the shielding which is necessary for decent RF performance. For this reason, it is preferable to get a Kit and build the UAV according to This post and then follow the instructions above (skipping step 5).
Installing an Audio Companion board:
1. Locate C37 and solder the Audio Companion board across its leads with ground (G) toward the front. Apply the soldering iron to both the capacitor lead and the large pads at the bottom of the board while applying solder until they flow together. This will provide power and hold the AC in place.
2. Solder a wire from input iA (the first pad at the top from the back) to the back pad of R50 (1K). This resistor is just inside the shield area in front of where the AC is now installed.
3. Connect the audio out wire to the last pad on the Audio Companion marked out. If you're using a coaxial wire, you can connect ground to the back pad of the capacitor in front of C37 (C51) or any other nearby grounded spot like the exposed shield strip.
Carefully check your work against the pictures before powering the system. Route cables carefully out of the shielding during reassembly.
- 7
-
I stumbled across this video presentation about reverse engineering the MOS 6502, and of course I had to watch it. Quite an interesting watch!
I always wondered about the LAX/SAX instructions, and why there aren't similar illegal opcodes for other register combinations. Turns out that the opcode's lower bits define which register is to be worked with, %00 for Y, %10 for A, and %01 for X. %11 is not intended to be used, but when it is used, it causes both A and X to be affected, explaining why we don't an opcode for, say, LAY.
As stated in the video, visual6502.org has a lot of information about the 6502 line of processors, and many others, as well. The ultra-high-resolution images of the chip are there, and my nerd wants to print them up and frame them on a wall.
I'm not really a hardware guy, more of a software guy, but for some reason I love learning how computers work (or trying to). I guess that's why I prefer the low-level programming languages. Assembly is about as low as you can get without getting into machine code, and it's a lot of fun for something like the Atari 2600. It brings you closer to the machine, and although it doesn't let you see the physical chip layout, it gives you an idea of how it must theoretically work.
I would love to try programming for the other old 6502 systems like the NES after I have a 2600 game or two complete, but anything other than that is better suited to a higher-level language. C++ is my favorite language for programming, although Python is nice for simple tasks that you just want to write quickly without worrying about code efficiency.- Read more...
- 0 comments
-
 Latest Entry
Christmas with Lord Fortescue!
Going somewhat off piste here, but as it's nearly Christmas, I thought - just this once - I'd post something non-Atari related - Lord Fortescue's Christmas Episode. Bobbety's lost Arabella's present, so he calls on his old chum, Bunty Norris, for help!
I hope you like it. Normal Atari-related service will resume after the twelfth night:-)
- Read more...
- 0 comments


-
Recently Browsing 0 members
- No registered users viewing this page.